
If you’re looking to add a fun twist to your dessert lineup, our Lucky Charms Cake recipe is just the ticket. This colorful treat combines the nostalgic charm of everyone’s favorite cereal with the rich, moist texture of a classic cake. It’s a playful way to bring a bit of magic and whimsy to any occasion.
Ingredients
To craft our Delicious Lucky Charms Cake, we gather ingredients that perfectly blend texture and flavor. Below we outline the essential components for the cake, frosting, and iconic Lucky Charms Toppings to elevate our whimsical dessert experience.
Cake Ingredients
Here are the precise ingredients we use to create a moist and flavorful base that complements the marshmallow magic:
- 2 cups all-purpose flour, sifted
- 1½ cups granulated sugar
- 2 teaspoons baking powder
- ½ teaspoon salt
- ½ cup unsalted butter, softened
- 1 cup whole milk, room temperature
- 3 large eggs
- 2 teaspoons vanilla extract
- 1½ cups Lucky Charms cereal, crushed (for texture and marshmallow bits inside cake)
Frosting Ingredients
To achieve a creamy and sweet frosting that pairs perfectly with our cake, gather these:
- 1 cup unsalted butter, softened
- 4 cups powdered sugar, sifted
- 2 tablespoons heavy cream or whole milk
- 2 teaspoons vanilla extract
- Pinch of salt (to balance sweetness)
Lucky Charms Toppings
To finish our Lucky Charms Cake with flair, we use the following toppings that bring crunch and colorful whimsy:
| Ingredient | Quantity | Note |
|---|---|---|
| Lucky Charms cereal | 1 cup | Whole pieces for garnish |
| Extra marshmallows | ½ cup | Optional, for extra fun |
| Rainbow sprinkles | 2 tablespoons | Adds vibrant color |
Equipment Needed
To create our Lucky Charms Cake with precision and ease, we need the right equipment. Using the proper tools ensures even mixing, accurate measurements, and a beautiful finish.
Here is the list of essential equipment for this recipe:
- Mixing bowls: Use medium and large bowls for combining dry and wet ingredients separately.
- Measuring cups and spoons: For precise ingredient amounts—dry and liquid measurements both matter.
- Electric hand mixer or stand mixer: To efficiently cream butter and sugar and thoroughly blend the batter.
- Rubber spatula: Ideal for scraping sides of bowls and folding in the crushed Lucky Charms cereal gently.
- 9×13-inch baking pan: Standard size for this cake to bake evenly.
- Parchment paper: To line the baking pan and prevent sticking.
- Cooling rack: Allows the cake to cool evenly after baking.
- Sifter or fine mesh sieve: To sift flour and baking powder, ensuring a light texture.
- Offset spatula or butter knife: For smooth and even frosting application.
- Knife or food processor: For crushing the Lucky Charms cereal finely.
- Decorating tools (optional): Piping bags or small spoons for detailed frosting work or adding toppings.
| Equipment | Purpose |
|---|---|
| Mixing bowls | Combine ingredients separately |
| Measuring cups/spoons | Accurate dry and liquid measurements |
| Electric mixer | Cream butter and sugar, blend batter |
| Rubber spatula | Scrape bowls, fold cereal into batter |
| Baking pan (9×13 in) | Bake cake |
| Parchment paper | Prevent sticking during baking |
| Cooling rack | Cool cake evenly |
| Sifter | Sift dry ingredients for texture |
| Offset spatula | Apply and smooth frosting |
| Knife/Food processor | Crush cereal |
| Decorating tools (opt) | Toppings and frosting details |
We find that preparing all this equipment before starting helps us focus on the creative and fun process of baking our Lucky Charms Cake.
Prep Work
Before diving into mixing and baking, thorough prep work ensures a smooth and successful process. Let’s get everything set up so we can focus on crafting our Lucky Charms Cake with ease and precision.
Preparing Baking Pans
Properly preparing the baking pans is crucial to achieve flawless cake layers that release easily after baking. Here is how we do it:
- Grease the 9×13-inch baking pan generously using softened butter or non-stick spray.
- Line the pan with parchment paper, making sure it covers the bottom and sides for an easy lift.
- Lightly grease the parchment paper surface to prevent sticking.
- Make certain the pans are clean and dry before proceeding.
This preparation step prevents the cake from sticking and keeps the layers intact, preserving the beautiful texture contributed by the crushed Lucky Charms cereal.
Measuring Ingredients
Precision in measuring ingredients directly affects the texture and flavor balance of our cake. Use these tips for accurate measuring:
| Ingredient | Measurement Tool | Notes |
|---|---|---|
| All-purpose flour | Dry measuring cup | Spoon flour into cup, level off with a knife |
| Granulated sugar | Dry measuring cup | Fill and level off neatly |
| Baking powder and salt | Measuring spoons | Use exact amounts as stated |
| Butter | Measuring cups or scale | Use room temperature butter, level cups |
| Milk | Liquid measuring cup | Measure at eye level on flat surface |
| Eggs | N/A | Use fresh large eggs |
| Vanilla extract | Measuring spoons | Use standard teaspoon measures |
| Crushed Lucky Charms | Measuring cup | Measure after crushing evenly |
Pro Tip: Always sift dry ingredients like flour, baking powder, and salt to remove lumps and aerate the flour. This ensures a tender crumb for our Lucky Charms Cake.
With these prep steps perfectly handled we set the stage for mixing a moist, flavorful, and truly magical cake.
Cake Batter Instructions
Let’s create the perfect foundation for our Lucky Charms Cake by carefully preparing the batter. Follow these steps to ensure a smooth, flavorful, and colorful cake batter.
Mixing Dry Ingredients
We begin by combining the dry ingredients to promote even distribution and a tender crumb:
- Sift together the following in a large mixing bowl:
- 2 ½ cups all-purpose flour
- 2 ½ teaspoons baking powder
- ½ teaspoon salt
- Add 1 ¾ cups granulated sugar to the sifted mixture.
- Stir gently with a whisk to evenly blend the sugar with the flour mixture.
Pro Tip: Sifting these dry ingredients helps aerate them, ensuring a lighter cake texture.
Combining Wet Ingredients
Next, we prepare the wet ingredients to bring moisture and richness to our batter:
| Ingredient | Measurement | Prep Notes |
|---|---|---|
| Unsalted butter | ½ cup (1 stick) | Softened to room temp |
| Whole eggs | 3 large | |
| Whole milk | 1 cup | Room temperature |
| Pure vanilla extract | 2 teaspoons |
- In a separate mixing bowl, use an electric mixer to beat the softened butter until creamy and smooth.
- Gradually add the sugar while continuing to beat until the mixture is light and fluffy.
- Add eggs one at a time, beating well after each addition.
- Pour in the milk and vanilla extract and mix until fully combined.
Reminder: Room temperature ingredients blend more easily, ensuring a more homogenous batter.
Incorporating Lucky Charms Cereal
Now for the magical touch — the Lucky Charms cereal adds texture, flavor, and colorful charm:
- Gently fold in 1 ½ cups of crushed Lucky Charms cereal, including both the oat pieces and marshmallows.
- Use a rubber spatula to carefully incorporate the cereal to avoid crushing the marshmallows too much.
- Then, gradually mix in the dry ingredients, about ⅓ at a time, alternating with the wet ingredient mixture until a smooth batter forms.
Note: Folding the cereal last preserves its whimsical texture and prevents it from sinking.
Baking Directions
Let’s bring our Lucky Charms Cake batter to life by carefully baking it for perfect texture and flavor. Follow these steps to ensure a moist, colorful, and whimsical dessert every time.
Oven Temperature and Timing
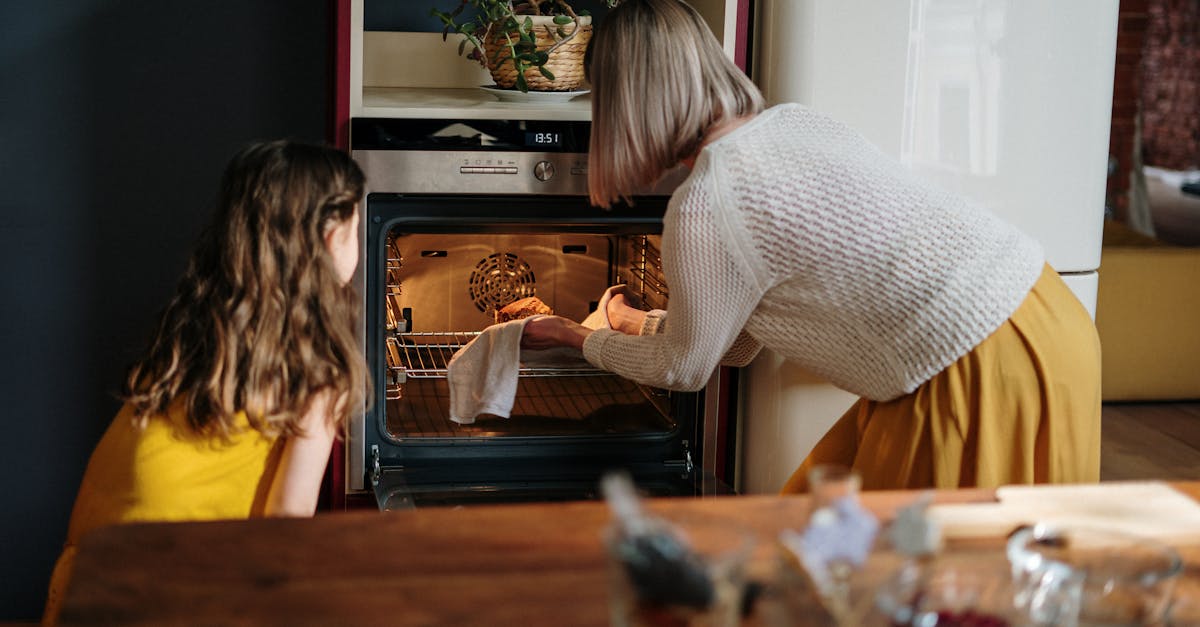
Preheat your oven to a consistent 350°F (175°C). This temperature allows the cake to bake evenly without overbrowning the edges or drying out the interior.
- Prepare the pans by greasing and lining them with parchment as described previously.
- Pour the batter evenly into the prepared 9×13-inch baking pan.
- Bake the cake for 30 to 35 minutes.
Baking at 350°F helps maintain the fluffy crumb and preserves the colorful charm pieces inside the cake for a visually appealing finish.
| Oven Temperature | Baking Time | Pan Size |
|---|---|---|
| 350°F (175°C) | 30–35 minutes | 9×13-inch pan |
Checking for Doneness
Accurate doneness checks keep our cake moist and perfect:
- Insert a toothpick or a clean skewer in the center of the cake.
- If it comes out clean or with a few moist crumbs, the cake is ready.
- Avoid overbaking; a dry or crumbly toothpick means the cake has baked too long.
- Lightly press the top of the cake: it should spring back gently.
“A perfectly baked Lucky Charms Cake holds its colorful marshmallows and moist texture, delighting every bite.”
Cooling the Cake Layers
Proper cooling is crucial for an ideal frosting application and serving experience:
- Allow the cake to sit in the pan on a wire cooling rack for 15 minutes.
- After 15 minutes, gently run a knife around the edges to loosen the cake.
- Carefully lift the cake out using the parchment paper and transfer it directly to the wire rack.
- Cool the cake completely, approximately 30 to 45 minutes, before applying frosting.
Cooling fully prevents the frosting from melting and maintains the vibrant colors of the marshmallow charms on top.
By following these baking directions with attention to temperature, timing, and cooling, our Lucky Charms Cake will come out moist, fun, and photogenic—ready for frosting and finishing touches.
Frosting Instructions
Our Lucky Charms Cake deserves a frosting that complements its colorful whimsy. Follow these steps to make a smooth and creamy frosting that enhances every bite.
Making the Frosting
To create the perfect frosting for our Lucky Charms Cake, we start by ensuring all ingredients are at room temperature. This allows for effortless mixing and a silky texture.
- Beat 1 cup (2 sticks) unsalted butter in a large bowl on medium speed until creamy—about 2 minutes. This forms the rich base of our frosting.
- Gradually add 4 cups powdered sugar, beating on low to avoid a sugar cloud.
- Add 2-3 tablespoons heavy cream or milk to adjust consistency. Start with 2 tablespoons and add more if needed for spreadability.
- Mix in 1 teaspoon vanilla extract to infuse warmth and depth of flavor.
- Add a pinch of salt to balance sweetness.
- Beat on high speed for 3-4 minutes until the frosting is light, fluffy, and spreadable.
Pro Tip: If the frosting is too thick, add an extra teaspoon of milk at a time. If it’s too thin, add powdered sugar by the tablespoon until desired consistency is reached.
Applying the Frosting to the Cake
Once the cake has completely cooled on the wire rack, we get ready to frost.
| Step | Action | Details |
|---|---|---|
| 1 | Level the cake top | Use a serrated knife for even surface |
| 2 | Place cake on a serving plate or stand | Ensures stable frosting application |
| 3 | Scoop frosting onto the cake | Start with a large dollop in the center |
| 4 | Spread evenly with an offset spatula | Use gentle strokes to avoid tearing |
| 5 | Frost the sides carefully | Turn the cake to get smooth edges |
| 6 | Decorate with whole Lucky Charms cereal | Add marshmallows and rainbow sprinkles |
Remember: Apply a thin crumb coat layer first if you want a cleaner finish. Chill the cake for 15 minutes before adding a final thick layer of frosting.
With these frosting instructions, our Lucky Charms Cake will look as magical as it tastes.
Assembling the Cake
Once our Lucky Charms Cake layers are fully cooled and our frosting is silky and smooth, it’s time to bring everything together. We’ll carefully assemble the cake to ensure each bite delivers the perfect balance of moist cake, creamy frosting, and colorful crunch.
Layering the Cake
We start by leveling the cooled cake layers to create an even surface for stacking. Using a serrated knife or cake leveler, we gently trim any domed tops until flat and uniform. This step ensures stability and a professional look.
Next, we place the first cake layer on our serving platter or cake board. Using an offset spatula, we spread a generous but even layer of frosting—about ¾ cup—over the entire surface, reaching the edges but not spilling over. This frosting layer not only adds flavor but also acts as glue between the layers.
We then carefully position the second cake layer on top, pressing down lightly to secure the layers together. We repeat the frosting application on the second layer to prepare for the final decoration.
| Step | Key Action | Measurement |
|---|---|---|
| Level cake layers | Trim domed tops for flat surfaces | N/A |
| Apply frosting on 1st layer | Spread evenly with offset spatula | ~¾ cup per layer |
| Stack layers | Press gently to secure | N/A |
Adding Lucky Charms Decorations
For the signature finish, we coat the entire cake with a thin crumb coat—a light layer of frosting that seals in crumbs. We chill the cake for 15-20 minutes to set this base.
Then, we apply a final thick layer of frosting smoothly around the sides and top for a clean appearance. The key is to keep your spatula steady and the frosting consistent.
To truly celebrate the Lucky Charms theme, we decorate generously with whole Lucky Charms cereal pieces, marshmallows, and rainbow sprinkles. We sprinkle the marshmallows on top in clusters, scatter rainbow sprinkles along the edges, and gently press some cereal pieces into the frosting sides. This adds vibrant color, texture, and that nostalgic cereal crunch in every slice.
“Pro Tip: For the best visual impact, arrange toppings in small groupings rather than spreading them evenly. This draws the eye and highlights the Lucky Charms magic.”
By following these detailed assembly steps, our Lucky Charms Cake not only tastes heavenly but looks spectacular—ready to delight everyone lucky enough to enjoy it.
Make-Ahead and Storage Tips
Proper planning and storage can make our Lucky Charms Cake baking experience even more enjoyable. Here’s how to make ahead and store the cake to maintain its freshness and vibrant appeal.
Make-Ahead Instructions
- Bake the cake layers up to 2 days in advance. Allow them to cool completely on a rack before wrapping them tightly in plastic wrap. This prevents dryness and preserves moisture.
- If desired, freeze the baked layers individually. Wrap each layer in plastic wrap followed by aluminum foil. Freeze for up to 1 month. Thaw in the refrigerator overnight before frosting.
- Prepare the buttercream frosting a day ahead. Store it in an airtight container at room temperature for up to 24 hours. Rewhip with a mixer before spreading if it thickens.
Pro Tip: Assemble the cake on the day you plan to serve it for optimal freshness and texture.
Storage Guidelines
To keep our Lucky Charms Cake fresh and delicious, follow these guidelines after assembling and frosting:
| Storage Method | Duration | Instructions |
|---|---|---|
| Room Temperature | 1-2 days | Cover cake loosely with a cake dome or plastic wrap. |
| Refrigerator | Up to 5 days | Cover cake tightly with plastic wrap or store in an airtight cake box. Bring to room temperature before serving to restore moisture. |
| Freezer | Up to 1 month | Freeze whole or sliced cake tightly wrapped in plastic wrap and foil. Thaw overnight in refrigerator. |
Additional Tips for Optimal Storage
- Avoid storing the cake near strong-smelling foods to prevent flavor absorption.
- Keep the decorated Lucky Charms toppings dry by avoiding refrigeration for long periods; moisture may cause cereal to soften.
- When transporting, place the cake in a sturdy container or cake carrier to protect the delicate frosting and toppings.
By adhering to these Make-Ahead and Storage Tips, we ensure the Lucky Charms Cake retains its moist crumb and colorful crunch, delivering a magical experience every time.
Serving Suggestions
To fully enjoy our Lucky Charms Cake, consider these creative serving ideas that enhance both the flavor and visual appeal.
- Plate Presentation: Slice the cake into generous portions and garnish each plate with a handful of extra Lucky Charms marshmallows. This adds a playful touch and reinforces the nostalgic theme.
- Drizzle Options: For added sweetness and texture contrast, drizzle a light vanilla glaze or white chocolate sauce over each slice. This adds a glossy finish and complements the cake’s buttery notes.
- Accompanying Beverages: Serve with a cold glass of milk or a warm cup of vanilla-flavored coffee or hot chocolate. The creamy drinks balance the cake’s sweetness and create a comforting experience.
- Party Platter: If serving at a gathering, arrange smaller cake squares on a vibrant platter with colorful rainbow sprinkles sprinkled around. This makes for an inviting centerpiece that draws attention.
- Ice Cream Pairing: Offer a scoop of vanilla bean ice cream on the side. The cold creaminess contrasts beautifully with the soft cake texture and enhances every bite.
| Serving Element | Description | Purpose |
|---|---|---|
| Lucky Charms marshmallows | Extra topping beside slices | Adds playful texture and color |
| Vanilla glaze | Light drizzle over cake slices | Enhances sweetness and shine |
| Milk or warm beverages | Milk, vanilla coffee, or hot chocolate | Balances sweetness and adds warmth |
| Rainbow sprinkles | Decorations on party platter | Visual appeal and fun |
| Vanilla bean ice cream | Scoop served alongside | Texture and temperature contrast |
“Serving our Lucky Charms Cake with thoughtful additions turns every bite into a delicious celebration of flavor and color.“
By following these Serving Suggestions we transform our Lucky Charms Cake from a fun treat into an unforgettable dessert experience.
Conclusion
This Lucky Charms Cake recipe brings a playful twist to classic baking that’s sure to brighten any occasion. With its colorful marshmallow bits and creamy frosting, it’s a treat that looks as good as it tastes.
Whether you’re baking for a special event or just to satisfy a sweet craving, this cake offers a delightful mix of nostalgia and flavor. With the tips we’ve shared, you’ll feel confident creating a cake that’s both fun and impressive.
Give it a try and watch how it becomes a favorite in your dessert lineup. Happy baking!
Frequently Asked Questions
What ingredients do I need to make Lucky Charms Cake?
You need all-purpose flour, granulated sugar, baking powder, salt, butter, milk, eggs, vanilla extract, and crushed Lucky Charms cereal. For the frosting, use butter, powdered sugar, heavy cream or milk, vanilla extract, and a pinch of salt.
What equipment is essential for baking this cake?
Essential tools include mixing bowls, measuring cups and spoons, an electric mixer, rubber spatula, 9×13-inch baking pan, parchment paper, cooling rack, sifter, and a knife or food processor to crush the cereal.
How do I prepare the baking pans?
Line your baking pans with parchment paper and lightly grease them. This prevents sticking and ensures easy removal of the cake layers.
At what temperature and how long should I bake the cake?
Bake the cake at 350°F (175°C). Baking time varies but typically ranges between 25–30 minutes. Check doneness by inserting a toothpick—it should come out clean.
How do I make the frosting creamy and smooth?
Use room temperature butter and add powdered sugar gradually while beating. Adjust consistency with heavy cream or milk until smooth and silky.
What is the best way to assemble the cake layers?
Level cooled cake layers, apply frosting between layers, and seal with a thin crumb coat. Finish with a thick layer of frosting for a clean look before decorating.
How should I decorate the Lucky Charms Cake?
Use whole Lucky Charms cereal pieces, extra marshmallows, and rainbow sprinkles. Arrange toppings in small groupings for visual appeal.
Can I prepare the cake ahead of time?
Yes, bake layers up to two days in advance or freeze them. You can also prepare frosting ahead and store it properly.
What is the best way to store the cake?
Store the cake at room temperature for up to two days, refrigerate up to a week, or freeze for longer storage. Keep it covered to preserve moisture and flavor.
Any serving suggestions for the Lucky Charms Cake?
Serve slices garnished with extra marshmallows, drizzle with vanilla glaze or white chocolate, and pair with cold milk or warm drinks like hot chocolate for a delightful treat.