
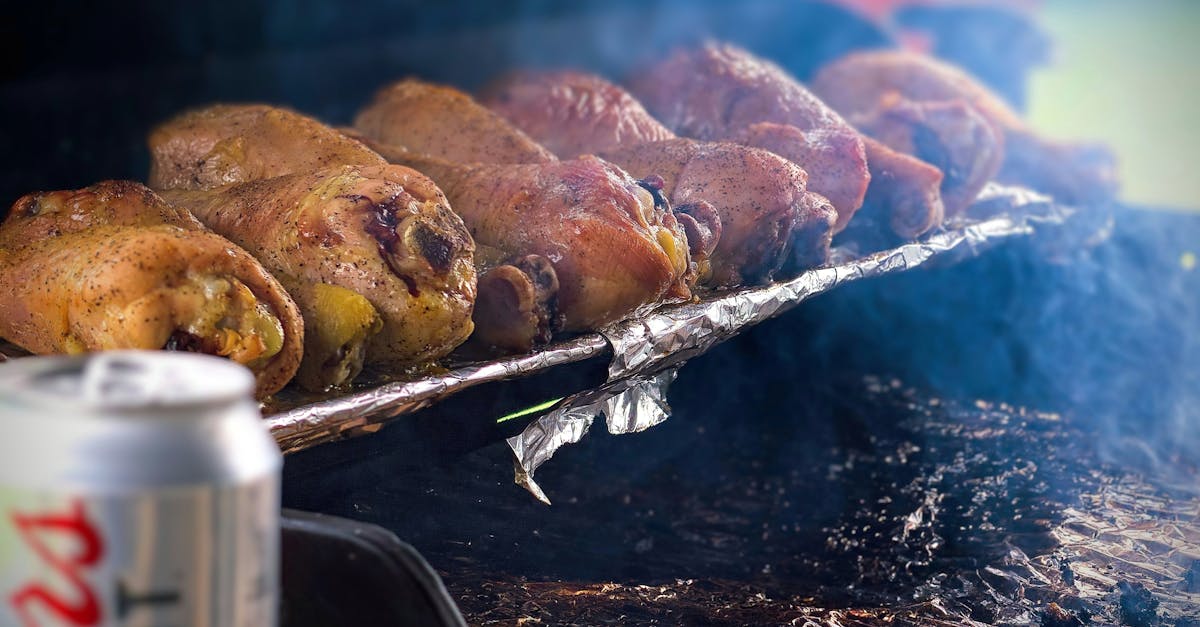
Pumpernickel bread is a rich and hearty classic known for its deep flavor and dense texture. Traditionally made with rye flour, it’s a favorite in many European kitchens. But for those of us avoiding gluten, enjoying this beloved bread can be a challenge.
That’s why we’ve crafted a gluten free pumpernickel recipe that doesn’t compromise on taste or authenticity. Using a blend of gluten free flours and natural ingredients, this recipe delivers the same robust flavor and satisfying chew. Whether you’re gluten intolerant or simply looking to try something new, this bread will quickly become a staple in your kitchen.
Let’s dive into making a loaf that’s perfect for sandwiches, toasting, or simply enjoying with butter and jam. This gluten free pumpernickel is sure to impress both gluten free eaters and traditional bread lovers alike.
Ingredients
To craft our gluten free pumpernickel bread with the perfect dense texture and rich flavor, we carefully select ingredients that mimic the traditional components while keeping it entirely gluten-free.
Dry Ingredients
We use a blend of gluten-free flours and natural flavor enhancers to achieve the characteristic deep color and hearty taste of classic pumpernickel.
- 1 ½ cups brown rice flour — provides a mild, nutty base
- 1 cup sorghum flour — adds structure and slight sweetness
- ½ cup tapioca starch — improves elasticity and chewiness
- ¼ cup cocoa powder (unsweetened) — contributes to dark color and depth
- 2 tablespoons flaxseed meal — acts as a binder and adds fiber
- 2 teaspoons baking powder (gluten-free) — leavens the bread
- 1 teaspoon baking soda — balances acidity for better rise
- 1 teaspoon salt — enhances overall flavor
- 1 tablespoon caraway seeds — classic pumpernickel spice note
Wet Ingredients
Combining wet ingredients carefully helps develop moisture and tenderness, crucial for a dense yet soft gluten free pumpernickel loaf.
- 1 ½ cups buttermilk (or dairy-free yogurt) — provides acidity and tang
- ¼ cup molasses — adds moisture, sweetness, and rich color
- 2 large eggs — bind ingredients and provide lift
- 3 tablespoons olive oil — ensures moist crumb and shelf life
Optional Ingredients
These optional add-ins allow us to customize texture and flavor to our liking while reinforcing the authentic pumpernickel experience.
- 1 tablespoon coffee or strong brewed espresso — intensifies bread’s deep flavor notes
- 1 tablespoon apple cider vinegar — boosts rise and tenderness
- Additional caraway seeds or whole flaxseeds — for topping or extra crunch
| Ingredient Category | Key Purpose | Notes |
|---|---|---|
| Dry Ingredients | Structure, flavor, binding | Blend of gluten-free flours |
| Wet Ingredients | Moisture, acidity, lift | Buttermilk and molasses crucial |
| Optional Ingredients | Flavor depth, texture variation | Coffee and vinegar enhance taste |
Our gluten free pumpernickel mix balances traditional tastes with gluten-free innovation for perfect homemade bread every time.
Equipment Needed
To create our Gluten Free Pumpernickel bread with authentic flavor and texture, having the right equipment is essential. Here’s what we find indispensable for a successful baking experience:
- Mixing Bowls
A set of medium and large mixing bowls to combine both dry and wet ingredients efficiently.
- Measuring Cups and Spoons
Precise measurement tools ensure the correct ratios of flours, starches, and liquids for perfect loaf structure.
- Electric Mixer or Stand Mixer
A mixer fitted with a paddle attachment makes blending the dense gluten-free dough easier and faster than mixing by hand.
- Loaf Pan
Use a standard 9×5-inch non-stick or well-greased loaf pan to shape the bread into the classic pumpernickel form.
- Rubber Spatula
Essential for scraping down the sides of bowls and folding ingredients without deflating the batter.
- Cooling Rack
Cooling the bread properly prevents sogginess; a wire rack allows air to circulate evenly.
- Oven Thermometer (optional but recommended)
Ensures your oven reaches and maintains the exact temperature for an ideal crust and crumb.
- Kitchen Scale (optional)
Provides precise weighting of ingredients for best consistency and reproducibility.
Here is a quick reference table summarizing the equipment and their purpose:
| Equipment | Purpose |
|---|---|
| Mixing Bowls | Combine dry & wet ingredients |
| Measuring Cups/Spoons | Accurate ingredient measurements |
| Electric/Stand Mixer | Efficient kneading and blending |
| Loaf Pan | Shape bread into traditional form |
| Rubber Spatula | Gentle folding & scraping |
| Cooling Rack | Proper cooling for crust and texture |
| Oven Thermometer | Maintain accurate oven temperature |
| Kitchen Scale | Precise measurement for consistency |
Using these tools helps us maintain control over every step of making our gluten free pumpernickel recipe, ensuring the loaf rises properly, develops its characteristic dense texture, and exhibits that deep, dark crust we love.
Prep Work
Before we dive into baking our Gluten Free Pumpernickel bread, it’s crucial to complete some foundational preparation steps. These ensure our ingredients blend seamlessly, delivering that signature dense texture and rich flavor.
Preparing the Gluten Free Flour Mix
The base of our recipe relies on a carefully balanced blend of gluten-free flours and starches. Combining these correctly mimics the structure and moisture retention of traditional rye flour while keeping it gluten-free.
- Measure precisely: Use a kitchen scale or measuring cups for accuracy.
- Combine thoroughly: Sift or whisk together to eliminate lumps and ensure even distribution.
- Store properly: If prepping in advance, keep the flour mix in an airtight container to preserve freshness.
| Ingredient | Measurement | Preparation |
|---|---|---|
| Brown Rice Flour | 1 cup | Sifted |
| Sorghum Flour | 1/2 cup | Sifted |
| Tapioca Starch | 1/3 cup | Sifted |
| Cocoa Powder | 2 tablespoons | Unsweetened, sifted |
| Flaxseed Meal | 3 tablespoons | Ground |
| Baking Powder | 1 teaspoon | |
| Baking Soda | 1/2 teaspoon | |
| Salt | 1 teaspoon | |
| Caraway Seeds | 1 tablespoon | Lightly crushed |
“Sifting and mixing our gluten-free flours creates the perfect canvas for our pumpernickel’s deep flavor and density.”
Soaking and Activating Seeds
Activating seeds like flaxseed meal improves their texture and nutritional availability, plus it acts as a natural binder replacing gluten’s elasticity.
Steps for seed activation:
- Combine flaxseed meal with warm water (use a ratio of 1 tablespoon flaxseed meal to 3 tablespoons water).
- Stir gently and allow to sit for 10 to 15 minutes until the mixture thickens to a gel-like consistency.
- This gel will help provide moisture and hold the bread together without gluten.
If using additional seeds such as sunflower or pumpkin seeds, soaking them briefly in warm water can improve their digestibility and crunch.
“Activating our seeds seals in moisture and improves structure, keeping our loaf tender yet cohesive.”
With these prep steps complete, our gluten-free pumpernickel bread is ready for mixing and baking, ensuring an authentic yet allergy-friendly result.
Instructions
Follow these step-by-step instructions to bake our Gluten Free Pumpernickel bread with a perfect dense texture and rich flavor. Precision and patience are key to achieving an authentic loaf.
Mixing the Dough
- In a large mixing bowl, combine the gluten-free flour blend, cocoa powder, flaxseed meal, baking powder, baking soda, salt, and caraway seeds. Use a whisk or your mixer on low speed to blend the dry ingredients thoroughly.
- In a separate bowl, whisk together the wet ingredients: buttermilk (or dairy-free yogurt), molasses, eggs, olive oil, apple cider vinegar, and brewed coffee if using.
- Slowly pour the wet mixture into the dry ingredients while mixing on medium speed. Mix until the dough becomes thick and uniform. It should resemble a dense cake batter rather than traditional bread dough.
- Scrape down the sides of the bowl with a rubber spatula to ensure all ingredients are fully integrated.
First Rise
- Transfer the dough to a lightly oiled bowl and cover it with plastic wrap or a damp kitchen towel.
- Let the dough rest in a warm, draft-free place for 60 to 90 minutes. This first rise allows the flaxseed meal to hydrate and the leavening agents to activate, contributing to the bread’s structure.
- The dough will not rise dramatically due to its density but should appear slightly puffed and set.
| Step | Time | Notes |
|---|---|---|
| First Rise | 60 to 90 mins | Warm draft-free environment needed |
| Dough Texture | Slightly puffed | Expect minimal volume increase |
Shaping the Loaf
- Once the first rise is complete, lightly flour your hands with gluten-free flour to prevent sticking.
- Gently transfer the dough onto a clean surface and shape it into a tight rectangular loaf.
- Place the shaped loaf into a greased 9×5-inch loaf pan, pressing down gently to fill the corners and smooth the top.
- Cover the pan loosely with plastic wrap or a towel for the second rise.
Second Rise
- Allow the loaf to rise again in a warm spot for 45 to 60 minutes. This second rise helps develop the final texture and allows the dough to relax.
- Preheat your oven to 350°F (175°C) at least 15 minutes before baking.
- When the second rise is complete, uncover the loaf and place it on the middle rack of the preheated oven.
- Bake for 50 to 60 minutes until the crust is firm, dark brown, and a toothpick inserted in the center comes out clean.
- Remove the bread from the oven and let it cool in the pan for 10 minutes before transferring it to a cooling rack to cool completely.
Tip: A deeply colored crust and rich aroma indicate the perfect authentic gluten-free pumpernickel flavor we aim for.
Baking Directions
To achieve the perfect gluten-free pumpernickel loaf, precise baking steps are essential. Let’s walk through the ideal oven settings, baking duration, and cooling process to ensure every slice bursts with authentic flavor and texture.
Oven Temperature and Settings
Preheat your oven to 350°F (175°C). For a dense and richly flavored crumb, bake the loaf using the conventional bake setting rather than convection. This slower heat penetration helps the bread develop its signature dense texture and deep crust color.
- Position the oven rack in the middle to ensure even baking.
- Use an oven thermometer if available to maintain accuracy, as oven temperatures often vary.
- Avoid opening the oven door during the first 30 minutes to prevent heat loss and a collapsed loaf.
| Oven Setting | Temperature | Rack Position | Notes |
|---|---|---|---|
| Conventional Bake | 350°F (175°C) | Middle | Maintains moist crumb and crust texture |
| Avoid Convection | N/A | N/A | Can dry out the loaf and cook too fast |
Baking Time and Tips
Bake the bread for 50 to 60 minutes until the crust is firm and a deep brown. The loaf will develop a rich aroma reminiscent of traditional pumpernickel.
- Check doneness by inserting a toothpick or skewer in the center; it should come out clean.
- For an extra crusty exterior, place a shallow pan of water in the bottom of the oven during the first 20 minutes to add steam.
- If the crust browns too quickly, tent the loaf loosely with aluminum foil after 40 minutes.
“Patience during baking rewards us with a moist, dense crumb and a crust that crackles beautifully.”
| Baking Time Range | Internal Temperature Goal | Crust Characteristic |
|---|---|---|
| 50–60 minutes | 200°F (93°C) | Deep brown, firm but not burnt |
Cooling the Bread
Once baked, remove the loaf from the pan and transfer it to a wire cooling rack immediately to prevent sogginess. Cooling allows the gluten-free pumpernickel to set properly, improving sliceability and texture.
- Let the bread cool completely for at least 2 hours before slicing.
- Avoid cutting too early; a warm loaf can crumble due to its delicate structure.
- Store cooled bread wrapped in a clean kitchen towel or bread box to preserve freshness.
Storage and Serving Suggestions
Proper storage and thoughtful serving can elevate our Gluten Free Pumpernickel experience while preserving flavor and texture. Here are the best practices to keep our bread fresh and to enjoy it at its finest.
Storage Guidelines
To maintain the dense texture and deep crust, our gluten-free pumpernickel needs careful storage:
| Storage Method | Instructions | Duration |
|---|---|---|
| Room Temperature | Wrap the cooled loaf in a clean kitchen towel, place in airtight container or bread box | Up to 2 days |
| Refrigeration | Wrap tightly in plastic wrap or foil, then place in ziplock bag | Up to 1 week |
| Freezing | Slice before freezing, then wrap slices individually in parchment and store in an airtight freezer bag | Up to 3 months |
Tip: Always ensure the bread is at room temperature before wrapping to avoid condensation which can cause sogginess.
Thawing and Refreshing Frozen Bread
When ready to use frozen Gluten Free Pumpernickel, follow these steps for best results:
- Remove slices from freezer and unwrap.
- Let thaw at room temperature for 15–20 minutes.
- For fresh-crisp texture, toast slices lightly or warm in a preheated 350°F (175°C) oven for 5–7 minutes wrapped in foil.
Serving Suggestions
Our Gluten Free Pumpernickel offers versatile options, perfect for various meals and occasions.
- Classic Spread: Serve sliced warm with butter or dairy-free margarine for a simple, comforting treat.
- Sandwiches: The dense texture holds up well to robust fillings like smoked salmon, cream cheese, or hearty vegetables.
- Toasted: Toast slices until edges are crisp to bring out the nutty, slightly sweet notes from molasses and cocoa powder. Ideal for avocado toast or sturdy bases for open-faced sandwiches.
- With Soups and Stews: Its rich flavor and substantial crumb complement hearty soups such as lentil stew, split pea, or beef goulash.
- Accompaniment to Cheese Boards: Pair thin slices with sharp cheeses like aged cheddar, gouda, or blue cheese for dynamic flavor contrasts.
Serving Tip: To highlight the traditional pumpernickel flavor, add a sprinkle of caraway seeds on top of toasted slices or within spreads.
Summary Table: Storage and Serving Highlights
| Aspect | Key Points |
|---|---|
| Storage Temperature | Room temperature up to 2 days, refrigeration up to 1 week, freezing up to 3 months |
| Wrapping | Use clean towel or airtight wrap to prevent moisture |
| Thawing | Thaw at room temp then toast or warm for best texture |
| Serving Styles | Sandwiches, toasted, with soups, butter spreads, cheese boards |
| Flavor Enhancers | Toasting, caraway seeds, molasses notes emphasized |
By following these storage and serving suggestions, we ensure our gluten free pumpernickel stays delicious and ready to enjoy in multiple ways without compromising its classic qualities.
Conclusion
Gluten-free pumpernickel doesn’t have to be a compromise. With the right ingredients and techniques, we can enjoy a loaf that’s rich in flavor and true to its traditional roots. This recipe opens the door for everyone to savor the dense texture and deep taste we love in pumpernickel bread.
By paying attention to each step—from mixing to baking and cooling—we ensure a perfect result every time. Whether for sandwiches, toasting, or simply enjoying with your favorite spread, this gluten-free version fits seamlessly into our meals.
Let’s embrace baking this classic bread at home, confident that gluten-free doesn’t mean missing out on quality or taste.
Frequently Asked Questions
What is pumpernickel bread?
Pumpernickel bread is a dense, dark rye bread known for its rich flavor and slightly sweet taste. Traditionally made with rye flour, it has a chewy texture and deep brown crust.
Can pumpernickel bread be made gluten-free?
Yes, pumpernickel bread can be made gluten-free by using a blend of gluten-free flours like brown rice, sorghum, and tapioca starch, along with other natural ingredients to replicate the traditional texture and flavor.
What gluten-free flours are used in the recipe?
The recipe uses brown rice flour, sorghum flour, and tapioca starch combined with flaxseed meal and cocoa powder to mimic the dense texture and taste of traditional pumpernickel.
What are the key wet ingredients in gluten-free pumpernickel?
Key wet ingredients include buttermilk (or dairy-free yogurt), molasses, eggs, and olive oil. Optional additions like coffee and apple cider vinegar enhance flavor depth.
Do I need special equipment to bake this gluten-free bread?
Basic baking tools like mixing bowls, measuring cups and spoons, an electric or stand mixer, a loaf pan, rubber spatula, and cooling rack are needed. Optional tools include an oven thermometer and kitchen scale for precision.
How long should the dough rise before baking?
The dough requires two rises: the first allows flaxseed meal to hydrate and leaveners to activate; the second rise helps develop the final texture. Each rise typically lasts about 30-60 minutes.
What is the ideal baking temperature and time?
Bake gluten-free pumpernickel bread at 350°F (175°C) for 50 to 60 minutes. Bake until the crust is firm and deep brown, using steam if possible to achieve the perfect crust.
How should I cool and store the bread?
Cool the bread on a wire rack for at least 2 hours before slicing. Store at room temperature for short-term use, refrigerate for up to a week, or freeze to keep it fresh longer.
Can this bread be used for sandwiches and toasting?
Yes, the gluten-free pumpernickel bread is versatile and works great for sandwiches, toasting, or enjoying with butter, jam, soups, and cheese boards.
How do flaxseeds help in gluten-free baking?
Flaxseed meal acts as a natural binder and improves texture by hydrating during dough rest, compensating for the absence of gluten and enhancing nutritional value.