
Nothing says the holidays are here quite like the warm scent of gingerbread. Our gingerbread clay recipe brings that festive magic into a fun hands-on project the whole family can enjoy. Whether we’re making ornaments for the tree or keepsake gifts for loved ones this DIY clay is a creative twist on classic holiday traditions.
We love how this recipe combines simple pantry staples with the cozy aroma of ginger and cinnamon. It’s safe for little hands and lets us craft decorations that look good enough to eat—though we’ll want to save the real gingerbread for snacking! Let’s gather our supplies and get ready to fill our homes with the sights and smells of the season.
Why You’ll Love This Gingerbread Clay Recipe
We know that holiday crafting should be easy, memorable, and safe for the entire family. Here’s why our bold Gingerbread Clay Recipe stands out as the perfect choice for festive fun:
- Simple Pantry Ingredients:
We only use household staples such as flour, salt, ground cinnamon, and ginger. No special supplies mean we can whip up a batch whenever inspiration strikes.
- Kid-Friendly & Non-Edible:
Our gingerbread clay offers a tactile, mess-free craft that’s completely safe for kids (even if they’re tempted to sneak a taste, it’s non-toxic but not edible).
- Warm, Festive Scent:
The blend of cinnamon and ginger creates that cozy holiday aroma. Rolling out this clay fills our home with a scent evocative of freshly baked gingerbread, adding sensory delight to the project.
- Long-Lasting Creations:
Once dried, ornaments and keepsakes made from this gingerbread clay become cherished decorations that can be enjoyed year after year.
- Customizable & Creative:
We can easily mold the dough into classic gingerbread men, stars, or custom shapes—then paint, decorate, or stamp for a truly personalized finish.
- Effortless Cleanup:
Since our recipe leaves out sticky syrup or glue, cleaning up is a breeze. No extra residue means more time for making memories.
Quick Comparison Table: Gingerbread Clay vs. Traditional Gingerbread Cookies
| Feature | Gingerbread Clay Recipe | Traditional Gingerbread Cookies |
|---|---|---|
| Main Use | Ornaments, keepsakes, decor | Eating, gifting |
| Ingredients | Flour, salt, cinnamon, ginger | Flour, sugar, eggs, ginger, etc. |
| Edible | No (non-toxic but not for eating) | Yes |
| Scent | Strong, lasting holiday aroma | Mild, fades over days |
| Storage | Year-round (no spoilage) | 1-2 weeks (before going stale) |
| Kid’s Craft Safe | Yes | Supervision needed |
| Cleanup | Quick, dry | Icing and dough residue |
With our easy-to-follow Gingerbread Clay Recipe we turn ordinary afternoons into cherished holiday traditions—full of warmth, creativity, and hands-on joy for all ages.
Tools and Equipment Needed
To create our gingerbread clay recipe ornaments, gathering the right tools ensures smooth shaping, drying, and decorating. Below is our essential supply list and their purposes.
Basic Equipment List
- Large Mixing Bowl – For combining the clay ingredients thoroughly
- Measuring Cups and Spoons – For accurate measurement of flour, salt, water, and spices
- Wooden Spoon or Sturdy Spatula – For mixing and blending the dough evenly
- Rolling Pin – For flattening the dough to uniform thickness
- Baking Sheet or Tray – For drying or baking the ornaments flat
- Parchment Paper or Silicone Baking Mat – To prevent sticking on surfaces and baking sheets
- Gingerbread Cookie Cutters – For cutting festive shapes such as trees, stars, or gingerbread people
- Drinking Straw or Skewer – For making holes in ornaments before drying
Optional Items for Decoration
- Acrylic Paints and Brushes – For adding vibrant color once the ornaments dry
- Twine or Ribbon – For threading ornaments to hang
- Glitter or Craft Glue – For extra sparkle and holiday flair
Tools and Purposes Table
| Tool or Equipment | Purpose |
|---|---|
| Mixing Bowl | Combine ingredients for the clay |
| Measuring Cups and Spoons | Accurate measurement of all recipe items |
| Wooden Spoon or Spatula | Evenly mix thick, spiced dough |
| Rolling Pin | Roll out dough smoothly |
| Baking Sheet or Tray | Surface for drying or oven-drying ornaments |
| Parchment Paper/Mat | Prevent sticking and help with easy cleanup |
| Cookie Cutters | Shape dough into festive gingerbread designs |
| Straw or Skewer | Create holes for ribbon in finished ornament |
| Paints/Brushes | Decorate with colorful details |
| Ribbon/Twine | Thread and hang finished creations |
Ingredients for Gingerbread Clay
To achieve that classic gingerbread clay look and irresistible holiday scent, we rely on a blend of simple pantry staples. Each ingredient plays a key role in making the clay sturdy, fragrant, and easy to work with.
Basic Ingredients
- 2 cups all-purpose flour
Provides structure to our gingerbread clay and gives it the right texture for rolling and shaping.
- 1 cup salt
Acts as a binder, helping to create a durable finished product.
- 1 cup warm water
Brings the dry ingredients together and gives us pliable dough.
- 2 tablespoons ground cinnamon
Infuses our clay with a rich, festive aroma and deep color.
- 1 tablespoon ground ginger
Adds warm spice for authentic gingerbread fragrance.
- 1 tablespoon ground nutmeg (optional)
Enhances the scent and color but can be omitted for a more subtle spice.
Optional Decorative Add-ins
- 1 teaspoon ground cloves
For an extra hint of holiday spice.
- Brown food coloring or liquid coffee
Adjusts the color for a classic gingerbread shade.
- Glitter or acrylic paint (for decorating)
For sparkling, personalized creations once the clay dries.
Tip: Always use spices for scent and color, not for consumption.
Our gingerbread clay is for crafting, not eating!
Gingerbread Clay Ingredient Comparison Table
| Ingredient | Function | Optional/Required | Sensory Contribution |
|---|---|---|---|
| Flour | Forms dough base, structure | Required | Neutral |
| Salt | Adds strength, preservation | Required | Slightly sandy texture |
| Water | Binds the mixture | Required | No scent |
| Cinnamon | Colors and scents dough | Required | Warm, spicy, aromatic |
| Ginger | Intensifies gingerbread aroma | Required | Zesty, gingery note |
| Nutmeg | Rounds out spice blend | Optional | Sweet, nutty spice |
| Cloves | Deepens spiced aroma | Optional | Sharp, clove fragrance |
| Brown food color | Evens out dough color | Optional | No scent, visual only |
| Decorative items | Personalizes dried clay | Optional | Adds sparkle, visual flair |
Gather these gingerbread clay ingredients before mixing and shaping your festive ornaments for a seamless holiday crafting session.
Directions
Let’s create our gingerbread clay with easy, step-by-step techniques. Follow these instructions to craft aromatic ornaments that bring a festive, hands-on experience to your home.
Prep Your Workspace
- Clear a flat surface and wipe it dry.
- Lay down wax paper or parchment for easy cleanup.
- Gather all tools and ingredients before starting.
- Keep a damp cloth on hand to wipe sticky hands or spills.
Mix the Dry Ingredients
- In a large mixing bowl add:
- 2 cups all-purpose flour
- 1 cup salt
- 2 tablespoons ground cinnamon
- 1 tablespoon ground ginger
- 1 tablespoon ground nutmeg (optional)
- Any optional spices such as ground cloves if desired
- Stir thoroughly with a wooden spoon until the mixture is consistent and spices are evenly distributed.
Add Wet Ingredients and Blend
- Pour 1 cup warm water slowly into the bowl.
- Mix with a wooden spoon or spatula, folding the liquid evenly into the dry ingredients.
- The dough will start to come together and look shaggy and sticky.
- For a darker, more gingerbread-like appearance, add a few drops of brown food coloring at this stage if desired.
Knead the Clay
- Dust your workspace lightly with flour.
- Turn out the clay and knead it for 6 to 8 minutes until smooth and pliable.
- The clay should feel soft and slightly tacky, not sticky.
- If you’re working with kids, let each participant knead a small portion to enjoy the spicy aroma.
Adjust Texture if Needed
| Issue | Solution |
|---|---|
| Clay too sticky | Sprinkle in small amounts of flour and knead |
| Clay too crumbly/dry | Add a teaspoon of warm water at a time and knead |
| Desired color not reached | Add more food coloring and knead thoroughly |
- Test a small pinch by pressing it between your fingers. Proper gingerbread clay should hold its shape easily and not stick.
“The perfect gingerbread clay offers a warm, spicy scent and a texture that rolls out smoothly without cracking or flaking.”
Now our clay is ready for rolling, cutting, and shaping into festive ornaments.
How to Shape and Use Gingerbread Clay
Once our gingerbread clay is perfectly mixed and fragrant, we can start shaping it into festive ornaments and creative decorations. This process is tactile and rewarding, allowing us to craft custom gifts and keepsakes that capture the spirit of the season.
Rolling Out the Clay
We begin by dusting our workspace and rolling pin with a light layer of flour. Place the ball of gingerbread clay in the center, and press it down gently to flatten. Using the rolling pin, we roll the clay to an even 1/4-inch thickness. This ensures sturdy ornaments that dry evenly and resist cracking.
For easy rolling:
- Turn the clay a quarter turn after each roll to prevent sticking.
- If the clay is too sticky, sprinkle a bit more flour on top.
- If the edges crack, smooth them with a slightly damp finger.
Cutting Out Shapes
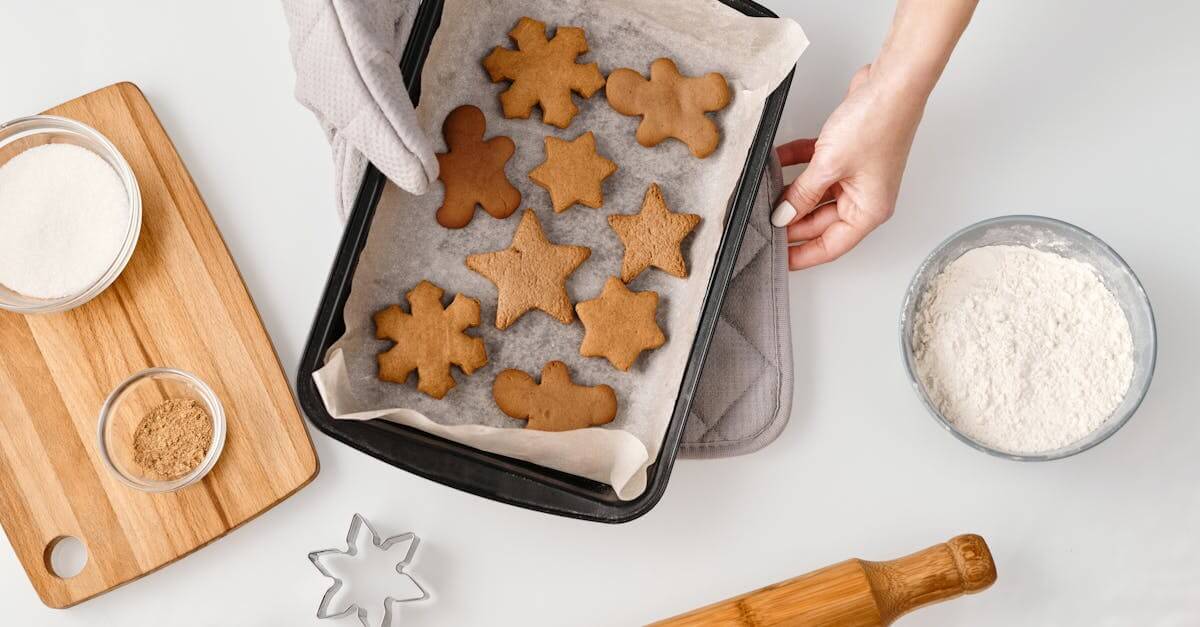
With our gingerbread clay evenly rolled, we reach for festive cookie cutters—think stars, trees, gingerbread men, and hearts. Press the cutters firmly into the clay to create clean, defined edges. Transfer each shaped piece to a nonstick baking sheet or parchment with a flat spatula.
Tips for cutting and moving shapes:
- Dip cutters in a bit of flour if the clay sticks.
- Use a straw or wooden skewer to make a hole at the top of each ornament for hanging.
- Gather and reroll any excess clay to maximize yield.
Here’s a quick reference for ornament shapes and their recommended uses:
| Shape | Common Use | Decoration Ideas |
|---|---|---|
| Gingerbread Man | Holiday Ornaments | Paint faces, add buttons |
| Star | Tree Decor | Dust with gold glitter |
| Heart | Gift Tags | Write messages with marker |
| Tree | Garland | Decorate with acrylic dots |
Making Gingerbread Ornaments
Once our shapes are cut and transferred, we add personalized touches. This is the perfect time to press patterns with textured stamps, add names with alphabet stamps, or dust the surface with extra cinnamon for richer color.
To assemble gingerbread clay ornaments:
- Insert a skewer or straw at the top to create a hanging hole.
- Smooth rough edges or cracks with your finger dipped in water.
- Let ornaments air dry for 24 to 48 hours, turning occasionally, or bake at 200°F for 2 to 3 hours for a quicker finish.
- When dry, decorate using non-toxic acrylic paints, markers, glitter, or puffy paint.
- Thread natural twine, ribbon, or metallic string through the holes for hanging.
A glance at ideal drying and decorating methods:
| Method | Timing | Recommended For |
|---|---|---|
| Air Drying | 24-48 hours | Large, thick pieces |
| Oven Bake | 2-3 hours at 200°F | Small, thin ornaments |
| Painting | After drying | All ornament types |
| Sealing | Optional, after paint | Keepsake longevity |
Using our own gingerbread clay recipe, we transform simple pantry staples into cherished, decorative keepsakes that fill our spaces with nostalgia and holiday cheer.
Drying and Storing Gingerbread Clay
Perfectly finished gingerbread clay ornaments depend on thorough drying and smart storage. Below we outline best practices to keep every creation looking festive and fresh year after year.
Air Drying vs. Baking
We have two reliable ways to dry our gingerbread clay shapes, both effective and easy to follow. The choice depends on our available time and desired finish.
| Method | Process | Pros | Cons |
|---|---|---|---|
| Air Drying | Place ornaments on a parchment-lined tray. Let air dry for 24–48 hours. | No risk of cracking. Even finish. | Takes longer. |
| Oven Baking | Bake at 200°F (93°C) for 2–3 hours. Flip halfway for even drying. | Faster drying. Firmer texture. | Risk of slight warping. |
- Tip: For best results, let thicker ornaments use the oven for faster, more even drying, while delicate shapes benefit from patient air drying. Always cool gingerbread clay decorations completely before handling or decorating.
Proper Storage Tips
To keep our gingerbread clay ornaments looking their best, we store them carefully each season:
- Let every ornament dry and cure completely before packing.
- Store finished pieces in an airtight container to prevent moisture absorption.
- Lay sheets of wax paper or parchment between layers to prevent sticking.
- Add a silica gel packet to absorb excess humidity.
- Keep decorations in a cool, dry place away from direct sunlight.
Pro Tip: Label the container with the year and project details for easy identification.
Decorating Ideas for Gingerbread Clay Creations
When our gingerbread clay ornaments are shaped and dried, we can elevate them with creative finishes and crafty embellishments. Decorating our gingerbread clay creations turns each piece into a unique holiday keepsake while letting us infuse personality and festive flair.
Painting and Finishing Techniques
- Acrylic Paint: We use water-based acrylics because they bond well with dried clay and produce vibrant colors. Before painting, we dust the ornaments with a soft brush to remove any excess flour.
- Detail Brushes: Fine-tipped brushes are perfect for intricate lines, like snowflake arms or lettering.
- Sealer Application: Once paint dries completely, we coat surfaces with a clear acrylic sealer or Mod Podge to protect finishes and add a soft sheen. This also helps lock in the delightful gingerbread scent.
Embellishments and Add-ons
- Glitter and Gems: For a magical shimmer, we sprinkle glitter onto wet paint or glue. Small rhinestones or faux pearls can mimic candy decorations—just dot glue where we want them and press gently.
- Textural Accents: Using white puffy paint or 3D fabric paint, we mimic classic royal icing outlines on gingerbread people, houses, or snowflakes. These accents dry soft and create tactile interest.
- Yarn, Ribbon, or Twine: Threading festive ribbon or baker’s twine through holes leaves us with polished ornaments ready to hang.
| Embellishment Type | How We Use It | Effect Achieved |
|---|---|---|
| Acrylic Paint | Brush on details | Vivid, colorful finishes |
| Glitter | Sprinkle onto glue | Sparkling, festive shimmer |
| Gems & Rhinestones | Attach with craft glue | Candy-like accents |
| Puffy Paint | Trace on edges | Raised “icing” texture |
| Ribbon or Twine | Loop through holes | Easy display and hanging |
Creative Personalization
- Names & Dates: Personal touches like “Emma 2024” or “Our First Christmas” make each ornament a memorable heirloom. We inscribe details using fine-tipped permanent markers or paint pens.
- Impression Patterns: Before drying, we gently press lace, stamps, or textured objects into the clay for intricate relief designs.
- Quote Inspiration: Sometimes, we add inspiring short phrases—“Let it Snow” or “Joy”—to make each piece special.
“No two gingerbread clay ornaments are ever alike—our creativity is the secret ingredient that transforms each one into a cherished keepsake.”
Display Tips
- Garlands: We string multiple creations together with twine for a festive garland draped across mantels or windows.
- Gift Tags: We use smaller gingerbread clay shapes as unique, personalized gift tags attached to wrapped presents.
- Tree Ornaments: Bright ribbon loops make it easy to add homemade charm to our holiday tree.
| Display Idea | Description |
|---|---|
| Garland | String several ornaments for a decorative swag |
| Gift Tag | Personalize and tie to gift wrap |
| Tree Ornament | Hang with ribbon for holiday sparkle |
Sealing and Caring for Decorated Ornaments
After embellishing, we let all decorations dry fully before handling. For lasting protection, we reapply clear sealer annually. We also store our finished gingerbread clay creations in a cool, dry place, layered between wax paper and away from heat or moisture.
Tips and Troubleshooting
Working with Gingerbread Clay
- If the clay is too sticky: Sprinkle in an extra tablespoon of all-purpose flour at a time. Knead after each addition until the gingerbread clay feels smooth and workable but not dry.
- If the clay feels dry or crumbly: Add a teaspoon of warm water and knead thoroughly. Repeat as needed until the clay becomes pliable.
Preventing Cracks and Warping
- For crack-free ornaments: Roll the gingerbread clay to an even 1/4-inch thickness. If shapes are too thick, they may crack during drying.
- If cracks appear during drying: Lightly dampen your finger and smooth over the cracks. Allow the piece to air dry.
| Problem | Solution |
|---|---|
| Sticky clay | Add more flour a tablespoon at a time |
| Dry or crumbly clay | Add warm water one teaspoon at a time |
| Cracks during drying | Smooth gently with a damp finger |
| Warped ornaments | Roll evenly and avoid overcrowding baking sheets |
Drying Tips
- To prevent warping: Flip the ornaments halfway through oven or air drying. Always use a flat, non-stick surface for best results.
- For quick results: Oven dry at 200°F. Check every 30 minutes and turn shapes for even drying.
- Humidity caution: High humidity prolongs air drying. Dry near a fan or dehumidifier if needed.
Decorating Do’s and Don’ts
- Wait until fully dry before painting or sealing your gingerbread clay ornaments.
- Use only water-based acrylic paints to avoid sticky finishes or discoloration.
- Always apply a clear sealer for long-lasting ornaments, especially if using glitter or puffy paint.
Storing Your Gingerbread Clay Creations
- Store in an airtight container layered between wax or parchment paper to prevent sticking and humidity damage.
- Add a silica gel packet to the container to absorb any moisture.
- Label containers with project details and dates to organize ornaments year after year.
Frequently Asked Questions
“Can we eat gingerbread clay?”
No, gingerbread clay is non-toxic but not edible. Reserve edible gingerbread dough for cookies.
“Why are my ornaments soft after baking?”
They may need more time in the oven, or the thickness is uneven. Return to the oven in 20-minute increments until fully dry and firm.
“How do we fix air bubbles?”
Gently press out air bubbles while kneading. For hidden bubbles, prick with a toothpick before drying.
Quick Reference: Gingerbread Clay Fixes
| Issue | Quick Fix |
|---|---|
| Sticky hands or tools | Dust with flour |
| Soft ornaments after drying | Return to oven or air dry longer |
| Glitter shedding | Add another coat of clear sealer |
| Dulled paint colors | Use bright water-based acrylic paint |
With these gingerbread clay troubleshooting tips, our creative projects will stay smooth, festive, and frustration-free.
Make-Ahead and Storage Instructions
We can easily prepare our gingerbread clay ahead of time to simplify holiday planning or group craft sessions. Follow these practical tips to keep your clay fresh and ornaments in pristine condition.
Making the Clay Ahead
- Mix and Knead our gingerbread clay just as instructed, ensuring a smooth, fragrant texture.
- Shape the dough into a tight ball and lightly coat it with a few drops of vegetable oil to prevent drying.
- Wrap the clay tightly in plastic wrap. For extra protection, place it in a resealable airtight bag or container.
- Store the wrapped clay in the refrigerator for up to 3 days.
- Before using, let the clay sit at room temperature for 20–30 minutes. If it’s firm, knead it gently until pliable.
Pro Tip: If the clay feels too dry after chilling, work in a few drops of warm water. For sticky clay, dust your hands with flour.
Storing Unused Clay
- Divide leftover gingerbread clay into small portions for individual projects.
- Wrap each portion tightly with plastic wrap.
- Place wrapped clay balls in an airtight container or zip-top bag.
- Store in the refrigerator. Use within 3 days for best results.
| Action | Storage Method | Maximum Storage Time |
|---|---|---|
| Mixed clay (unshaped) | Wrapped and refrigerated | 3 days |
| Unused, leftover clay | Wrapped, airtight, chilled | 3 days |
Storing Finished Gingerbread Clay Ornaments
- Allow ornaments to dry completely, following our chosen drying method (air or oven).
- Layer ornaments with wax paper or parchment to avoid scratches and sticking.
- Place in a sturdy airtight container to keep out moisture and dust.
- For multiple layers, add a sheet of wax paper between rows.
- Drop a silica gel packet into the container for added protection against humidity.
- Store in a cool, dry place away from direct sunlight to preserve colors and structure.
| Ornament State | Storage Container Type | Notes |
|---|---|---|
| Fully dry, decorated | Airtight box or plastic bin | Stack with wax paper separators |
| Extra protection | Add silica gel packet | Reduces humidity |
| Long-term storage | Label with year and project | Helps identify keepsake ornaments |
Pro Tip: Label each storage box with the project date and type for easy holiday organizing.
Rehydrating Dried-Out Clay
If our gingerbread clay becomes too dry in storage:
- Place a damp (not wet) paper towel over the clay.
- Seal it in an airtight bag and leave for about 1 hour.
- Knead thoroughly and add water drop by drop if needed.
Reviving Soft or Sticky Ornaments
If finished pieces become slightly soft or sticky during storage:
- Spread on a lined baking sheet.
- Bake at 200°F for 30–60 minutes to reset dryness and shape.
Proper make-ahead and storage practices ensure our fragrant, gingerbread clay ornaments remain beautiful and durable holiday after holiday.
Conclusion
Gingerbread clay crafting lets us capture the magic of the holidays in a way that’s both creative and memorable. With just a few pantry staples and a bit of imagination we can fill our homes with the sights and scents of the season.
Whether we’re making ornaments with the kids or designing keepsakes for loved ones this project brings everyone together. Let’s embrace the joy of crafting and make this holiday season extra special with our own handmade gingerbread clay creations.