
Who doesn’t love a bite-sized dessert that’s as adorable as it is delicious? Starbucks’ chocolate cake pops have become a favorite treat for many of us, combining rich, moist cake with a smooth chocolate coating. They’re perfect for satisfying a sweet tooth without overindulging, and let’s face it, they’re almost too cute to eat!
The best part? We can recreate these indulgent little delights at home with just a few simple ingredients. Whether you’re making them for a party, a gift, or just because you deserve a treat, these homemade cake pops are guaranteed to impress. Plus, there’s something so satisfying about enjoying a Starbucks-inspired dessert without leaving the house.
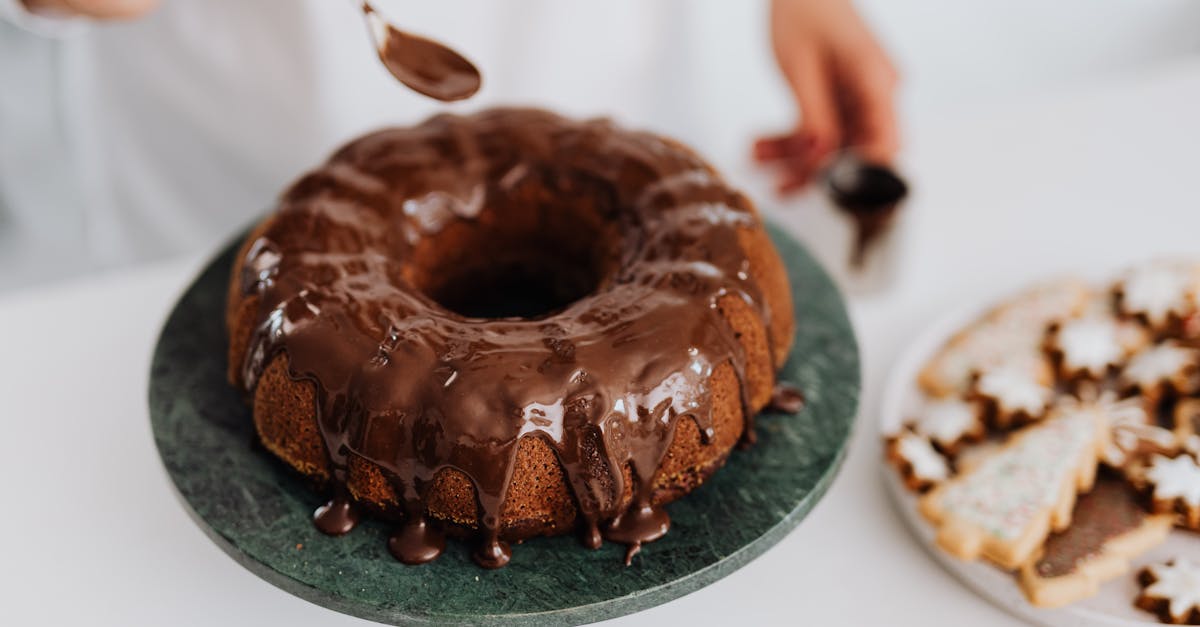
Chocolate Cake Pops Starbucks Recipe
Recreating Starbucks-inspired chocolate cake pops at home is simpler than it seems. Let’s break it down into easy-to-follow steps. With the right ingredients and techniques, we’ll make these bite-sized delights that are moist, rich, and as indulgent as the ones from your favorite coffee shop.
Ingredients
For the cake:
- 1 ½ cups all-purpose flour
- 1 cup granulated sugar
- ½ cup unsweetened cocoa powder
- 1 tsp baking powder
- ½ tsp baking soda
- ½ tsp salt
- 2 large eggs
- ½ cup buttermilk (room temperature)
- ½ cup warm water
- ¼ cup vegetable oil
- 1 tsp vanilla extract
For the frosting:
- ½ cup unsalted butter (softened)
- 1 ¾ cups powdered sugar
- ¼ cup unsweetened cocoa powder
- 2 tbsp heavy cream
- 1 tsp vanilla extract
For assembly:
- 2 cups semi-sweet chocolate (melted)
- Cake pop sticks or lollipop sticks
- Sprinkles (optional, for decoration)
Step-by-Step Instructions
1. Prepare the Cake
- Preheat the oven to 350°F and grease a 9×13-inch baking pan.
- In a large bowl, sift together the flour, cocoa powder, baking powder, baking soda, and salt.
- In another bowl, whisk the eggs, sugar, buttermilk, oil, water, and vanilla extract until smooth.
- Gradually combine the wet and dry ingredients to form a smooth batter.
- Pour the batter into the prepared pan, spreading it evenly. Bake for 30-35 minutes or until a toothpick inserted in the center comes out clean. Let the cake cool completely.
2. Make the Frosting
- In a mixing bowl, beat the softened butter until fluffy.
- Add the powdered sugar, cocoa powder, heavy cream, and vanilla extract. Beat until creamy and spreadable.
3. Crumb the Cake and Combine
- Crumble the cooled cake into fine crumbs in a large bowl.
- Add a portion of the frosting (start with half) and mix until the texture is moldable. Add more frosting if needed, but avoid making the mixture too sticky.
4. Shape the Cake Balls
- Scoop tablespoon-sized portions (about 1 inch in diameter) and form them into smooth balls using your hands.
- Place the balls on a parchment-lined baking sheet and refrigerate for 30 minutes.
5. Assemble the Cake Pops
- Melt the semi-sweet chocolate in a microwave in 30-second intervals, stirring between each interval until fully smooth.
- Dip the tip of each cake pop stick into the melted chocolate and insert it halfway into a cake ball. This step ensures the stick stays secure.
- Return to the fridge for another 10 minutes to set the chocolate.
6. Coat and Decorate
- Dip each cake pop into the melted chocolate, coating it evenly. Gently tap off the excess chocolate.
- If desired, sprinkle with decorative sprinkles before the coating hardens.
- Stand the cake pops upright in a styrofoam block or a cake pop stand to let them dry.
Tips for Success
| Tip | Why It Matters |
|---|---|
| Use room temperature ingredients | Ensures smoother batter and even mixing. |
| Chill before coating | Prevents the cake balls from falling apart while dipping. |
| Use quality chocolate | Higher-grade chocolate offers better coating and richer flavor. |
| Work in small batches | Keeps melted chocolate warm and cake pops manageable during assembly. |
We have rich chocolate cake pops that are perfect for parties, gifting, or simply treating ourselves. These homemade Starbucks-inspired treats are worth the effort! What decoration will you try first? Choose sprinkles, a drizzle of white chocolate, or keep it classic—each option guarantees a delicious finish.
Ingredients
To recreate Starbucks-inspired Chocolate Cake Pops at home, we’ll need a few key ingredients. Below are the categories of ingredients required for the cake, frosting, coating, and optional toppings. Gather these before you begin for a smooth baking process!
For The Cake
- 1 cup all-purpose flour
- 1/2 cup unsweetened cocoa powder
- 1 tsp baking powder
- 1/4 tsp baking soda
- 1/2 tsp salt
- 1/2 cup granulated sugar
- 1/2 cup light brown sugar, packed
- 1/2 cup whole milk, at room temperature
- 1/4 cup vegetable oil
- 2 large eggs, at room temperature
- 1 tsp pure vanilla extract
- 1/2 cup hot water
For The Frosting
- 1/4 cup unsalted butter, softened
- 1 cup powdered sugar, sifted
- 2 tbsp unsweetened cocoa powder
- 1 tbsp milk, plus more if needed
- 1/2 tsp vanilla extract
For The Coating
- 2 cups semi-sweet chocolate or candy melts
- 2 tbsp vegetable shortening or coconut oil (for a smoother finish)
- Lollipop sticks
Optional Toppings
- Colorful sprinkles
- Crushed nuts
- Shaved chocolate
- Drizzle of white chocolate
The right combination of these simple ingredients will result in delightful, homemade cake pops that rival Starbucks! Be sure to choose high-quality cocoa and chocolate for the best flavor.
Tools And Equipment
To perfectly recreate Starbucks-inspired chocolate cake pops at home, having the right tools and equipment is just as important as using quality ingredients. Here’s a list of items we’ll need to ensure a smooth and enjoyable cooking process:
Essential Tools
- Mixing bowls: At least two; one large for mixing the cake batter and a smaller one for frosting preparation.
- Hand mixer or stand mixer: For smooth and evenly mixed batter and frosting. A hand whisk could work, but we recommend a mixer for better results.
- Baking pan: An 8-inch round or square pan works well for baking the chocolate cake base.
- Cooling rack: Ensures proper airflow to cool the cake evenly before crumbling it.
- Food processor (optional): Helps achieve a fine crumb if hand-crumbling is cumbersome.
- Measuring cups and spoons: For precise measurements of dry and liquid ingredients.
- Silicone spatula: Great for scraping the sides of bowls and spreading frosting evenly.
Shaping and Decorating Tools
- Cookie scoop (1 tablespoon size): Helps portion out uniformly sized cake balls for consistent pops.
- Lollipop sticks: Essential for creating the signature cake pop look and making them easier to enjoy.
- Parchment paper: Prevents the cake balls from sticking while chilling or coating them.
- Microwave-safe bowls: For melting chocolate and candy melts without burning.
- Dipping tools: Forks or cake pop dipping tools make it easy to coat each cake pop in chocolate evenly.
- Styrofoam block or cake pop stand: Holds the pops upright as the chocolate coating sets.
Cleaning and Storage Tools
- Kitchen towels or wipes: For keeping the workspace clean during decorating.
- Airtight containers: For storing finished cake pops, ensuring freshness and flavor retention.
Quick Reference Table: Tools Checklist
| Tool/Equipment | Purpose |
|---|---|
| Mixing bowls | For batter and frosting preparation |
| Hand/stand mixer | To mix ingredients evenly |
| Baking pan | For baking the chocolate cake |
| Cooling rack | Ensures even cooling of the cake |
| Cookie scoop | Forms consistent cake ball sizes |
| Lollipop sticks | To assemble and hold the cake pops |
| Styrofoam block | To set cake pops upright while coating hardens |
| Microwave-safe bowls | For melting chocolate and candy melts |
| Parchment paper | Prevents sticking during chilling and coating processes |
| Airtight containers | For fresh storage of finished chocolate cake pops |
Directions
Let’s dive into the step-by-step process of recreating the famous Starbucks Chocolate Cake Pops at home. Follow along carefully to craft these delightful treats with ease.
Prep
- Gather all ingredients and pre-measure them for a hassle-free baking experience.
- Set the oven to 350°F (175°C) for preheating.
- Grease and line a 9×13-inch baking pan with parchment paper to ensure the cake releases smoothly.
- Prepare your necessary tools, including mixing bowls, hand mixers, lollipop sticks, and a stand to hold the pops while drying.
Bake The Cake
- In a large mixing bowl, combine the dry ingredients: 1 cup of all-purpose flour, 1/2 cup of unsweetened cocoa powder, 1 teaspoon of baking powder, and 1/4 teaspoon of salt. Whisk well.
- In another bowl, cream together 1/2 cup unsalted butter (softened) and 1 cup of granulated sugar until light and fluffy.
- Add 2 large eggs and 1 teaspoon of vanilla extract to the creamed mixture. Mix well.
- Gradually incorporate the dry ingredients into the wet mixture, alternating with 1/2 cup of milk, until just combined. Do not overmix.
- Pour the batter into the prepared pan and bake for 25-30 minutes. Use a toothpick to check; it should come out clean when inserted into the center.
- Cool the cake completely on a wire rack.
Make The Frosting
- In a mixing bowl, beat 1/2 cup unsalted butter (softened) until creamy.
- Slowly add 1 1/2 cups powdered sugar, mixing well to avoid lumps.
- Add 2 tablespoons cocoa powder for a rich chocolate flavor and 1-2 tablespoons of milk to reach the desired consistency. Beat until smooth.
- Taste and adjust sweetness or texture if needed.
Combine And Roll The Cake Pops
- Crumble the cooled cake into fine crumbs using your hands or a fork.
- Mix the cake crumbs with 3/4 of the frosting (reserve some for adjustments). Blend until the mixture is moist and sticks together like dough.
- Using a tablespoon or small cookie scoop, shape the mixture into 1-inch balls. Place them on a parchment-lined baking tray.
- Refrigerate the cake balls for 1-2 hours or freeze them for 15-20 minutes until firm.
Coat The Cake Pops
- Melt 2 cups of high-quality chocolate or candy melts in a microwave-safe bowl. Use 15-second intervals, stirring in between to prevent overheating.
- Dip the tips of the lollipop sticks into the melted chocolate and insert them halfway into each cake ball. This helps secure the stick.
- Fully submerge each cake ball into the melted chocolate, ensuring an even coating. Tap gently on the side of the bowl to remove excess chocolate.
Add Optional Toppings
- Decorate the pops immediately after coating while the chocolate is still wet. Sprinkles, crushed nuts, or shredded coconut are excellent choices.
- Place the coated pops upright in a cake pop stand or a foam block to set. Allow the chocolate to harden completely, approximately 30 minutes.
Make-Ahead Instructions
When it comes to chocolate cake pops inspired by Starbucks, making them ahead can save time and ensure perfect results for any occasion. Here’s how we can prepare these delicious treats in advance for stress-free enjoyment.
1. Preparing the Cake and Frosting in Advance
- Bake the cake: Follow the recipe steps to bake the chocolate cake, allow it to cool completely, and then wrap it tightly in plastic wrap. Store it in the refrigerator for up to 3 days or in the freezer for up to 1 month.
- Make the frosting: Prepare the frosting as instructed and store it in an airtight container in the refrigerator for up to 5 days. When ready to use, let it sit at room temperature for 15-20 minutes and re-whip if necessary.
2. Shaping and Storing Cake Balls
- After combining the crumbled cake with frosting and forming the cake balls:
- Place the uncoated cake balls on a parchment-lined baking sheet.
- Chill them in the refrigerator for 2 hours or freeze for up to 2 weeks.
- Store them in a freezer-safe, airtight container. For ease of use, layer the cake balls with parchment paper to prevent sticking.
3. Coating and Decorating Ahead
If you plan to coat and decorate the cake pops ahead of time:
- Dip and decorate the cake pops as instructed.
- Let the chocolate coating fully harden, then store the finished cake pops in an airtight container at room temperature for up to 2 days, or refrigerate for up to 1 week.
4. Freezing Fully Decorated Cake Pops
If freezing decorated cake pops:
- Place them in a single layer on a parchment-lined baking sheet for 1-2 hours to “flash-freeze” them and prevent smudging.
- Once frozen, transfer them to a freezer-safe container, layering parchment paper between them. Stored this way, they can last for up to 1 month.
- To serve, thaw them in the refrigerator overnight or at room temperature for 1-2 hours.
Storage and Shelf-Life Overview
| Component | Refrigeration Timeframe | Freezer Timeframe |
|---|---|---|
| Baked Chocolate Cake | Up to 3 days | Up to 1 month |
| Prepared Frosting | Up to 5 days | Not recommended |
| Shaped Cake Balls (Uncoated) | Up to 2 days | Up to 2 weeks |
| Fully Decorated Cake Pops | Up to 1 week | Up to 1 month |
Tips For Success
Creating homemade chocolate cake pops may seem straightforward, but following a few key tips will elevate the quality and ensure the process goes smoothly. Here’s how to master the Starbucks-inspired chocolate cake pops:
1. Use Room Temperature Ingredients
For flawless mixing and smooth results, ensure all your ingredients—especially the eggs, butter, and milk—are at room temperature. This prevents curdling and creates a consistent batter.
2. Crumble the Cake Evenly
After baking and cooling the cake, crumble it into fine, even crumbs. Larger chunks can lead to a lumpy texture in the cake pops, which makes shaping them difficult.
3. Add Frosting Gradually
When mixing the cake crumbs with frosting, add the frosting one spoonful at a time. This helps us avoid excess moisture, which can make the mixture too sticky and soft. Aim for a dough-like consistency where the mixture holds its shape when pressed.
4. Chill the Cake Balls Completely
Before inserting the sticks or coating the cake pops in chocolate, let the shaped cake balls chill in the refrigerator or freezer. Chilling them for at least 30 minutes ensures they stay firm and don’t fall apart while dipping.
5. Use High-Quality Chocolate
The coating is the highlight of these chocolate cake pops—opt for high-quality melting chocolate or couverture chocolate. Avoid using regular chocolate bars, as they may not melt or coat properly.
6. Thin the Chocolate for Dipping
To achieve that Starbucks-style glossy finish, we recommend thinning the melted chocolate with coconut oil or vegetable shortening. The chocolate should be smooth and fluid enough to coat the cake pops evenly.
| Thinner | Recommended Amount per Cup of Chocolate |
|---|---|
| Coconut oil | 1-2 teaspoons |
| Vegetable shortening | 1-2 teaspoons |
7. Insert Sticks Securely
Dip the lollipop stick into the melted chocolate before inserting it halfway into the cake ball. The chocolate acts as glue, firmly attaching the stick to the cake pop.
8. Upright Drying
Place the coated cake pops upright to dry. Use a styrofoam block, cake pop stand, or even an empty egg carton for this purpose. This prevents the coating from smudging or becoming uneven.
9. Temperature Control for the Coating
Avoid extreme temperature changes when dipping the cake pops. If the cake balls are too cold and the chocolate is too hot, the coating may crack.
10. Decorate Quickly
If adding sprinkles, crushed nuts, or other garnishes, sprinkle them on right after dipping the cake pops in chocolate. The coating hardens fairly quickly, so act fast for perfect adhesion.
11. Practice Patience
Rushing through the process can lead to mistakes. Give the cake pops adequate time to chill, coat, and set for the best results.
By keeping these essential tips in mind, we can recreate café-style chocolate cake pops that look and taste like they came straight from Starbucks! Adjust each step as needed to fit the flow of your kitchen for a smooth, enjoyable dessert-making experience.
Conclusion
Recreating Starbucks’ chocolate cake pops at home is not only fun but also incredibly rewarding. With the right ingredients, tools, and a little patience, we can craft delicious, café-style treats that are perfect for any occasion.
By following the steps and tips outlined, we’ll achieve a flawless finish that’s just as delightful to look at as it is to eat. Whether we’re making them for a party, as a gift, or simply to satisfy our sweet tooth, these homemade cake pops are sure to impress. Let’s get creative and enjoy the process!
Frequently Asked Questions
What is a Starbucks chocolate cake pop?
Starbucks chocolate cake pops are bite-sized, round treats made of crumbled cake mixed with frosting, coated in chocolate, and served on a stick. They are popular for their rich flavor, adorable appearance, and convenient size, making them an ideal dessert or snack.
Can I make Starbucks chocolate cake pops at home?
Yes, you can easily recreate Starbucks-style chocolate cake pops at home. With simple ingredients like cake, frosting, chocolate coating, and lollipop sticks, you can follow a step-by-step recipe to make these delicious treats.
What ingredients do I need to make chocolate cake pops?
To make chocolate cake pops, you’ll need basic ingredients like flour, sugar, cocoa powder, eggs, butter, milk (for the cake), butter or cream cheese (for frosting), and chocolate for coating. Optional toppings like sprinkles can be added for decoration.
What tools are essential for making cake pops?
Must-have tools include mixing bowls, a hand mixer or whisk, a baking pan, a cake pop stand or styrofoam block, and lollipop sticks. These make it easier to bake, assemble, and store the cake pops.
How do I keep my cake pops from falling off the stick?
Ensure the cake balls are chilled before inserting sticks and dipping in chocolate. Dip the stick into melted chocolate before inserting it into the cake ball; this acts as a “glue” that holds it in place securely.
Can I make cake pops in advance?
Yes, cake pops can be made ahead of time. Bake and crumble the cake, make the frosting, or even shape the cake balls a day or two in advance. Fully decorated cake pops can also be stored in the refrigerator or freezer for longer periods.
How long do homemade cake pops last?
In the refrigerator, cake pops last up to 5-7 days when stored in an airtight container. If frozen, they can last for 1-2 months. Allow frozen cake pops to thaw in the fridge before serving.
What chocolate should I use for coating cake pops?
High-quality melting chocolate or candy melts are ideal for coating cake pops. They melt smoothly and harden quickly, giving your cake pops a professional-looking finish.
Can I customize cake pops for special occasions?
Absolutely! You can use colored candy melts, sprinkles, edible glitter, or themed decorations to suit any occasion, whether it’s a birthday, wedding, or holiday event.
What’s the best tip for making perfect cake pops?
For successful cake pops, ensure the cake crumbs are even, use room-temperature ingredients for smooth mixing, and chill the cake balls before dipping them in chocolate. Secure the sticks properly and decorate quickly for a café-style finish!