
Caramel bits are a game-changer when it comes to making homemade candy. These little morsels melt smoothly and add a rich buttery sweetness that takes your treats to the next level. Whether we’re whipping up fudge, drizzling over popcorn, or mixing into cookies, caramel bits bring that perfect gooey texture and deep caramel flavor without the hassle of melting whole caramel bars.
Ingredients for Candy Recipes Using Caramel Bits
To create delicious candies packed with buttery richness, we rely on a simple yet versatile list of ingredients. Below are the essential components and optional enhancements to complement the smooth melt and sweet flavor of caramel bits.
Basic Ingredients
The foundation of any great candy featuring caramel bits includes a few staple items that guarantee perfect texture and taste every time.
- Caramel bits – 1 to 2 cups, depending on recipe size
- Sweetened condensed milk – 1 cup for creaminess and binding
- Butter – 2 tablespoons, adds smoothness and richness
- Semi-sweet chocolate chips – 1 cup, pairs beautifully with caramel
- Vanilla extract – 1 teaspoon, enhances flavor depth
- Nuts (e.g., pecans, walnuts) – ½ cup chopped (optional but commonly used)
- Salt – a pinch to balance sweetness and boost caramel flavor
Optional Mix-Ins and Toppings
Adding mix-ins and toppings opens up endless candy possibilities, letting us tailor each batch to our preferred flavor profiles and textures.
| Mix-Ins | Toppings | Suggested Quantity |
|---|---|---|
| Sea salt flakes | Drizzled melted chocolate | 1-2 teaspoons or to taste |
| Crushed pretzels | Chopped nuts (pecans/walnuts) | ¼ to ½ cup |
| Mini marshmallows | Sprinkles or colored sugar | ¼ cup |
| Dried cranberries or cherries | Shredded coconut (toasted) | 2 tablespoons |
| Espresso powder (for richness) | Crushed toffee bits | 1 teaspoon or 2 tablespoons |
By combining these ingredients with caramel bits, we elevate simple recipes into irresistible treats rich with texture and deep buttery sweetness.
Equipment Needed
To craft delicious candy recipes using caramel bits, having the right equipment ensures smooth preparation and exceptional results. Below we outline the essential and optional tools that make candy-making both efficient and enjoyable.
Essential Tools
Using the correct Essential Tools guarantees we achieve the ideal texture and flavor when working with caramel bits. Here’s what we recommend:
- Double Boiler or Heatproof Bowl and Saucepan
For melting caramel bits gently and evenly, avoiding burning.
- Silicone Spatula
Perfect for stirring melted caramel and scraping the bowl clean.
- Measuring Cups and Spoons
Accurate measurement of ingredients is crucial for consistency.
- Candy Thermometer
Helps us monitor the temperature, especially when combining caramel bits with other ingredients like chocolate or sugar syrups.
- Mixing Bowls
Various sizes for combining ingredients smoothly.
- 9×9 or 8×8 Inch Baking Pan
Ideal for setting fudge or other caramel-based candies.
- Parchment Paper or Silicone Baking Mat
Prevents sticking and makes cleanup easier.
- Whisk
For blending ingredients evenly and adding air if needed.
Optional Tools for Decoration
To elevate the presentation and texture of our caramel bit candies, these optional tools come in handy:
- Piping Bag with Small Round Tip
For precise drizzle of melted chocolate or caramel for decoration.
- Offset Spatula
To evenly spread mixtures or toppings on candy surfaces.
- Candy Molds
For shaping caramel bits into fun or elegant forms.
- Small Sieve or Fine Mesh Strainer
Useful for dusting powdered sugar or cocoa for a finishing touch.
- Kitchen Tweezers
To delicately place decorative toppings like sea salt flakes or crushed pretzels.
- Cooling Rack
Allows candies to cool evenly while preventing sogginess.
| Tool Category | Purpose | Impact on Candy Making |
|---|---|---|
| Double Boiler | Gentle melting of caramel bits | Prevents burning & ensures smooth texture |
| Silicone Spatula | Stirring and scraping | Efficient mixing and minimal waste |
| Measuring Tools | Ingredient precision | Consistent taste and texture |
| Candy Thermometer | Temperature control | Perfect candy consistency |
| Baking Pan & Parchment | Setting candy to cool | Easy removal and clean edges |
| Piping Bag (Optional) | Decorative drizzle | Professional finishing touch |
Using these tools, we maximize the quality and appearance of our candy recipes using caramel bits, making the candy-making process seamless and fun.
Preparation Steps
To create delicious candies using caramel bits, precise preparation ensures perfect texture and flavor. Follow these steps carefully to melt the caramel and prepare the candy base efficiently.
Melting Caramel Bits
- Place caramel bits in a heatproof bowl or the top of a double boiler.
- Set the bowl over simmering water, ensuring the bottom does not touch the water.
- Stir the caramel bits gently and continuously with a silicone spatula.
- Heat for about 5 to 7 minutes until the bits are completely melted and smooth.
- Avoid overheating to prevent burning or crystallization.
- Remove from heat immediately once melted for a glossy and creamy caramel base.
Preparing Candy Base
- In a separate mixing bowl, combine 1 cup sweetened condensed milk and 2 tablespoons unsalted butter.
- Warm the mixture slightly in the microwave or over low heat until the butter melts.
- Add the melted caramel bits to this mixture.
- Stir in 1 teaspoon vanilla extract for added depth.
- Gradually fold in 1 cup semi-sweet chocolate chips if making chocolate caramel candy.
- Mix thoroughly until smooth and evenly combined.
| Ingredient | Quantity | Preparation Details |
|---|---|---|
| Caramel Bits | 1 ½ cups | Melted over double boiler |
| Sweetened Condensed Milk | 1 cup | Room temperature |
| Unsalted Butter | 2 tablespoons | Melted |
| Vanilla Extract | 1 teaspoon | Added after caramel melts |
| Semi-Sweet Chocolate Chips | 1 cup (optional) | Folded in after caramel mix |
By following these meticulous Preparation Steps, we build a rich, creamy base to craft our exquisite candy recipes featuring caramel bits.
Instructions for Candy Recipes Using Caramel Bits
Mastering candy recipes with caramel bits becomes easy and rewarding when we follow precise, step-by-step instructions. Below, we guide you through four delicious treats showcasing the rich, buttery sweetness of caramel bits.
Caramel Bit Chocolate Clusters
- Prepare melting setup: Place a heatproof bowl over simmering water to create a double boiler.
- Melt caramel bits: Add 1 cup of caramel bits and stir continuously until smooth and glossy.
- Add chocolate: Remove from heat. Immediately fold in 1 1/2 cups semi-sweet chocolate chips until fully combined.
- Spoon clusters: Using a tablespoon, drop dollops of the mixture onto parchment-lined baking sheets.
- Chill: Refrigerate for at least 30 minutes or until clusters set firmly.
- Serve or store: Enjoy immediately or store in an airtight container.
Caramel Bit Peanut Butter Cups
- Prepare candy molds: Lightly grease or line silicone molds for easiest removal.
- Melt caramel bits: In the double boiler, gently melt 3/4 cup caramel bits until smooth.
- Mix with peanut butter: Stir in 1/2 cup creamy peanut butter until fully blended.
- Add base layer: Spoon 1/4 cup melted semi-sweet chocolate into molds, tilting to coat bottoms.
- Layer caramel mixture: Add caramel-peanut butter mixture on top of chocolate layer.
- Top with chocolate: Cover with remaining melted chocolate to seal the cups.
- Chill thoroughly: Place molds in refrigerator for 1 hour or until firm.
- Unmold and enjoy: Carefully pop peanut butter cups out and serve.
Caramel Bit Pretzel Bites
- Heat caramel bits: Melt 1 cup caramel bits in a heatproof bowl over simmering water.
- Prepare pretzels: Arrange 20 mini pretzels on parchment paper.
- Combine with mix-ins: Stir in 1/2 cup crushed pretzels and 1/4 teaspoon sea salt flakes into melted caramel.
- Form bites: Using a spoon, drop spoonfuls of caramel mixture onto mini pretzels.
- Top with chocolate chips: Garnish each bite with 1 semi-sweet chocolate chip pressing gently.
- Refrigerate: Chill bites for at least 45 minutes until set.
- Serve: Delight in the rich salty-sweet flavors.
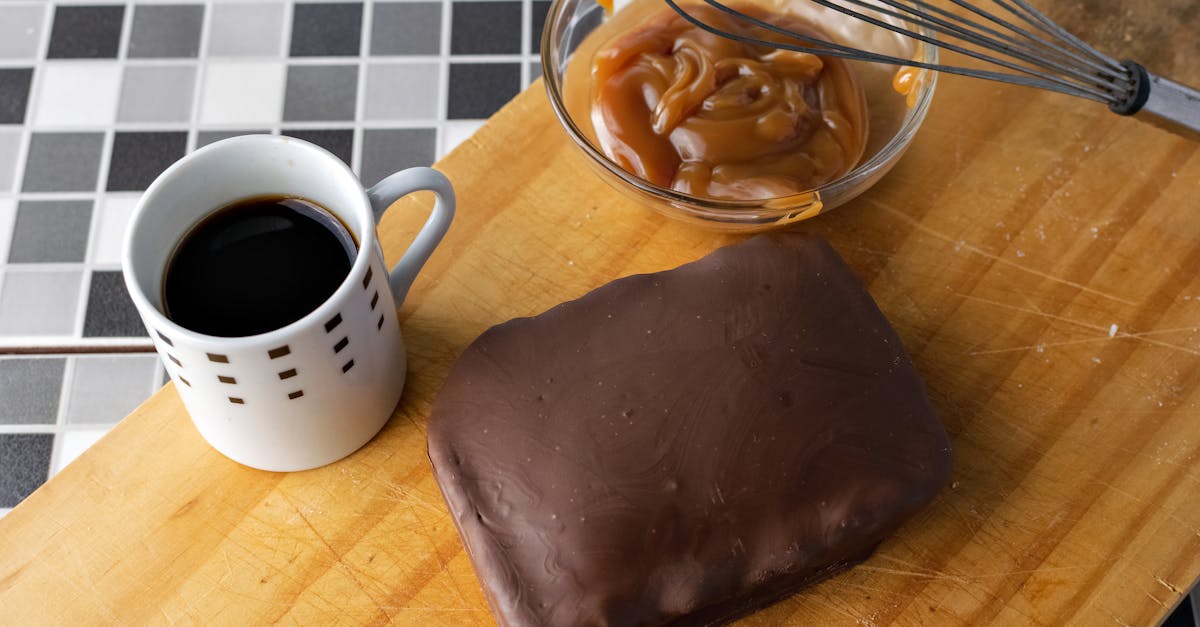
Caramel Bit Fudge
- Prepare pan: Line an 8-inch square baking pan with parchment paper.
- Combine base ingredients: In a saucepan over low heat, melt 1 cup caramel bits with 1 (14 oz) can sweetened condensed milk and 2 tablespoons butter.
- Stir constantly: Heat until smooth and creamy, approximately 5 minutes.
- Add flavor: Remove from heat and mix in 1 teaspoon vanilla extract.
- Optional chocolate swirl: Fold in 1/2 cup semi-sweet chocolate chips for marbled effect.
- Pour and smooth: Transfer mixture into the prepared pan, smoothing the top.
- Chill: Refrigerate fudge for 2–3 hours until firm.
- Cut and serve: Slice into squares and enjoy the luscious texture and buttery caramel flavor.
Ingredient Measurement Summary for Candy Recipes Using Caramel Bits
| Recipe | Caramel Bits | Semi-Sweet Chocolate Chips | Other Key Ingredients |
|---|---|---|---|
| Chocolate Clusters | 1 cup | 1 1/2 cups | None |
| Peanut Butter Cups | 3/4 cup | 1/4 cup | 1/2 cup creamy peanut butter |
| Pretzel Bites | 1 cup | 20 chips (one per bite) | 20 mini pretzels, 1/2 cup crushed pretzels, 1/4 tsp sea salt flakes |
| Fudge | 1 cup | 1/2 cup | 1 can (14 oz) sweetened condensed milk, 2 tbsp butter, 1 tsp vanilla extract |
Directions for Serving and Storing
Proper serving and storing are essential to maintaining the rich flavor and perfect texture of our candy recipes using caramel bits. Follow these guidelines to enjoy your treats at their best.
Cooling and Setting Candy
To ensure the ideal texture for our caramel bit candies, we need to cool and set them carefully:
- Pour the hot candy mixture into the prepared pan lined with parchment paper immediately after cooking.
- Spread evenly using an offset spatula to achieve uniform thickness.
- Allow the candy to cool at room temperature for 2 to 3 hours without disturbance. This lets the caramel bits solidify perfectly.
- For faster setting, place the pan in the refrigerator for about 30 to 45 minutes but avoid freezing as it can alter texture.
- Before cutting, let the candy rest at room temperature for about 10 minutes to prevent cracking.
“Cooling thoroughly guarantees the rich buttery flavor of the caramel bits shines through with every bite.”
Storage Tips to Maintain Freshness
To keep our caramel bit candies fresh and appetizing, proper storage is key:
| Storage Method | Duration | Conditions | Tips |
|---|---|---|---|
| Room Temperature | Up to 1 week | Airtight container, cool dry spot | Separate layers with wax paper to avoid sticking |
| Refrigerator | Up to 3 weeks | Airtight container | Bring to room temperature before serving |
| Freezer | Up to 3 months | Airtight and freezer-safe wraps | Thaw overnight in refrigerator before use |
- Always store candies in an airtight container to prevent moisture absorption and loss of texture.
- Use parchment or wax paper between layers if stacking to prevent sticking.
- Avoid storing candies in direct sunlight or warm areas as heat can cause caramel bits to soften and lose shape.
- When serving chilled candies, allow them to sit at room temperature for about 15 minutes for optimum mouthfeel.
By following these cooling and storage techniques, we preserve the luscious, buttery sweetness of caramel bits and extend the shelf life of our homemade candies beautifully.
Make-Ahead Tips for Candy Recipes Using Caramel Bits
To ensure the best results with our candy recipes using caramel bits, planning ahead is key. Here are essential make-ahead strategies to guarantee smooth preparation, maximum flavor, and perfect texture every time.
1. Prepare Ingredients in Advance
Measure out all ingredients precisely before starting the candy-making process. Pre-measured caramel bits, sweetened condensed milk, butter, vanilla extract, and any optional add-ins like semi-sweet chocolate chips or crushed pretzels streamline the workflow. Store these ingredients in airtight containers to maintain freshness.
2. Melt Caramel Bits Ahead of Time
We recommend melting the caramel bits in a heatproof bowl over simmering water at least one hour before assembly. Stir continuously until smooth. Pour the melted caramel into a sealed container and refrigerate.
When ready to use, gently rewarm the caramel bits over low heat or in short bursts in the microwave, stirring between intervals to restore its silky texture without scorching.
3. Assemble and Refrigerate
For recipes like Caramel Bit Fudge or Peanut Butter Cups, assemble the layers, then cover the pan tightly with plastic wrap or a lid. Refrigerate for up to 24 hours to allow the candy to fully set. This resting phase intensifies the buttery richness and improves sliceability or chunk separation.
4. Storage Durations for Prepared Candy
| Storage Method | Temperature Range | Maximum Duration | Notes |
|---|---|---|---|
| Room Temperature | 68–75°F (20–24°C) | 2–3 days | Keep candies in airtight container |
| Refrigerator | 35–40°F (2–4°C) | 1–2 weeks | Prevent moisture exposure |
| Freezer | 0°F (-18°C) | Up to 3 months | Wrap in foil then place in container |
Tip: When freezing candies with caramel bits, separate layers with parchment paper to avoid sticking.
5. Reheat and Serve
Before serving, bring refrigerated or frozen candies back to room temperature for 30 minutes. This step unlocks the full buttery flavor and ensures an enjoyable, tender bite.
6. Use Airtight Containers for Make-Ahead Storage
Choose containers that seal tightly to protect candies from air and humidity. For optimum freshness and texture retention, glass or BPA-free plastic containers are preferred.
By following these make-ahead tips for candy recipes using caramel bits, we control the sweetness and texture while giving ourselves convenient windows to prepare treats in advance for gatherings or gifting.
Conclusion
Caramel bits open up a world of easy and delicious candy-making possibilities. Their smooth melt and rich flavor let us create a variety of treats without the hassle of melting whole caramel bars. With the right ingredients, tools, and techniques, we can customize each recipe to suit our taste and occasion.
By planning ahead and using make-ahead tips, we ensure every batch turns out perfectly textured and full of buttery goodness. Whether for sharing or gifting, candies made with caramel bits are sure to impress and satisfy every sweet tooth.
Frequently Asked Questions
What are the benefits of using caramel bits in homemade candy making?
Caramel bits melt easily and add a rich, buttery sweetness, enhancing flavor and texture without the hassle of melting whole caramel bars.
What essential ingredients are needed for candy recipes with caramel bits?
Key ingredients include caramel bits, sweetened condensed milk, butter, semi-sweet chocolate chips, and vanilla extract for perfect taste and texture.
Can I customize my caramel bit candies with additional mix-ins?
Yes, optional mix-ins like sea salt flakes, crushed pretzels, and mini marshmallows add unique flavors and textures to your candies.
What equipment is necessary for making caramel bit candies?
Essential tools include a double boiler or heatproof bowl, silicone spatula, measuring cups, candy thermometer, mixing bowls, baking pans, and parchment paper.
How do I melt caramel bits properly for candy recipes?
Melt caramel bits in a heatproof bowl over simmering water, stirring continuously until smooth and fully melted.
Are there specific recipes suggested for caramel bit candies?
Yes, recipes include Caramel Bit Chocolate Clusters, Peanut Butter Cups, Pretzel Bites, and Fudge, each with detailed instructions and ingredient lists.
How should I cool and set my caramel bit candies?
Pour the mixture into a prepared pan, then cool at room temperature for 2-3 hours or refrigerate for 30-45 minutes until set.
What is the best way to store homemade caramel bit candies?
Store in airtight containers at room temperature (up to 1 week), refrigerated (up to 3 weeks), or frozen (up to 3 months) for freshness.
Can I prepare caramel bit candies ahead of time?
Yes, you can prepare ingredients and melt caramel bits in advance. Assembly ahead of time in the refrigerator enhances flavor and texture.
Should refrigerated or frozen caramel candies be served cold?
It’s best to bring refrigerated or frozen candies to room temperature before serving to fully unlock their rich, buttery flavor.