
There’s something truly special about homemade jam, especially when it combines the sweet tartness of cherries with the warm, comforting aroma of vanilla. Our Cherry Vanilla Jam recipe captures this perfect balance, making it a delightful addition to your breakfast table or a tasty gift for friends and family.
We love how simple ingredients transform into a luscious spread that bursts with fresh fruit flavor and a hint of vanilla warmth. Whether you’re new to canning or a seasoned jam maker, this recipe is straightforward and rewarding. Let’s dive into creating a jar of cherry vanilla goodness that’ll brighten your mornings and inspire your culinary creativity.
Ingredients
To create our delicious Cherry Vanilla Jam, we use a handful of simple yet flavorful ingredients. Each component plays a vital role in balancing sweetness, tang, and aroma to bring out the best in this classic preserve.
Fresh Cherries
- 4 cups of fresh, pitted sweet cherries (preferably Bing or Rainier)
- Wash cherries thoroughly and remove stems and pits for a smooth jam texture
Vanilla Extract
- 2 teaspoons of pure vanilla extract
- Adds warm, fragrant notes that complement the natural cherry sweetness perfectly
Sugar
- 3 cups of granulated sugar
- Essential for preserving and sweetening our jam while enhancing the cherry flavor
Lemon Juice
- 2 tablespoons of fresh lemon juice
- Provides natural acidity which balances sweetness and helps the jam set properly
Pectin (Optional)
- 1 packet (1.75 oz) of powdered fruit pectin, optional depending on desired thickness
- Using pectin ensures a firmer set, especially if cherries are less ripe or you prefer a spreadable consistency
| Ingredient | Quantity | Purpose |
|---|---|---|
| Fresh Cherries | 4 cups | Base fruit for flavor and texture |
| Vanilla Extract | 2 teaspoons | Adds rich vanilla aroma |
| Sugar | 3 cups | Sweetens and preserves |
| Lemon Juice | 2 tablespoons | Balances acidity and aids gel formation |
| Pectin (Optional) | 1 packet (1.75 oz) | Helps jam set firmer if desired |
Each ingredient’s quality directly impacts the final taste and texture of our cherry vanilla jam, making this recipe both simple and special.
Equipment Needed
To create our delicious Cherry Vanilla Jam, having the right equipment is essential for a smooth cooking and canning process. Below are the tools we rely on to achieve perfect texture and flavor every time.
Saucepan
We use a large, heavy-bottomed saucepan to cook the cherries and sugar evenly without scorching. A heavy base distributes heat steadily, helping our jam reach the ideal consistency while preserving the vibrant color of the cherries.
Canning Jars
Proper Canning Jars are crucial for safely storing our jam. We prefer sterilized glass jars with new, tight-fitting lids to ensure freshness and prevent contamination. The jars must be heat-resistant and sized appropriately for our recipe yield.
| Jar Type | Capacity | Use |
|---|---|---|
| Wide-mouth jar | 8 oz (240 ml) | Fits ladle easily, good for jams |
| Standard-mouth jar | 8-16 oz (240-480 ml) | Perfect for longer storage |
Ladle
A large, heat-resistant ladle allows us to transfer hot jam cleanly into the jars without spills. The ladle’s capacity helps portion the jam efficiently, reducing cooling time and mess.
Wooden Spoon
We stir our jam with a Wooden Spoon to scrape the pan’s bottom and prevent sticking or burning. Wooden spoons hold up well under heat and help us maintain control over the jam’s texture as it thickens.
Candy Thermometer (Optional)
While not mandatory, a candy thermometer is a great tool for precisely measuring the jam’s temperature. Cherry Vanilla Jam sets best at around 220°F (104°C), and monitoring this helps us avoid undercooking or overcooking.
Preparation
To craft the perfect Cherry Vanilla Jam, careful preparation is essential. We begin by prepping the fresh cherries and then ensure our jars are impeccably sterilized for safe storage.
Preparing the Cherries
First, wash 4 cups of fresh sweet cherries thoroughly under cold running water to remove any dirt or impurities. Next:
- Pit the cherries using a cherry pitter or a small paring knife. Removing pits is crucial for smooth texture and easy spreading.
- Chop the pitted cherries roughly to release more juice and aid even cooking.
- Place the chopped cherries into a large mixing bowl.
This step enables the cherries to soften uniformly during cooking, allowing the natural sweetness and vivid color to infuse perfectly with the vanilla.
Pro tip: Use ripe, firm cherries to maximize flavor and jam consistency.
Sterilizing the Jars
Proper sterilization of jars prevents contamination and spoilage, preserving the jam’s freshness.
- Place clean glass canning jars and lids into a large pot.
- Cover completely with water and bring to a boil.
- Boil for 10 minutes to sterilize.
- Use tongs to carefully remove the jars and lids from hot water.
- Set jars on a clean drying rack or towel, keeping them warm until filling.
| Sterilization Steps | Time | Temperature |
|---|---|---|
| Boiling jars and lids | 10 minutes | 212°F (100°C) |
Remember: Always handle hot jars with care to avoid burns and maintain sterilization. Filling warm jars helps prevent breakage when adding hot jam.
By meticulously preparing the cherries and sterilizing our jars, we set the foundation for a safe and delicious Cherry Vanilla Jam that captures the essence of fresh summer fruit with a warm vanilla touch.
Cooking Instructions
Follow these clear steps to transform fresh cherries into a luscious Cherry Vanilla Jam that bursts with flavor and has the perfect spreadable texture.
Making the Jam Mixture
- In our large, heavy-bottomed saucepan, combine the 4 cups of fresh, pitted sweet cherries and 3 cups of granulated sugar.
- Stir gently to coat the cherries evenly with sugar. This helps to draw out natural juices for better consistency.
- Add 2 tablespoons of fresh lemon juice to balance sweetness and assist the jam in setting properly.
- If using, sprinkle in 1 packet of powdered fruit pectin and stir until fully dissolved, ensuring a thicker texture.
- Let the mixture sit at room temperature for 20-30 minutes. This maceration step allows the fruit to release maximum juice and dissolve sugar evenly.
Cooking the Jam
- Place the saucepan over medium-high heat and bring the cherry mixture to a full rolling boil that cannot be stirred down.
- Reduce heat slightly and continue boiling while stirring frequently with a wooden spoon to prevent sticking or burning.
- Use a candy thermometer to monitor the temperature. Target is 220°F (104°C), the ideal point for jam setting.
- Boil the mixture for 10-15 minutes past the boiling point or until the jam reaches the desired thickness. Test the consistency by dropping a small spoonful on a chilled plate; if it wrinkles when pushed, it’s ready.
- Remove from heat and allow the jam to settle for 5 minutes before adding vanilla.
Adding Vanilla Flavor
- Stir in 2 teaspoons of pure vanilla extract gently but thoroughly to distribute the rich vanilla aroma evenly throughout the jam.
- The vanilla enhances the natural sweetness of cherries, adding depth and warmth that makes our jam unique.
- Immediately ladle the hot jam into the sterilized glass canning jars, leaving 1/4 inch of headspace.
- Wipe jar rims clean, seal with lids, and process in a boiling water bath for 10 minutes to preserve freshness.
- Allow jars to cool completely before storing in a cool, dark place to enjoy the full harmony of cherry and vanilla.
| Step | Ingredient/Action | Key Detail |
|---|---|---|
| Macerate | Cherries, sugar, lemon juice | 20–30 minutes at room temperature |
| Boil | Jam mixture | Full rolling boil, stir frequently |
| Temperature Monitoring | Candy thermometer | Aim for 220°F (104°C) |
| Flavor Enhancement | Vanilla extract | Add after cooking to preserve aroma |
| Jar Filling | Sterilized jars | Leave 1/4 inch headspace |
Canning and Storing
Proper canning and storing techniques ensure our Cherry Vanilla Jam stays fresh, flavorful, and safe for months. Let’s walk through the essential steps to preserve our homemade jam perfectly.
Filling the Jars
We begin by carefully filling our sterilized glass canning jars with the hot Cherry Vanilla Jam. Use a large ladle to transfer the jam into each jar, leaving about 1/4 inch of headspace at the top. This gap is crucial to allow for expansion during processing and to create a proper vacuum seal. Avoid overfilling to prevent jam from leaking during sealing.
Next, clean any jam residue from the jar rims with a damp, clean cloth. This step guarantees the jar lids adhere securely, preventing contamination.
Sealing and Processing
Once the jars are filled and the rims wiped clean, place sterilized lids and screw on the metal bands just until they are fingertip tight. Over-tightening can interfere with air escape during processing.
We process the jars in a boiling water bath for 10 minutes to kill any remaining bacteria and ensure airtight preservation. Make sure the jars are covered by at least 1 inch of water during boiling.
| Step | Details |
|---|---|
| Headspace | 1/4 inch |
| Lid Tightness | Finger-tight |
| Boiling Time | 10 minutes |
| Water Depth | 1 inch above jars |
After the water bath, carefully remove jars using a jar lifter and place them upright on a towel. Let them cool undisturbed for 12 to 24 hours. You should hear satisfying “pop” seals, indicating a vacuum has formed.
Storage Tips
Once sealed and cooled, label each jar with the date and store them in a cool, dark, and dry place such as a pantry or cupboard. Avoid direct sunlight or heat sources, which degrade flavor and color. Properly sealed jars last for up to one year.
After opening, refrigerate the jam and consume it within 3 weeks for optimal taste and safety.
By following these canning and storing steps carefully, we preserve the rich essence of our Cherry Vanilla Jam to enjoy any time of the year.
Serving Suggestions
Our Cherry Vanilla Jam bursts with rich sweetness and fragrant warmth, making it wonderfully versatile. Here are some delightful ways we enjoy it:
- Spread on Warm Toast or Scones
Slather a generous layer of jam over freshly toasted bread or buttery scones. The cherry’s bright tartness paired with vanilla’s smooth aroma elevates any breakfast.
- Swirl into Yogurt or Oatmeal
Stirring a spoonful into plain Greek yogurt or creamy oatmeal adds natural sweetness and a vibrant ruby-red color. It transforms simple meals into satisfying treats.
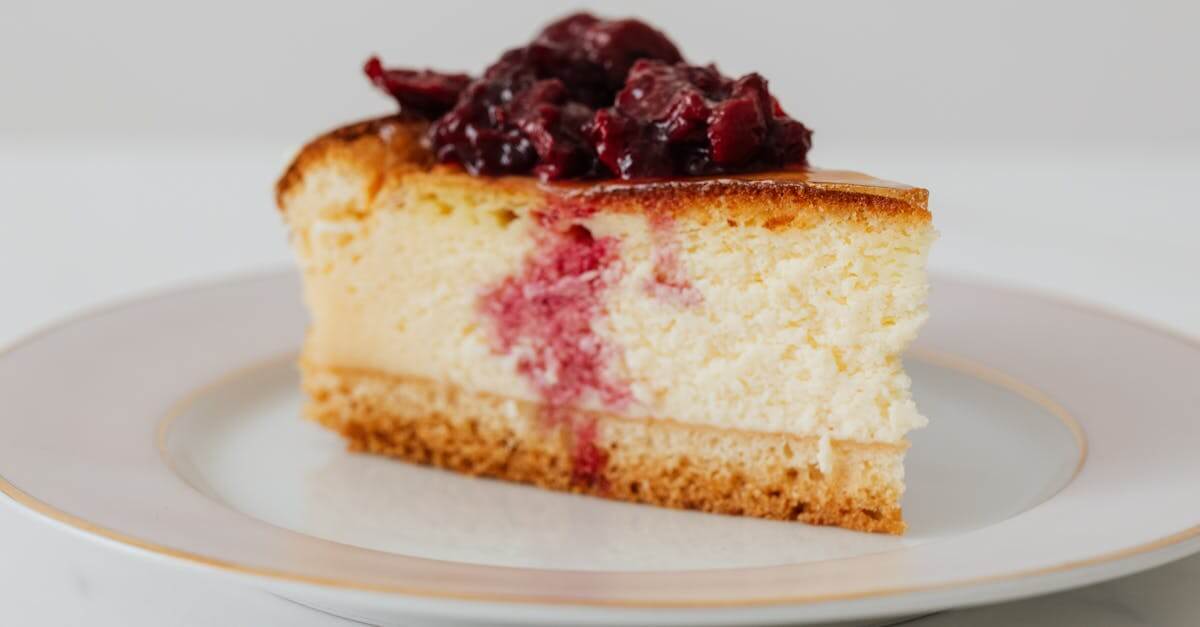
- Top for Cheesecake or Ice Cream
Warm the jam slightly and drizzle over vanilla cheesecake or classic vanilla ice cream for a luscious dessert with fruity depth.
- Glaze for Meats
Use the jam as a glaze for roasted pork or chicken. The sweet-tart profile with vanilla notes creates a beautiful balance enhancing savory dishes.
- Filling for Pastries and Thumbprint Cookies
Spoon the jam into dough before baking or fill thumbprint cookies for a tender bite with bursts of vibrant flavor.
| Serving Idea | Description | Best Paired With |
|---|---|---|
| Toast or Scones | Spread generously for a classic toast experience | Buttery or rustic breads |
| Yogurt or Oatmeal | Swirl in for natural sweetness and color | Plain Greek yogurt, oatmeal |
| Cheesecake or Ice Cream | Warm and drizzle for a decadent topping | Vanilla cheesecake or ice cream |
| Meat Glaze | Brush on meat before roasting | Pork chops, chicken breasts |
| Pastry Filling or Cookies | Use as a juicy filling in baked goods | Thumbprint cookies, tarts |
Pro Tip: For an extra burst of flavor, warm your Cherry Vanilla Jam slightly in the microwave before serving. The heat will release its rich aroma and create a more luscious texture.
Exploring these serving ideas helps us appreciate the depth and versatility of our Cherry Vanilla Jam in both sweet and savory creations.
Conclusion
Making Cherry Vanilla Jam at home brings a satisfying blend of fresh fruit and warm vanilla right to our kitchen. It’s a simple yet rewarding process that results in a versatile treat perfect for many occasions. Whether we’re enjoying it ourselves or sharing it as a thoughtful gift, this jam adds a special touch to any meal.
With just a few quality ingredients and the right techniques, we can create a delicious preserve that captures the essence of summer cherries all year long. It’s a wonderful way to elevate everyday breakfasts and desserts with a homemade touch.
Frequently Asked Questions
What ingredients are needed for Cherry Vanilla Jam?
You need 4 cups fresh pitted sweet cherries, 3 cups granulated sugar, 2 teaspoons pure vanilla extract, 2 tablespoons fresh lemon juice, and optionally 1 packet powdered fruit pectin for firmer jam.
Why is lemon juice important in the jam recipe?
Lemon juice adds acidity, which helps balance the sweetness, aids in proper setting, and ensures safe preservation of the jam.
Can I use frozen cherries for this jam?
Fresh cherries are best for flavor and texture, but frozen cherries can be used if thawed and drained properly before cooking.
What equipment is essential for making and storing the jam?
You need a large heavy-bottomed saucepan, sterilized glass canning jars with lids, a wooden spoon, a large ladle, and optionally a candy thermometer.
How do I sterilize jars for canning?
Boil the jars and lids in water for 10 minutes to kill bacteria and prevent spoilage before filling them with hot jam.
How long should I cook the jam?
Cook until it reaches a full rolling boil and hits 220°F (104°C) or thickens to desired consistency, usually after about 15-20 minutes of boiling.
What is the purpose of the boiling water bath after filling jars?
The boiling water bath ensures a proper vacuum seal and kills any remaining bacteria, extending the shelf life of the jam.
How should I store Cherry Vanilla Jam after canning?
Store sealed jars in a cool, dark place. Once opened, refrigerate the jam and consume it within a few weeks for best taste and safety.
What are some popular ways to serve Cherry Vanilla Jam?
Spread on toast or scones, swirl into yogurt or oatmeal, drizzle over desserts, use as a meat glaze, or fill pastries and cookies.
Can beginners easily make this jam recipe?
Yes, the recipe is simple and clearly guided, making it suitable for both beginners and experienced canners alike.