
If you’re craving a creamy, chocolatey treat with a fun twist, our Reese’s Ninja Creami recipe is exactly what you need. Combining the rich flavors of Reese’s peanut butter cups with the smooth texture created by the Ninja Creami, this dessert is a game-changer for homemade ice cream lovers. It’s simple to make and perfect for satisfying those sweet tooth moments without leaving your kitchen.
We love how this recipe brings together the best of both worlds—decadent chocolate and creamy peanut butter—into a refreshing frozen dessert. Whether you’re looking for a quick snack or a crowd-pleasing dessert, this Ninja Creami creation delivers on flavor and texture every time. Let’s dive into making this irresistible treat that’s sure to become a favorite in your dessert lineup.
Ingredients
To create the perfect Reese’s Ninja Creami dessert, we carefully select ingredients that balance creamy texture with intense peanut butter and chocolate flavors. Below are the essentials plus optional additions to enhance your treat.
Main Ingredients
These are the core components that bring the rich peanut butter and chocolate fusion to life:
- 1 cup heavy cream (for rich creaminess and smooth texture)
- 1/2 cup whole milk (to balance creaminess and firmness)
- 3/4 cup granulated sugar (to sweeten the base without overpowering)
- 1/2 cup creamy peanut butter (preferably natural or no-stir for smooth blending)
- 1 teaspoon vanilla extract (to enhance flavor depth)
- 1/4 teaspoon salt (to intensify the peanut butter taste)
- 5 Reese’s peanut butter cups, chopped (folded in after processing for texture)
| Ingredient | Quantity | Purpose |
|---|---|---|
| Heavy cream | 1 cup | Adds creaminess and richness |
| Whole milk | 1/2 cup | Balances texture and firmness |
| Granulated sugar | 3/4 cup | Sweetens the ice cream base |
| Creamy peanut butter | 1/2 cup | Core flavor of the recipe |
| Vanilla extract | 1 teaspoon | Enhances overall flavor |
| Salt | 1/4 teaspoon | Amplifies peanut butter flavor |
| Reese’s peanut butter cups | 5, chopped | Adds chocolate-peanut crunch |
Optional Mix-Ins and Toppings
Customize the Reese’s Ninja Creami to fit your perfect indulgence. We recommend experimenting with these add-ons for extra bursts of flavor and texture:
- Mini Reese’s pieces (for even more peanut butter and chocolate elements)
- Chocolate chips or chunks (to intensify chocolate richness)
- Crushed pretzels (adds a salty crunch contrast)
- Caramel swirl (drizzled on top for sweet gooey texture)
- Chopped roasted peanuts (for added crunch and peanut flavor)
- Whipped cream (light finish and presentation boost)
- Chocolate syrup or fudge sauce (for drizzling on top)
Feel free to mix these in during or after the Ninja Creami process to match your preferred consistency and flavor intensity.
Equipment and Tools
To make the Reese’s Ninja Creami Recipe perfectly creamy and delicious, having the right equipment is essential. Below, we outline the key tools that ensure smooth preparation and optimal texture.
Ninja Creami Machine
The Ninja Creami is the heart of this recipe. This innovative ice cream maker transforms your base mixture into a smooth, creamy treat with ease. It works by rapidly spinning the frozen pint to create a rich texture without the need for churning or long freezing periods.
Key features we rely on include:
| Feature | Description |
|---|---|
| Powerful Motor | Ensures consistent blending for ultra-smooth ice cream |
| Multiple Settings | Includes options for ice cream, gelato, sorbet, and more |
| Easy-to-Clean Design | Removable paddle and lid for quick cleaning |
| Compact Size | Fits easily on kitchen counters without clutter |
Using the Ninja Creami Machine, we achieve the perfect blend that highlights the intense flavors of Reese’s peanut butter cups in our dessert.
Additional Kitchen Tools
Apart from the Ninja Creami, a few essential kitchen tools make the process seamless and efficient:
- Measuring Cups and Spoons: Precise measurement of ingredients like cream, milk, sugar, and peanut butter keeps the texture balanced.
- Mixing Bowl: A medium-sized bowl for combining ingredients before transferring to the Ninja Creami pint.
- Whisk or Hand Mixer: To blend the base smoothly, ensuring no lumps remain in the peanut butter or sugar.
- Plastic Pint Containers: These come with the Ninja Creami and are perfect for freezing the mixture evenly.
- Spatula: Helpful for scraping down the sides of the mixing bowl and transferring mixture without waste.
- Freezer: A stable freezer temperature is vital for solidifying the base before processing in the Ninja Creami.
Having these tools ready allows us to focus on crafting a perfectly creamy and indulgent Reese’s Ninja Creami dessert every time.
Prep Work
Before diving into the Reese’s Ninja Creami recipe, getting a smooth workflow in the kitchen begins with efficient prep work. This ensures every ingredient and step aligns perfectly for that creamy, chocolatey delight.
Preparation of Ingredients
- Measure Precisely: We start by measuring 1 cup heavy cream, 1/2 cup whole milk, and 3/4 cup granulated sugar to guarantee the right creaminess and sweetness level.
- Peanut Butter: Soften 1/2 cup creamy peanut butter at room temperature for easy blending. Avoid cold or hardened peanut butter to ensure even mixing.
- Vanilla and Salt: Add 1 tsp vanilla extract and a pinch of salt to enhance the flavors and balance sweetness.
- Chopped Reese’s: Chop approximately 1/2 cup Reese’s peanut butter cups, saving some for mix-ins after freezing. Aim for bite-sized pieces about 1/4 inch.
- Optional Mix-ins & Toppings: Prepare any extras like mini peanut butter pieces, chocolate chips, or crushed pretzels in advance for quick additions after the creamier base freezes.
| Ingredient | Amount | Prep Notes |
|---|---|---|
| Heavy Cream | 1 cup | Measured precisely |
| Whole Milk | 1/2 cup | Room temperature preferred |
| Granulated Sugar | 3/4 cup | Use fine sugar for smoothness |
| Creamy Peanut Butter | 1/2 cup | Softened to room temperature |
| Vanilla Extract | 1 tsp | Pure vanilla preferred |
| Salt | Pinch | Balances sweetness |
| Reese’s Peanut Butter Cups | 1/2 cup | Chopped into 1/4 inch pieces |
Freezing Instructions
- Transfer Base to Pint Container: Pour the well-mixed Reese’s base mixture into the Ninja Creami’s plastic pint container. Leave about 1/2 inch space at the top to allow for expansion during freezing.
- Seal & Label: Secure the lid tightly to prevent freezer odors from seeping in. Label the container with the date for freshness tracking.
- Freeze Flat: Place the pint container on a level surface in the freezer. Freeze for 24 hours minimum. This strict freezing time is crucial to achieve the perfect texture when processing in the Ninja Creami.
- Avoid Disturbance: Do not open or shake the container during freezing. This keeps the mix uniform and prevents ice crystal formation that can affect creaminess.
Tip: For best results, set a timer or reminder to check after 24 hours before processing. This ensures optimum firmness and consistency for the Reese’s Ninja Creami dessert.
Instructions
Follow these precise steps to transform our Reese’s Ninja Creami recipe base into a smooth and indulgent frozen dessert using the Ninja Creami. Proper setup and processing are key to unlocking the perfect creamy texture and rich flavor.
Setting Up the Ninja Creami
- Freeze the Base Mixture: Ensure that your Reese’s base mixture has been frozen flat in the Ninja Creami pint container for at least 24 hours to solidify fully.
- Thaw Slightly Before Processing: Remove the pint from the freezer and allow it to sit at room temperature for 3–5 minutes, just enough to slightly soften the edges.
- Prepare the Machine: Place the Ninja Creami bowl securely in the machine. Confirm that the outer bowl lid is locked in place.
- Align Properly: Make sure the pint container is correctly positioned to prevent jamming or uneven spinning during the process.
| Step | Important Detail |
|---|---|
| Freezing | Minimum 24 hours, flat freeze |
| Thawing | 3–5 minutes at room temperature |
| Machine Setup | Secure bowl and locking lid |
| Alignment | Center pint container properly |
Processing the Recipe in the Ninja Creami
- Select the “Ice Cream” Function: On the Ninja Creami, choose the Ice Cream setting for optimal creaming of frozen dessert bases.
- Start Processing: Press Start and allow the machine to blend and shave the frozen mixture into a creamy consistency.
- Listen to the Motor: The powerful motor will automatically stop once the ice cream reaches the desired texture.
- Remove the Bowl: Carefully unlock the outer lid, lift the bowl out, and inspect the texture.
“The Ice Cream function perfectly balances power and precision, ensuring our Reese’s mixture transforms into a smooth, luscious ice cream without the need for traditional churning.“
Mixing and Re-Creaming Steps
- Add Mix-Ins: Gently remove the inner core of the ice cream with a spoon and create a small well in the center. Add your chopped or mini Reese’s peanut butter cups and other preferred mix-ins such as chocolate chips or crushed pretzels.
- Use the “Mix-In” Function: Return the pint to the machine and select the Mix-In setting. This function evenly incorporates add-ins without pulverizing them.
- Re-Cream if Needed: If the texture is crumbly or icy, select the Re-Cream option for a second pass. This step restores creaminess.
- Final Inspection: Once complete, scoop the creamy Reese’s treat into serving dishes. Add toppings like whipped cream or chocolate syrup for extra indulgence.
| Function | Purpose |
|---|---|
| Ice Cream | Transform frozen base into creamy dessert |
| Mix-In | Evenly fold in crunchy/additional ingredients |
| Re-Cream | Enhance texture; smooth out icy or crumbly ice cream |
By following these detailed Instructions we ensure each batch of our Reese’s Ninja Creami recipe delivers perfectly balanced, crave-worthy dessert every time.
Serving Suggestions
To elevate our Reese’s Ninja Creami recipe experience, thoughtful serving ideas will bring out the best in every scoop. Let’s explore creative ways to present and pair this decadent dessert for maximum enjoyment.
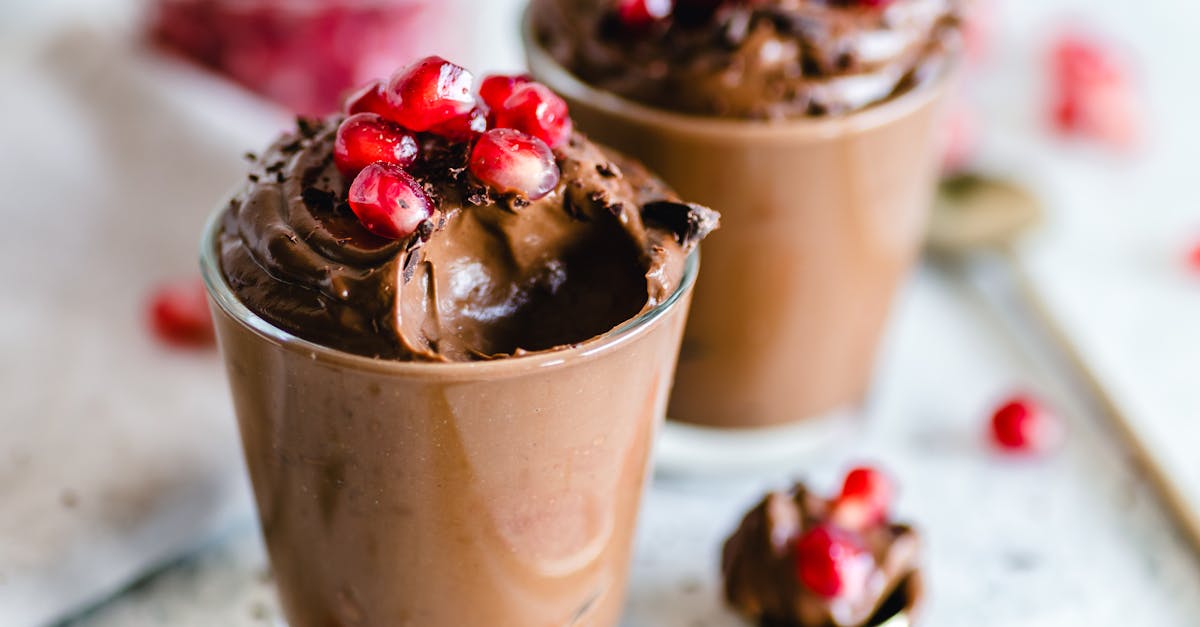
Presentation Ideas
For a visually stunning and appetizing dessert, consider these presentation tips:
- Serve the ice cream in clear glass bowls or cups to showcase the luscious chocolate and peanut butter swirls.
- Garnish with a few chopped Reese’s peanut butter cups or mini Reese’s pieces on top for texture and visual appeal.
- Drizzle warm chocolate syrup or a caramel swirl over the ice cream to add glossy richness.
- Add a dollop of freshly whipped cream sprinkled with crushed roasted peanuts or a pinch of sea salt for contrast.
- Use small dessert spoons and arrange the bowls on a rustic wooden board for a cozy, inviting look.
Complementary Pairings
Pairing flavors and textures thoughtfully enhances this rich treat without overpowering it. Here are some of our favorite combinations to serve alongside:
| Pairing | Description | Why It Works |
|---|---|---|
| Fresh Strawberries | Bright, tangy slices add freshness and balance the richness. | Cuts through the dense peanut butter and chocolate flavors. |
| Warm Brownies | Gooey, chocolatey brownies complement the ice cream’s texture. | Double chocolate indulgence with contrasting temperatures. |
| Salted Pretzels | Crunchy and salty bites offer textural contrast and saltiness. | Enhances the sweet and salty flavor dynamic. |
| Espresso or Coffee | A small cup of strong coffee pairs well with the dessert. | Bitter notes counterbalance the sweet richness. |
Tips and Tricks
Mastering Reese’s Ninja Creami at home means paying close attention to texture and storage. Below we share our best Tips and Tricks to help you create the creamiest, most flavorful dessert every time.
How to Get the Perfect Texture
Achieving that signature creamy and smooth texture requires precise steps:
- Freeze the mixture properly
Freeze your Reese’s base flat in the Ninja Creami pint container for at least 24 hours. This ensures an even freeze and prevents icy clumps.
- Thaw before processing
Let the pint sit at room temperature for about 5-10 minutes before loading it into the Ninja Creami. This softens the edges and allows the machine to create a silky consistency.
- Select the right function
Use the “Ice Cream” setting for smoothness. If your dessert comes out crumbly or icy, run the “Re-Cream” function to restore creaminess without melting the base.
- Add mix-ins carefully
Incorporate chopped Reese’s or other crunchy toppings using the “Mix-In” setting. Add them gradually to avoid breaking the machine blade or overmixing.
- Consistency check
Here’s what to look for and fix during processing:
| Texture Issue | Cause | Solution |
|---|---|---|
| Too icy or crumbly | Mixture too frozen or dry | Use “Re-Cream” function |
| Too soft or runny | Mixture partially thawed too long | Freeze longer before processing |
| Chunky without mix-in integration | Mix-ins too large or unevenly added | Chop finely and add with “Mix-In” |
“For the creamiest ice cream, perfect freezing and gentle processing are non-negotiable.”
Storage Recommendations
Proper storage keeps our Reese’s Ninja Creami dessert ready to serve with perfect flavor and texture:
- Use airtight containers
Transfer any leftovers to an airtight container to prevent freezer burn and absorption of other odors.
- Freeze flat
Keep the container flat in the freezer to maintain uniform texture and avoid hard clumps.
- Label and date
Always label containers with the make date to track freshness. We recommend consuming within 1-2 weeks for best taste and texture.
- Scoop and serve smart
Let frozen portions sit out for 3-5 minutes before scooping to soften slightly, making serving easier and enhancing the creamy mouthfeel.
| Storage Tip | Reason | Recommended Action |
|---|---|---|
| Airtight container | Prevents odors and freezer burn | Use Ninja Creami pint or similar |
| Flat freezing | Maintains consistent texture | Freeze on a flat surface without stacking |
| Consume within 1-2 weeks | Ensures optimal flavor and texture | Label container with date |
| Soften before serving | Improves scoopability and creaminess | Leave out 3-5 minutes at room temp |
Conclusion
Making Reese’s Ninja Creami dessert at home is a rewarding experience that brings rich flavors and creamy texture together effortlessly. With the right ingredients and equipment, we can create a dessert that satisfies any sweet tooth while allowing room for customization.
By following the steps carefully and using the Ninja Creami’s functions wisely, we ensure every batch turns out smooth and indulgent. This recipe is a versatile addition to our dessert lineup, perfect for sharing or enjoying solo whenever cravings strike.
Frequently Asked Questions
What ingredients are needed for the Reese’s Ninja Creami dessert?
You’ll need heavy cream, whole milk, granulated sugar, creamy peanut butter, vanilla extract, salt, and chopped Reese’s peanut butter cups. Optional add-ons include mini Reese’s pieces, chocolate chips, caramel swirl, crushed pretzels, whipped cream, and chocolate syrup.
What is the Ninja Creami and why is it important for this recipe?
The Ninja Creami is a machine that turns frozen mixtures into creamy desserts without churning. It offers multiple settings for smooth texture and easy customization, making it perfect for creating this peanut butter and chocolate treat.
How do I prepare the base mixture for freezing?
Mix the heavy cream, milk, sugar, softened peanut butter, vanilla, and salt until smooth. Then fold in chopped Reese’s cups. Pour the mixture into the Ninja Creami pint container, seal, and freeze flat for at least 24 hours.
How long should I freeze the dessert base before processing?
Freeze the mixture flat and undisturbed for a minimum of 24 hours to ensure proper firmness and smooth texture when processed in the Ninja Creami.
What Ninja Creami settings do I use to make this dessert?
Use the “Ice Cream” function to process the frozen base into creamy ice cream. Use the “Mix-In” function to add extra mix-ins without breaking texture. The “Re-Cream” function helps fix icy or crumbly results.
Can I customize the dessert with extra toppings?
Yes! You can add toppings like chopped Reese’s pieces, chocolate syrup, caramel drizzle, whipped cream, or crushed nuts to enhance flavor and presentation.
How should I store leftover Reese’s Ninja Creami dessert?
Store leftovers in airtight, flat containers in the freezer. Label with the date and allow the dessert to soften slightly before scooping for best texture.
What are some serving suggestions for this peanut butter dessert?
Serve in clear bowls to show off swirls, garnish with Reese’s pieces and syrup. Pair with fresh strawberries, warm brownies, salted pretzels, or coffee for an elevated treat.
What tips help achieve the perfect creamy texture?
Freeze the mixture flat for 24 hours, thaw slightly before processing, and use the Ninja Creami’s recommended settings. Adding mix-ins after processing prevents sogginess and preserves texture.
Is this recipe suitable for quick snacks and parties?
Yes, the recipe is easy to prepare and versatile, making it perfect for small snacks or larger gatherings where a crowd-pleasing dessert is needed.