
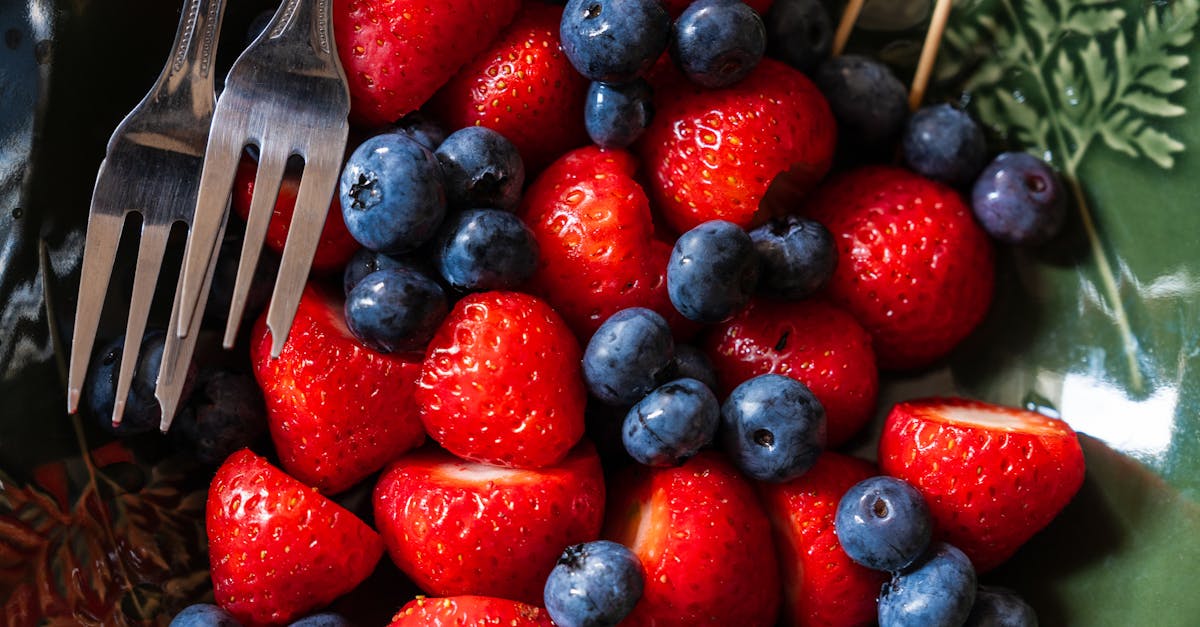
We all love a good meal, but what if our cooking could also help reduce food waste? Rescued Recipes are all about turning overlooked ingredients into delicious dishes that save both money and the planet. These recipes make the most of leftovers, imperfect produce, and pantry staples, proving that creativity in the kitchen can be both sustainable and satisfying.
By embracing rescued recipes, we not only cut down on waste but also discover new flavors and cooking techniques. It’s a win-win for our taste buds and the environment. Let’s dive into these inspired meals that transform what might have been tossed into something truly tasty and nourishing.
What Are Rescued Recipes?
Rescued Recipes are creative culinary solutions designed to transform overlooked or unused ingredients into delicious dishes. These recipes focus on reducing food waste by utilizing what might otherwise be discarded—such as leftovers, imperfect produce, and pantry staples—in a smart and flavorful way.
Core Principles of Rescued Recipes
- Utilizing Leftovers
We reimagine leftover meals by incorporating them into new recipes, preventing food from being wasted and giving it a second life on our plates.
- Embracing Imperfect Produce
Misshapen fruits and vegetables that are often discarded are perfectly edible and packed with nutrients. Rescued Recipes encourage us to include these in our meals instead of throwing them away.
- Reinventing Pantry Staples
Expired or near-expiration pantry items can be creatively combined to form new dishes that are both economical and tasty.
Benefits of Embracing Rescued Recipes
| Benefit | Explanation |
|---|---|
| Environmental Impact | Reduces food waste, lowering greenhouse gas emissions. |
| Cost Savings | Saves money by fully utilizing food we already have. |
| Culinary Creativity | Encourages inventive cooking and unique flavor combinations. |
| Nutritional Value | Maintains nutrient intake by using whole food resources. |
“Cooking with rescued ingredients is not just smart, it’s a powerful way to respect the food we have and the planet we live on.”
By understanding what makes a recipe ‘rescued,’ we can consciously shift our cooking habits. That shift helps us enjoy satisfying dishes while contributing to a more sustainable kitchen.
Ingredients
To master Rescued Recipes, we focus on versatile, often overlooked ingredients that transform leftovers and pantry staples into creative meals. Below are the key elements we commonly use to reduce food waste and boost flavor.
Common Leftover Ingredients
Leftovers are treasure troves in rescue cooking. Here are the most frequently rescued ingredients from our fridge:
- Cooked grains (rice, quinoa, barley): Perfect bases for stir-fries, salads, or casseroles.
- Roasted or steamed vegetables: Ideal for blending into soups, fritters, or mixed into pasta.
- Cooked proteins (chicken, beef, tofu): Great in wraps, salads, or scrambled with eggs.
- Stale bread: Can be transformed into croutons, bread pudding, or used as a binder for meatballs.
- Cooked beans and lentils: Provide protein and fiber for stews, burgers, and dips.
- Mashed potatoes: Versatile for making patties, shepherd’s pie topping, or thickening soups.
Using these ingredients helps us embrace creativity and enjoy new textures and flavors while minimizing waste.
Pantry Staples for Rescued Recipes
Pantry staples form the backbone of our Rescued Recipes. Here is a list of essentials that pair beautifully with leftovers to create balanced meals:
| Pantry Staple | Typical Use in Rescued Recipes | Notes |
|---|---|---|
| Olive oil | Sautéing, roasting, dressing salads | Adds healthy fat and flavor |
| Canned tomatoes | Base for sauces, stews, and braises | Rich in umami, versatile |
| Pasta | Quick meal base combined with veggies or protein | Long shelf life |
| Dried herbs/spices | Enhance flavor without extra calories | Keeps dishes vibrant |
| Stock cubes or broth | Adds depth to soups and risottos | Use leftover veggie scraps to make broth |
| Flour | Thickening sauces, making batter or dough | Supports texture and structure |
| Vinegar or lemon | Brightens and balances flavors | Helps lift tired leftovers |
By combining these pantry staples with leftover ingredients, we unlock countless rescued recipe possibilities that are sustainable, delicious, and nutritious.
Tools and Equipment Needed
To excel at creating Rescued Recipes we need the right tools and equipment that enhance efficiency and maintain the quality of rescued ingredients. These tools help us transform overlooked produce and leftovers into delicious dishes with ease.
Essential Kitchen Tools for Rescued Recipes
- Sharp Chef’s Knife: Precise chopping is key when working with imperfect produce. A sharp knife ensures clean cuts that preserve texture and flavor.
- Cutting Board: A sturdy surface to prep ingredients safely. Using separate boards for vegetables and proteins helps avoid cross-contamination.
- Mixing Bowls: Various sizes for combining rescued ingredients, marinating, and tossing salads or leftovers.
- Measuring Cups and Spoons: Accurate measurements of herbs, spices, and liquids maintain recipe balance.
- Cast Iron Skillet or Heavy-Bottomed Pan: Ideal for sautéing vegetables, reheating leftovers, and achieving caramelization that adds depth to rescued foods.
- Large Pot with Lid: Useful for boiling grains, making stocks from scraps, or slow-cooking vegetable pulp.
- Blender or Food Processor: Perfect for pureeing cooked vegetables, blending sauces, or transforming stale bread into crumbs.
- Colander: Essential for rinsing beans, draining cooked grains, or cleaning harvested vegetables.
- Storage Containers: Airtight containers for preserving leftover and prepped rescued ingredients safely.
Additional Helpful Tools
| Tool | Purpose |
|---|---|
| Vegetable Peeler | Removes blemishes and thin skins from imperfect produce |
| Kitchen Scale | Weighs ingredients to ensure recipe consistency |
| Silicone Spatula | Scrapes bowls and pans clean to minimize waste |
| Fine Mesh Sieve | Strains stocks or removes debris from purees |
| Ovenproof Baking Dish | Roasts leftovers and imperfect vegetables efficiently |
Quotes from Our Experience
“With the right tools Rescued Recipes become not only practical but creative. We trust our cast iron skillet and sharp knives to bring out the best in every ingredient rescued.”
“A blender is a game-changer for turning leftovers and bits into silky soups and spreads, minimizing waste and maximizing flavor.”
Equipping our kitchens with these essential tools empowers us to fully embrace the art of Rescued Recipes. We can confidently repurpose ingredients while maintaining taste, texture, and nutritional value.
Make-Ahead Tips for Rescued Recipes
Planning ahead is key to maximizing the potential of our Rescued Recipes. Here are practical steps to help us prepare and store ingredients and dishes effectively, ensuring freshness, flavor, and convenience.
Step 1: Prioritize Proper Storage of Rescued Ingredients
- Store leftovers like cooked grains, proteins, and roasted vegetables in airtight containers to maintain moisture and prevent odors.
- Use clear labeling with dates to track freshness and rotate ingredients systematically.
- Keep imperfect produce in cool, dry places or refrigerate depending on the item to extend usability.
Step 2: Batch-Cooking Rescued Staples
- Prepare staple components such as cooked legumes, mashed potatoes, or roasted veggies in bulk.
- Divide into single or family-sized portions in freezer-safe containers or resealable bags.
- Cool ingredients completely before freezing to prevent ice crystals that alter texture.
Step 3: Assemble and Freeze Complete Dishes
- When possible, complete a Rescued Recipe like casseroles, soups, or stews, then store them fully assembled in freezer-safe dishes.
- Add herbs, spices, or toppings right before serving to keep flavors vibrant.
- Defrost overnight in the refrigerator for even reheating.
Step 4: Plan for Quick Reheating and Serving
- Use cast iron skillets or heavy-bottom pans to gently reheat dishes, preserving texture.
- Add a splash of olive oil or broth when reheating to refresh flavors and prevent dryness.
- For baked items, warm in the oven at 350°F for 10–15 minutes to regain crispness.
Step 5: Leverage Pantry Staples for Flavor Boosts
- Keep canned tomatoes, dried herbs, vinegar, and stock cubes on hand to elevate reheated rescued meals quickly.
- A drizzle of fresh lemon juice or vinegar adds brightness to leftovers just before serving.
Make-Ahead Tips Summary Table
| Tip | Description | Storage Recommendation | Reheating Advice |
|---|---|---|---|
| Proper Storage | Airtight containers, label with dates | Refrigerator or pantry | – |
| Batch-Cooking Staples | Cook in bulk, portion, freeze | Freezer-safe containers/bags | Defrost before use |
| Assemble & Freeze Dishes | Freeze complete meals in ovenproof dishes | Freezer | Defrost in fridge, reheat gently |
| Quick Reheating | Use quality pans, add moisture | – | Low-medium heat stovetop/oven |
| Pantry Staples Flavor Boost | Add herbs, vinegar, lemon before serving | Pantry | Add fresh to reheated dishes |
“Rescued Recipes become even more practical when we combine make-ahead preparation with smart storage. This approach ensures our rescued ingredients shine with fresh vibrant taste every time we serve.”
By integrating these make-ahead strategies we maximize efficiency reduce waste and enjoy dynamic flavors across all our rescued meals.
Instructions
To create delicious Rescued Recipes that minimize waste and maximize flavor, we follow precise preparation, smart cooking techniques, and inventive ways to combine leftovers.
Prep Work
Proper Prep Work sets the foundation for successful Rescued Recipes. Start by:
- Sorting ingredients: Separate leftovers, imperfect produce, and pantry staples, discarding anything spoiled.
- Cleaning and trimming: Wash vegetables and herbs thoroughly. Remove wilted leaves and tough stems.
- Chopping uniformly: Cut vegetables and proteins into even pieces for consistent cooking.
- Measuring precisely: Use measuring cups and spoons to maintain balance in flavors and textures.
- Batch preparation: Pre-cook staples like grains or beans in bulk to save time later.
Remember, organizing ingredients and prepping efficiently reduces cooking time and ensures every item is ready to transform.
Cooking Techniques for Rescued Recipes
Successful rescued meals depend on versatile, efficient cooking methods that enhance texture and flavor:
| Technique | Purpose | Tips |
|---|---|---|
| Sautéing | Quick cooking to retain crispness and color | Use a hot pan and moderate oil; stir frequently |
| Roasting | Concentrates flavors, adds caramelization | Spread ingredients evenly; roast at 400°F for 20-30 mins |
| Simmering | Gently combines flavors in soups, stews, or sauces | Keep heat low; cover pot to retain moisture |
| Stir-frying | Maintains crisp textures in vegetables | Use high heat and toss ingredients constantly |
| Baking | Reinvigorates stale bread or combines dishes in casseroles | Preheat oven fully; use oven-safe containers |
Emphasize heat control to safeguard delicate rescued ingredients. Use your trusted cast iron skillet or heavy-bottomed pan for even cooking and superior flavor development.
Combining Leftovers Creatively
The heart of Rescued Recipes is transforming leftover ingredients into new culinary gems. Here are strategies to inspire creativity:
- Layer Flavors: Use pantry staples like garlic, canned tomatoes, dried herbs, and vinegar to elevate simple leftovers.
- Mix Textures: Combine creamy mashed potatoes with crunchy roasted vegetables or crisp stale bread to engage the senses.
- Reinvent Dishes: Turn leftover grains and proteins into fried rice, salads, or stuffed vegetables.
- Use Sauces and Dressings: A zesty vinaigrette or hearty broth can bind disparate ingredients.
- Combine Colors: Brighten plates by mixing colorful produce to make dishes visually appealing.
Example combinations:
| Leftover Ingredient | Creative Use |
|---|---|
| Cooked grains | Grain bowls or crispy patties |
| Roasted vegetables | Veggie frittatas or blended soups |
| Stale bread | Croutons or bread pudding |
| Cooked protein | Tacos or pasta add-ins |
By thinking beyond traditional pairings, we unlock delightful rescued meals that are as exciting as they are sustainable.
Directions
Creating Rescued Recipes is a rewarding process that transforms overlooked ingredients into vibrant, flavorful meals. Below, we provide a clear, step-by-step guide to help us maximize flavors while minimizing waste.
Step-by-Step Guide to Creating a Rescued Recipe Meal
- Gather and Assess Ingredients
- Collect all rescued ingredients, including leftovers, imperfect produce, and pantry staples.
- Sort by freshness and preparation needs.
- Discard any items that are spoiled to ensure safety.
- Prepare Ingredients Thoroughly
- Wash fruits and vegetables thoroughly under cold running water.
- Peel and chop uniformly to promote even cooking and visual appeal.
- Measure dry and wet pantry staples accurately using measuring cups and spoons.
- Choose Appropriate Cooking Methods
- Select methods like sautéing, roasting, simmering, stir-frying, or baking based on ingredient types and desired texture.
- Use a cast iron skillet or heavy-bottomed pan for even heat distribution.
- Adjust cooking times precisely to avoid overcooking delicate rescued ingredients.
- Combine Ingredients Creatively
- Layer flavors by adding herbs, spices, and acids (like lemon or vinegar) to brighten the dish.
- Mix textures by pairing creamy mashed potatoes with crunchy roasted veggies, for example.
- Reinvent traditional recipes by incorporating rescued elements—transform stale bread into croutons or stuffing.
- Monitor Flavor and Texture Balance
- Taste frequently during cooking to adjust seasoning.
- Use pantry staples like salt, pepper, garlic powder, or dried herbs to enhance flavor depth.
- Ensure the final dish balances saltiness, acidity, sweetness, and umami for maximum satisfaction.
- Presentation and Serving
- Arrange dishes to maximize color contrast using the variety of rescued produce.
- Garnish with fresh herbs or a drizzle of olive oil for an appetizing finish.
- Serve immediately or cool for storage following make-ahead tips.
| Step | Key Actions | Tools Needed | Purpose |
|---|---|---|---|
| 1. Gather & Assess | Sort ingredients, check freshness | Cutting board, bowls | Ensure safe and suitable ingredients |
| 2. Prepare | Wash, peel, chop uniformly | Chef’s knife, peeler | Promote even cooking and texture |
| 3. Choose Cooking Method | Select method, adjust time & temperature | Skillet, oven, pot | Achieve optimal texture and flavor |
| 4. Combine Creatively | Layer flavors, mix textures, reinvent dishes | Mixing bowls, spoons | Elevate rescued ingredients |
| 5. Balance Flavors | Taste, season appropriately | Measuring spoons | Create well-rounded dishes |
| 6. Present & Serve | Garnish, arrange colors | Serving plates | Enhance meal appeal |
“Cooking with rescued ingredients is an art of creativity and mindfulness,” reminding us that every step counts toward sustainability without sacrificing taste.
Tips for Successful Rescued Recipes
To master Rescued Recipes and transform overlooked ingredients into delicious meals, we follow several practical and creative tips. These strategies ensure that every rescued ingredient reaches its full potential while maintaining flavor, texture, and nutritional value.
1. Assess and Prioritize Ingredients
Start by carefully inspecting your rescued ingredients. Sort them by freshness and suitability for different recipes. Prioritizing what needs to be used first prevents further waste.
- Check for any spoilage or off smells.
- Separate delicate ingredients from sturdy ones.
- Use highly perishable items immediately.
By understanding each ingredient’s condition, we can tailor cooking methods that bring out their best qualities.
2. Prep Thoughtfully and Efficiently
Preparation is key to successful Rescued Recipes. To maintain uniform cooking and attractive presentation, prep ingredients with care.
- Clean all produce thoroughly to remove dirt and residues.
- Chop uniformly so everything cooks evenly.
- Batch prep where possible to save time during cooking.
Organizing ingredients before cooking turns a potentially overwhelming rescue into a smooth, enjoyable process.
3. Choose Cooking Methods That Maximize Flavor
Some cooking techniques work exceptionally well with rescued ingredients because they enhance texture and depth of flavor.
| Cooking Method | Best for Rescued Ingredients | Benefit |
|---|---|---|
| Sautéing | Vegetables, cooked proteins | Quick, retains nutrients |
| Roasting | Root veggies, stale bread | Concentrates natural sweetness |
| Simmering | Soups, stews (using broth & scraps) | Melts flavors together |
| Stir-frying | Mixed veggies, tofu, grains | Crisp-tender texture |
| Baking | Casseroles, leftovers | Adds comforting consistency |
Selecting methods that suit the rescued item encourages new tastes and textures, making leftovers exciting.
4. Layer Flavors Creatively
Combining rescued ingredients with bold flavors is essential. We build complexity by layering herbs, spices, acids, and fats.
“A pinch of dried herbs or a splash of vinegar can revive any rescued meal.”
- Incorporate aromatic herbs like thyme, oregano, or rosemary.
- Balance flavors with acidity such as lemon juice or vinegar.
- Use healthy fats like olive oil or butter to enrich dishes.
This approach turns humble ingredients into vibrant, restaurant-quality meals.
5. Combine Textures and Colors
Visual appeal enhances the appeal of rescued foods. Mixing textures and colors makes plates inviting and satisfying.
- Pair crisp fresh elements (like greens or nuts) with soft cooked ingredients.
- Use bright colors such as red peppers or orange carrots to liven the dish.
- Add garnishes like fresh herbs or seeds for contrast.
This practice ensures our Rescued Recipes are as delightful to look at as they are to eat.
6. Utilize Pantry Staples for Flavor and Structure
Pantry essentials often bridge gaps in rescued meals by adding flavor, binding ingredients, or thickening sauces. Keep stock of:
- Olive oil
- Canned tomatoes
- Flour
- Dried herbs and spices
- Vinegar or lemon juice
- Stock cubes
These staples act as flavor boosters and structural supports, helping us create balanced and satisfying dishes.
Summary Table: Key Tips for Successful Rescued Recipes
| Tip | Purpose | Examples/Actions |
|---|---|---|
| Assess and prioritize | Avoid spoilage | Check freshness, sort ingredients |
| Thoughtful preparation | Uniform cooking & presentation | Clean, chop uniformly, batch prep |
| Select proper cooking methods | Maximize flavor and texture | Sauté, roast, simmer, stir-fry, bake |
| Layer creative flavors | Depth and balance | Use herbs, acids, fats |
| Combine textures and colors | Visual appeal & mouthfeel | Mix crisp and soft, contrast colors & garnishes |
| Use pantry staples | Boost flavor and structure | Olive oil, canned tomatoes, flour, spices |
By integrating these tips into our cooking routine, we elevate Rescued Recipes from simple resourcefulness to culinary creativity and sustainability.
Storing and Reheating Rescued Recipes
Proper storage and reheating are crucial to maintaining the freshness, flavor, and safety of our rescued recipes. By following these guidelines, we ensure that every bite remains delicious and every ingredient retains its nutritional value.
Storing Rescued Ingredients and Dishes
- Use Airtight Containers:
Transfer leftovers and batch-cooked dishes into airtight containers immediately after they cool to room temperature. This prevents moisture loss and protects against contaminants.
- Label with Dates:
Always label containers with the date of preparation to track freshness and prioritize use effectively. We suggest a simple sticker or masking tape with a marker.
- Refrigeration Guidelines:
- Store cooked dishes and leftovers in the refrigerator at or below 40°F (4°C).
- Use within 3 to 4 days for optimal taste and safety.
- For vegetables and grains, use within 1 to 2 days to avoid spoilage.
- Freezing for Long-Term Storage:
Freeze surplus rescued meals when fresh use isn’t possible. Ensure airtight packaging to prevent freezer burn. Most dishes freeze well for up to 3 months, maintaining texture and flavor.
| Storage Method | Temperature | Safe Storage Duration |
|---|---|---|
| Refrigerator | ≤ 40°F (4°C) | 3 to 4 days (leftovers) |
| Refrigerator | ≤ 40°F (4°C) | 1 to 2 days (fresh produce) |
| Freezer | 0°F (-18°C) | Up to 3 months |
Reheating Rescued Recipes
- Reheat Evenly:
Use a microwave, stovetop, or oven to heat dishes evenly. Stir halfway through microwave reheating to avoid cold spots and ensure the internal temperature reaches at least 165°F (74°C).
- Reheat Only Once:
To safeguard food quality and prevent foodborne illness, avoid reheating dishes multiple times. Only reheat the portion you will consume immediately.
- Use Moist Heat Methods for Leftovers:
Adding a splash of water, broth, or olive oil before reheating prevents drying out, especially for grains, roasted vegetables, and proteins.
- Oven Reheating:
For best texture, warm casseroles or baked dishes covered with foil in a preheated oven at 350°F (175°C) until hot (usually 15 to 20 minutes).
Tip: “Reheating rescued recipes thoughtfully makes the difference between a delightful meal and a disappointing one.”
Quick Reference: Storage and Reheating Tips
| Step | Action | Purpose |
|---|---|---|
| Cool Before Storing | Let food cool to room temp | Prevent condensation and spoilage |
| Airtight Containers | Seal tightly | Maintain freshness |
| Label & Date | Mark container date | Track freshness |
| Refrigerate Promptly | Store at ≤ 40°F (4°C) | Slow bacterial growth |
| Freeze for Long-Term | Use freezer-safe containers | Extend shelf life |
| Reheat Thoroughly | Heat to 165°F (74°C) evenly | Kill pathogens and enhance taste |
| Avoid Multiple Reheats | Only reheat what will be eaten | Ensure safety and quality |
| Add Moisture When Needed | Splash of water or broth during reheating | Maintain texture and flavor |
By mastering proper storing and reheating techniques, we elevate the enjoyment and sustainability of our rescued recipes, preserving their rich flavors and reducing food waste daily.
Conclusion
Embracing Rescued Recipes opens up a world where creativity meets sustainability in our kitchens. By transforming overlooked ingredients into flavorful meals we not only reduce waste but also discover new culinary possibilities.
With the right tools, techniques, and mindset, turning leftovers and pantry staples into delicious dishes becomes second nature. This approach empowers us to cook thoughtfully, save money, and make a positive impact on the environment—all without compromising taste or nutrition.
Let’s continue to explore and innovate with Rescued Recipes, making every meal an opportunity to celebrate resourcefulness and mindful eating.
Frequently Asked Questions
What are Rescued Recipes?
Rescued Recipes are creative meals made by using overlooked ingredients like leftovers, imperfect produce, and pantry staples. They help reduce food waste, save money, and introduce new flavors and cooking techniques.
Which ingredients are commonly used in Rescued Recipes?
Common ingredients include cooked grains, roasted vegetables, cooked proteins, stale bread, beans, mashed potatoes, olive oil, canned tomatoes, pasta, dried herbs, stock cubes, flour, and vinegar or lemon.
What kitchen tools are essential for making Rescued Recipes?
Key tools include a sharp chef’s knife, cutting board, mixing bowls, measuring tools, cast iron skillet, large pot with lid, blender or food processor, colander, and airtight storage containers.
How can I store rescued ingredients to keep them fresh?
Use airtight containers, label with dates, refrigerate or freeze appropriately, and use pantry staples to maintain flavor and freshness. Proper storage prevents spoilage and saves time.
What cooking methods work best for Rescued Recipes?
Versatile methods like sautéing, roasting, simmering, stir-frying, and baking bring out great flavors and textures in rescued meals.
How can I make Rescued Recipes more appealing?
Combine flavors creatively, mix textures, use colorful ingredients, layer sauces, and present dishes attractively to enhance both taste and visual appeal.
Are Rescued Recipes nutritious?
Yes, by using a variety of leftover and fresh ingredients, these recipes can maintain and even boost nutritional value while minimizing waste.
Can I prepare Rescued Recipes ahead of time?
Absolutely! Batch-cook staples, assemble meals in advance, freeze complete dishes, and reheat quickly for convenience without sacrificing quality.
Why should I try Rescued Recipes?
They reduce food waste, save money, foster cooking creativity, introduce new flavors, and support eco-friendly, sustainable cooking habits.
How do I start creating my own Rescued Recipe?
Begin by gathering leftover and pantry ingredients, assess their quality, prepare them properly, choose suitable cooking methods, combine creatively, and balance flavors for a delicious, sustainable meal.