
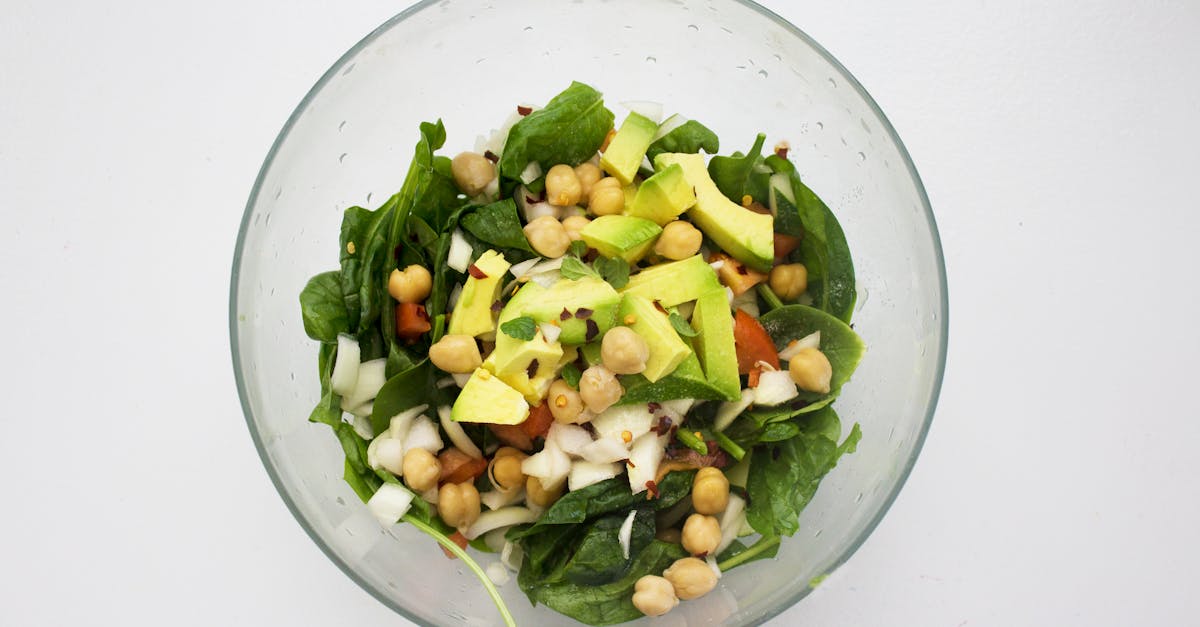
When we’re looking for a quick and nutritious snack that keeps us energized, protein pucks are a game changer. These compact bites pack a powerful punch of protein and wholesome ingredients, making them perfect for busy mornings or post-workout refueling.
Originating from the idea of combining convenience with nutrition, protein pucks are easy to customize with your favorite flavors and ingredients. Whether you’re vegan, gluten-free, or just want a clean snack, this recipe adapts to fit your needs without sacrificing taste or texture.
In this recipe, we’ll guide you through making protein pucks that are not only delicious but also simple to prepare. Let’s dive into creating a snack that fuels our day and satisfies our cravings in the best way possible.
Ingredients
To create our protein pucks packed with energy and flavor, we need a balanced blend of dry, wet, and optional add-in ingredients. These components combine to provide a snack that’s not only nutritious but customizable to our taste and dietary needs.
Dry Ingredients
Our Dry Ingredients form the base of the protein pucks, providing texture, protein, and essential nutrients.
- 1 cup rolled oats — the wholesome foundation for chewy texture
- 1/2 cup protein powder (choose whey, plant-based, or your preference) — the main protein source
- 1/4 cup ground flaxseed — adds fiber and healthy fats
- 1/4 cup chopped nuts (almonds, walnuts, or pecans) — for crunch and healthy fats
- 2 tbsp chia seeds — boosts omega-3 and fiber content
- 1/4 tsp salt — to balance flavors
| Ingredient | Quantity | Notes |
|---|---|---|
| Rolled oats | 1 cup | Use gluten-free if needed |
| Protein powder | 1/2 cup | Any preferred flavor or type |
| Ground flaxseed | 1/4 cup | Freshly ground for best taste |
| Chopped nuts | 1/4 cup | Optional for crunch |
| Chia seeds | 2 tbsp | Hydrates for binding |
| Salt | 1/4 tsp | Enhances flavor |
Wet Ingredients
The Wet Ingredients bind the dry mix and add natural sweetness and moisture for perfect puck consistency.
- 1/2 cup natural nut butter (peanut, almond, or cashew) — creamy binder and protein boost
- 1/4 cup honey or maple syrup — natural sweetener and helps hold shape
- 1 tsp vanilla extract — enriches flavor
- 2–3 tbsp unsweetened almond milk (or any milk) — adjusts texture as needed
Optional Add-Ins
Customize our protein pucks further with these Optional Add-Ins to enhance flavor, nutrition, or texture.
- 1/4 cup dark chocolate chips — for a sweet, antioxidant-rich twist
- 2 tbsp shredded coconut — adds tropical aroma and chewiness
- 1/4 cup dried fruit (cranberries, raisins, or chopped dates) — natural sweetness and chew
- 1 tsp cinnamon or pumpkin spice — warm, fragrant notes
Each add-in complements the core ingredients, allowing us to tailor our protein puck recipe perfectly to our preferences.
Equipment Needed
To craft our protein pucks perfectly every time, having the right equipment is essential. Each tool plays a role in achieving the ideal texture, consistency, and ease of preparation. Here is the detailed list of what we need and why:
| Equipment | Purpose |
|---|---|
| Large mixing bowl | To combine all dry and wet ingredients thoroughly |
| Measuring cups & spoons | For accurate measurement ensuring balanced flavor and nutrition |
| Rubber spatula | To fold all ingredients and scrape sides without waste |
| Food processor or blender (optional) | To finely chop nuts or seeds to improve puck texture |
| Baking sheet or tray | To arrange pucks neatly during shaping or setting |
| Parchment paper or silicone mat | To prevent sticking during setting or baking |
| Refrigerator | To chill and firm up the protein pucks before serving |
| Spoon or cookie scoop | To portion out uniform puck sizes effortlessly |
We emphasize using a large mixing bowl and measuring tools since precision impacts binding and final texture. A food processor helps when including chopped nuts or other chunky add-ins, giving an even blend without overprocessing the base ingredients.
Setting these pucks on parchment paper ensures effortless removal and clean cleanup. Cooling them in the refrigerator guarantees they hold shape well and deliver that satisfying bite we aim for.
Prep Work
Before we start mixing, accurate preparation ensures our protein pucks turn out perfectly balanced and flavorful. Let’s focus on careful measuring and prepping of key ingredients.
Measuring Ingredients
To craft the ideal protein puck, precise measurements are crucial. Use reliable measuring cups and spoons for consistency:
| Ingredient | Amount | Notes |
|---|---|---|
| Rolled oats | 1 cup | Use old-fashioned for best texture |
| Protein powder | 1/2 cup | Choose your preferred flavor |
| Ground flaxseed | 2 tbsp | Adds fiber and Omega-3 |
| Chopped nuts | 1/4 cup | Toast if desired for extra crunch |
| Chia seeds | 1 tbsp | Boosts nutrition and texture |
| Salt | 1/4 tsp | Enhances all flavors |
| Natural nut butter | 1/2 cup | Creamy binder |
| Honey or maple syrup | 1/4 cup | Natural sweetness and moisture |
| Vanilla extract | 1 tsp | For depth of flavor |
| Almond milk | 2-3 tbsp | Adjust for desired consistency |
We recommend measuring dry ingredients first then the wet ingredients separately. This method helps us avoid clumping and ensures an even blend.
Tip: Use a digital kitchen scale if possible for accurate protein powder measurement, especially since different brands vary in scoop size.
Preparing Add-Ins
Optional add-ins bring extra texture and flavor. Preparing these before mixing expedites the process and distributes them evenly in our protein puck base:
- Chop dried fruit into small, uniform pieces to avoid overpowering bites.
- Toast nuts or seeds lightly in a dry pan over medium heat for 3-5 minutes until fragrant for enhanced aroma.
- Measure chocolate chips, shredded coconut, or spices to include desired intensity.
- If using fresh fruit zest, finely grate it and set aside to prevent moisture from altering puck consistency.
“Prepping add-ins thoughtfully amplifies flavors and keeps our protein pucks satisfying and balanced.”
Once our ingredients are measured and add-ins prepared, we’re ready to mix and shape the protein pucks for a delightful snack experience.
Directions
Follow these clear steps to create delicious and nutritious protein pucks that fuel your day. Each phase ensures perfect texture and flavor.
Mixing the Ingredients
- In a large mixing bowl, combine the dry ingredients:
- 1 cup rolled oats
- 1/2 cup protein powder
- 2 tbsp ground flaxseed
- 1/4 cup chopped nuts
- 1 tbsp chia seeds
- 1/4 tsp salt
- In a separate small bowl, whisk together the wet ingredients:
- 1/2 cup natural nut butter
- 1/3 cup honey or maple syrup
- 1 tsp vanilla extract
- 2 tbsp almond milk
- Gradually pour the wet mixture into the dry ingredients. Use a rubber spatula to fold everything together. Mix until the ingredients are evenly combined and form a sticky dough. If using optional add-ins, gently fold them in now:
- Dark chocolate chips
- Shredded coconut
- Dried fruit
- Spices (cinnamon, nutmeg)
“Achieving a uniform, sticky texture helps the protein pucks hold their shape.“
Forming the Protein Pucks
- Lightly grease a baking sheet or line it with parchment paper to prevent sticking.
- Scoop approximately 2 tablespoons of the mixture for each puck.
- Roll the scooped mixture into firm balls using your hands. Then gently flatten each ball to create a puck shape about half an inch thick.
| Step | Action | Tips |
|---|---|---|
| 1 | Scoop 2 tbsp mixture | Use a measuring spoon |
| 2 | Roll into a ball | Press firmly for compactness |
| 3 | Flatten to half inch | Create uniform thickness |
“Consistent size and shape ensure even setting and easy portioning.“
Cooking/Baking Instructions
We recommend chilling the pucks instead of baking to preserve raw ingredients’ nutrients and maintain moist texture.
- Place the formed pucks on the prepared baking sheet.
- Refrigerate for at least 30 minutes until they firm up.
- Store in an airtight container in the fridge for up to one week, or freeze for longer storage.
Alternatively, if you prefer a baked version:
| Temperature | Time | Note |
|---|---|---|
| 350°F (175°C) | 10–12 minutes | Place pucks on parchment-lined baking sheet, watch carefully to avoid drying out |
“Chilling locks shape and packs in flavors while baking adds slight crispness.“
By following these directions precisely, we create perfectly balanced protein pucks ready for a quick snack that energizes anytime.
Storage Tips
Proper storage is key to maintaining the freshness, texture, and flavor of our protein pucks. Here’s how we can keep them delicious and ready to fuel us anytime.
How to Store Protein Pucks
- Place the protein pucks in an airtight container to prevent exposure to air and moisture.
- Separate layers with parchment paper to avoid sticking.
- Store the container in the refrigerator for optimal preservation and texture firmness.
- Keep the temperature consistent around 38°F to 40°F (3°C to 4°C).
Shelf Life and Freezing
To extend the shelf life of our protein pucks without sacrificing quality, freezing is an excellent option.
| Storage Method | Temperature | Duration | Notes |
|---|---|---|---|
| Refrigeration | 38°F to 40°F (3°C-4°C) | Up to 1 week | Best for ready-to-eat snacking within a week. |
| Freezing | 0°F (-18°C) or below | Up to 3 months | Wrap individually or store in freezer bags. |
Freezing Tips:
- Wrap pucks tightly in plastic wrap or foil before placing in a freezer-safe bag.
- Thaw in the refrigerator overnight before consuming to retain flavor and texture.
- Avoid repeated thawing and refreezing to maintain nutrient integrity.
By following these storage tips, our protein pucks will stay fresh, tasty, and packed with energy whenever we need a quick and nutritious snack.
Serving Suggestions
We designed these Protein Pucks to be versatile and convenient. Here are several delicious and practical ways to enjoy them:
Quick On-the-Go Snack
Wrap a Protein Puck in parchment paper or place it in a small reusable container. It’s perfect for those busy mornings or mid-afternoon energy slumps. Pair it with a piece of fruit or a glass of milk for a balanced mini-meal.
Pre- or Post-Workout Fuel
Enjoy a Protein Puck about 30 minutes before or after your workout session. The combination of protein, healthy fats, and natural sugars helps replenish muscles and sustain energy levels. For added hydration, sip on coconut water or electrolyte-rich drinks alongside.
Breakfast Boost
Add a Protein Puck alongside your morning yogurt or smoothie bowl. Crumble it over to add texture, nutrients, and a hint of natural sweetness. It’s a great alternative to granola with fewer processed sugars.
Snack Platter Addition
Serve a variety of homemade Protein Pucks with nuts, fresh berries, and cheese for a nutrient-dense snack platter during gatherings or meetings. This adds flavor variety and appeals to different dietary needs.
Sweet Treat with a Twist
Warm your Protein Puck slightly in the microwave (about 10 seconds) to soften the texture. Serve with a dollop of Greek yogurt and a drizzle of honey or maple syrup for an indulgent yet healthy dessert option.
Storage and Serving Temperature Recommendations
| Storage Method | Duration | Serving Temperature | Notes |
|---|---|---|---|
| Refrigerator | Up to 1 week | Chill or room temp | Keep in airtight container to maintain freshness |
| Freezer | Up to 3 months | Thaw 30 minutes prior | Wrap individually to prevent freezer burn |
“Serving Protein Pucks chilled enhances their firm texture, while warming slightly softens and releases more flavor.”
When sharing, we recommend providing small plates or napkins for easy handling and encouraging guests to savor every bite slowly to fully appreciate the blend of natural flavors and nutrients.
By experimenting with these serving suggestions, we keep our protein-packed snacks exciting and adaptable to any part of the day.
Conclusion
Protein pucks are a versatile snack that fits effortlessly into our busy lives while delivering the nutrition and energy we need. With simple ingredients and easy preparation, they offer a customizable option that suits various dietary preferences.
By mastering the recipe and storage tips, we can enjoy fresh protein pucks anytime, whether as a quick bite on the go or a nourishing addition to our meals. Let’s keep experimenting with flavors and serving styles to make these snacks an essential part of our routine.
Frequently Asked Questions
What are protein pucks?
Protein pucks are small, energy-packed snacks made from a blend of protein powder, oats, nut butter, and other ingredients. They provide a convenient and nutritious way to fuel your body on the go.
Are protein pucks suitable for specific diets?
Yes, protein pucks are highly customizable to fit various dietary preferences, including vegan and gluten-free options, by choosing appropriate ingredients like plant-based protein powders and gluten-free oats.
What ingredients are needed to make protein pucks?
The basic ingredients include rolled oats, protein powder, ground flaxseed, nuts, chia seeds, nut butter, sweeteners like honey or maple syrup, vanilla extract, and almond milk. Optional add-ins can enhance flavor and nutrition.
How do I prepare protein pucks?
Mix dry ingredients separately from wet ones, then combine them thoroughly. Shape the mixture into small pucks, and chill in the refrigerator or bake as directed to firm up.
What equipment is required to make protein pucks?
You’ll need a large mixing bowl, measuring cups and spoons, a rubber spatula, a baking sheet, parchment paper, and optionally, a food processor for chopping nuts or seeds.
How should I store protein pucks?
Store protein pucks in an airtight container with parchment paper between layers in the refrigerator at 38°F to 40°F for up to one week. For longer storage, freeze them wrapped well and thaw before eating.
Can I customize the flavor of protein pucks?
Absolutely. You can add dark chocolate chips, shredded coconut, dried fruit, or spices like cinnamon to tailor the taste and texture to your liking.
When is the best time to eat protein pucks?
Protein pucks are great as a quick snack anytime, especially before or after workouts, or as part of breakfast to provide sustained energy throughout the day.
How do I serve protein pucks?
Enjoy them chilled for the best texture or warmed slightly to enhance flavor. They can be paired with Greek yogurt, honey, or added to snack platters for variety.