
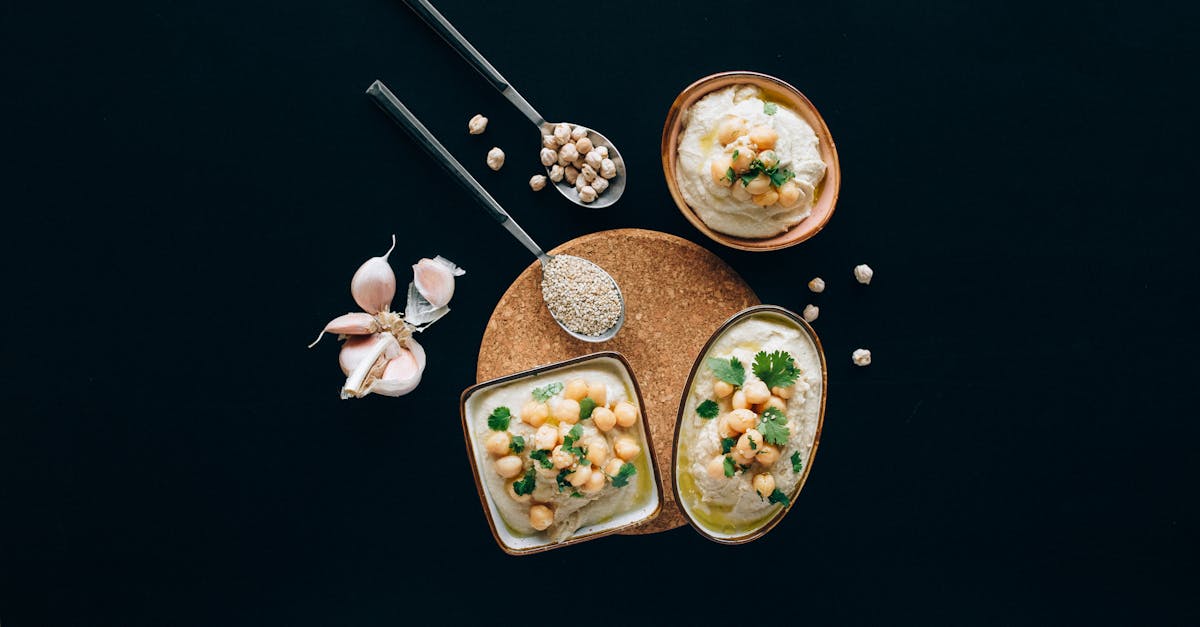
Olive dips have long been a staple in Mediterranean cuisine known for their bold flavors and versatility. Our kosher olive dip recipe brings that same vibrant taste to your table while adhering to kosher dietary laws. It’s a perfect appetizer or snack that pairs beautifully with fresh veggies, pita bread, or crackers.
We love how simple ingredients like olives, garlic, and herbs come together to create a rich and savory spread. Whether you’re hosting a gathering or looking for a quick flavorful addition to your meals this dip is sure to impress. Let’s dive into making this easy and delicious kosher olive dip that’s packed with authentic taste and perfect for any occasion.
Ingredients
To craft our Kosher Olive Dip, we rely on simple yet flavorful ingredients that exemplify the richness of Mediterranean cuisine. Each component plays a vital role in building the dip’s bold and savory profile.
Olives
We start with a combination of kosher olives to ensure the authentic taste and proper dietary standards. Using a mix enhances complexity:
| Olive Type | Quantity | Preparation |
|---|---|---|
| Kalamata Olives | 1 cup (pitted) | Coarsely chopped |
| Green Olives | 1 cup (pitted) | Sliced |
| Black Olives | ½ cup (pitted) | Halved or chopped |
Choosing olives with firm texture and briny flavor guarantees a dip that is rich, tangy, and vibrant.
Fresh Herbs
Fresh herbs bring bright aromatic notes that balance the dip’s saltiness and richness:
- Fresh parsley: ½ cup, finely chopped – adds crisp freshness
- Fresh oregano: 2 tablespoons, minced – offers an earthy depth
- Fresh thyme: 1 teaspoon, finely chopped – provides subtle fragrance
Using fresh herbs rather than dried intensifies the herbal zest and keeps the dip lively and fresh.
Garlic and Seasonings
Garlic forms the backbone of this dip’s savory character alongside these seasonings:
- Garlic cloves: 3 large, minced finely – delivers pungent warmth
- Crushed red pepper flakes: ¼ teaspoon – adds a gentle spicy kick
- Ground black pepper: ½ teaspoon – sharpens flavor
- Kosher salt: to taste – essential for seasoning but used sparingly to avoid overpowering the olives
By layering garlic with controlled heat and seasoning, we build a balanced boldness without overwhelming the natural olive flavors.
Olive Oil and Vinegar
The final ingredients bring cohesion and richness to our dip’s texture and taste:
- Extra virgin olive oil: ⅓ cup – a silky base that rounds out the mixture
- Red wine vinegar: 1 tablespoon – introduces bright acidity to lift the flavors
We emphasize using high-quality extra virgin olive oil for smoothness and an authentic Mediterranean taste. The vinegar’s subtle tang keeps the dip intriguing and refreshing.
This combination of kosher olives, fresh herbs, garlic, quality olive oil, and red wine vinegar establishes the foundation for a delicious and versatile Kosher Olive Dip.
Equipment Needed
To prepare our Kosher Olive Dip efficiently and with ease, we need specific tools that help bring out the rich textures and flavors. Here is a detailed list of essential equipment along with their purposes:
- Food Processor or Blender
This is our main tool for blending the olives, garlic, herbs, and seasonings into a smooth, creamy dip. A food processor offers better control over chunkiness for a rustic texture, while a blender gives a smoother consistency.
- Measuring Spoons
Precise measurement of ingredients like garlic, olive oil, red wine vinegar, and spices ensures the perfect balance of flavors every time.
- Cutting Board and Knife
We use these for chopping fresh herbs and garlic before adding them to the processor.
- Mixing Bowl
If adjustments are needed after blending, a medium-sized mixing bowl helps with folding in additional ingredients or adjusting consistency.
- Spatula
Essential for scraping the sides of the food processor bowl to incorporate all ingredients evenly.
- Serving Dish
Presenting the dip in a clean, attractive bowl enhances the eating experience, especially when paired with pita bread, crackers, or veggies.
| Equipment | Purpose | Notes |
|---|---|---|
| Food Processor/Blender | Puree and blend ingredients | Choose based on desired texture |
| Measuring Spoons | Accurate ingredient measurement | Crucial for balanced flavor |
| Cutting Board & Knife | Chop fresh herbs and garlic | Use sharp knife for efficiency |
| Mixing Bowl | Adjust and mix dip post-blending | Optional but helpful |
| Spatula | Scrape sides for thorough mixing | Prevents uneven flavor |
| Serving Dish | Display and serve the finished dip | Enhances presentation |
Prep Work
Before blending the bold flavors in our kosher olive dip recipe, we focus on precise preparation. This stage ensures every ingredient shines through with the right texture and intensity.
Preparing the Olives
For the best dip texture and flavor, we start with kosher olives. We use a mix of Kalamata, green, and black olives to create that complex, savory base. Here’s how to prepare them efficiently:
| Step | Details |
|---|---|
| Rinse | Rinse olives under cold water to remove excess brine or salt. |
| Pit | Remove pits carefully to avoid bitterness. Use a small knife or olive pitter. |
| Rough Chop | Chop olives into coarse pieces for even blending without over-processing. |
“Properly preparing the olives helps control the dip’s texture and prevents an overly bitter taste,” we always remind ourselves.
Chopping Fresh Ingredients
Fresh herbs and garlic bring essential brightness and depth to our kosher olive dip. We finely chop these for even distribution throughout the dip.
- Garlic: Peel and mince 2–3 cloves finely. This releases their sharp aroma without overpowering.
- Herbs: Use fresh parsley, oregano, and thyme. Remove thick stems and finely chop leaves to maximize freshness.
- Consistency: Aim for small uniform pieces to blend smoothly with the olives.
We use a sharp knife on a clean cutting board to maintain ingredient integrity and prevent bruising. These steps guarantee vibrant flavors that balance the richness of the olives.
“Chopping fresh ingredients properly is key to achieving the perfect harmony in our dip’s flavor profile,” we note every time before mixing.
Instructions
Follow these clear and precise steps to craft our Kosher Olive Dip. Attention to detail ensures perfect texture and vibrant flavor every time.
Combining the Ingredients
- Start by placing the pitted and roughly chopped kosher olives (Kalamata, green, and black) into the food processor or blender.
- Add the finely minced fresh garlic and chopped fresh herbs (parsley, oregano, thyme) to the olives.
- Pour in extra virgin olive oil and add a splash of red wine vinegar to balance richness with acidity.
- Sprinkle in crushed red pepper flakes and freshly ground black pepper for a nuanced spicy kick.
- Add a pinch of kosher salt to taste, keeping in mind olives can be naturally salty.
Blending or Mashing the Dip
We have two options depending on the texture we want:
| Method | Resulting Texture | Instructions |
|---|---|---|
| Using Food Processor | Smooth to slightly chunky | Pulse the mixture 6-8 times, stopping often to scrape down the sides with a spatula. Stop blending once the dip reaches a thick but spreadable consistency. Avoid over-blending to prevent bitterness. |
| Mashing by Hand | Chunky and rustic | Use a mortar and pestle or fork to mash the olives and garlic together. This method maintains more texture and allows for a bite of fresh herbs. Mix in olive oil and vinegar gradually until blended. |
Adjusting Seasonings
- Taste the dip before finalizing. Adjust seasoning carefully:
- Add more olive oil if too thick or harsh.
- Add a few drops of red wine vinegar to brighten flavors.
- Increase red pepper flakes gradually if more heat is desired.
- Add salt or black pepper to enhance depth.
- Stir the dip thoroughly after each adjustment for consistent flavor.
- Let the dip rest for 10-15 minutes at room temperature to allow flavors to meld perfectly.
With these steps, our Kosher Olive Dip Recipe will deliver an irresistible Mediterranean spread bursting with vibrant, well-balanced flavors.
Serving Suggestions
Our Kosher Olive Dip shines as a versatile appetizer that enhances any spread with its bold Mediterranean flavors. Here are several ways to serve it for maximum enjoyment:
- Pair with Pita Bread and Crackers
Serve the dip alongside warm, soft pita bread or crunchy artisan crackers. Their neutral taste and pleasant texture perfectly complement the savory, herbaceous character of our olive dip.
- Fresh Vegetables
Arrange sliced cucumbers, bell peppers, cherry tomatoes, and celery sticks on a platter for a refreshing, healthy option. The crisp, natural flavors and moisture of the veggies balance the rich, savory dip.
- Mediterranean Mezze Plate
Incorporate the dip as part of a mezze spread with hummus, baba ganoush, falafel, marinated artichokes, and olives. This creates a vibrant, flavorful experience that highlights Mediterranean cuisine.
- Topping for Grilled Proteins
Use our dip as a flavorful topping for grilled chicken, fish, or lamb. Its salty, herbal notes enhance the smoky char and add a deliciously tangy finish.
- Sandwich and Wrap Spread
Swap mayonnaise with our olive dip in sandwiches or wraps. It adds moisture, vibrant flavor, and an unexpected gourmet twist.
| Serving Option | Recommended Accompaniments | Texture Contrast | Flavor Enhancement |
|---|---|---|---|
| Pita Bread and Crackers | Warm pita, crisp crackers | Soft or crunchy | Mild base complements dip’s boldness |
| Fresh Vegetables | Cucumber, bell pepper, celery | Crisp and juicy | Fresh and cool contrast |
| Mediterranean Mezze Plate | Hummus, falafel, marinated olives | Variety | Layered Mediterranean flavors |
| Topping for Grilled Proteins | Chicken, fish, lamb | Tender, smoky | Herbal and tangy balance |
| Sandwich and Wrap Spread | Whole grain bread, flatbread | Firm but moist | Creamy replacement for mayo |
To maximize the dip’s flavor, we recommend serving it at room temperature. This allows the herbs and olive oils to release their full aromatic profile.
“Serving the dip with textures that contrast its creamy yet chunky consistency will delight your guests and elevate every bite.”
We encourage experimenting by drizzling extra virgin olive oil and sprinkling fresh herbs on top just before serving to refresh the dip’s vibrant appeal.
Storage and Make-Ahead Tips
Proper storage and preparation save us time while preserving the fresh flavors and texture of our Kosher Olive Dip. Follow these tips to ensure the dip remains vibrant and ready for any occasion.
Refrigeration Guidelines
After preparing the dip, transfer it into an airtight container. The Kosher Olive Dip keeps well in the refrigerator for up to 5 days. Constantly ensure the surface is covered tightly to avoid exposure to air which can cause the dip to dry out or oxidize, affecting taste and appearance.
| Storage Method | Duration | Notes |
|---|---|---|
| Airtight Container | Up to 5 days | Keep refrigerated, stir before serving |
| Freezer | Not recommended | Freezing can change texture and flavor |
Make-Ahead Preparation
We can easily make the dip 1 to 2 days ahead. In fact, allowing it to rest overnight intensifies the blend of garlic, herbs, and olives, creating a deeper, more harmonious flavor profile.
“Resting the dip lets the savory flavors meld beautifully,” enhancing the overall taste experience.
Before serving, let the dip sit at room temperature for about 20 minutes to regain its creamy consistency and let the extra virgin olive oil bring out its glossy richness.
Serving After Storage
- Always stir the dip thoroughly after refrigeration to reincorporate oils that may have separated.
- Consider a light drizzle of fresh extra virgin olive oil and a sprinkle of chopped fresh parsley or oregano to brighten its presentation and flavor just before serving.
- If the dip seems too thick, stirring in a few drops of cold water or a splash of extra virgin olive oil can restore the preferred spreadable texture.
Utilizing these storage and make-ahead tips ensures our Kosher Olive Dip is as flavorful and smooth as when freshly made, ready to impress for hours or days.
Conclusion
This kosher olive dip brings vibrant Mediterranean flavors to any table with ease and elegance. Its simple yet bold ingredients make it a versatile choice for snacks, appetizers, or meal accompaniments. By following the preparation tips and serving suggestions, we can enjoy a dip that’s both fresh and full of character.
Whether we’re hosting a gathering or looking for a flavorful spread, this dip fits perfectly. Its ability to pair with a variety of foods ensures it will become a favorite in our recipe collection. With proper storage and a little advance prep, it’s always ready to impress.
Frequently Asked Questions
What are the main ingredients in the kosher olive dip?
The main ingredients include a mix of kosher olives (Kalamata, green, black), garlic, fresh herbs (parsley, oregano, thyme), crushed red pepper flakes, black pepper, extra virgin olive oil, and red wine vinegar.
How do I prepare the olives for the dip?
Rinse the olives, remove the pits, and roughly chop them to achieve the right texture and consistency for the dip.
What equipment is needed to make this olive dip?
A food processor or blender, measuring spoons, cutting board, knife, mixing bowl, spatula, and a serving dish are recommended for preparation and presentation.
Can I make the dip ahead of time?
Yes, the dip can be made 1 to 2 days in advance. Resting it overnight enhances the flavor. Store it in an airtight container in the refrigerator.
How should I serve the kosher olive dip?
Serve it at room temperature with warm pita bread, crackers, fresh veggies, or as part of a Mediterranean mezze plate. Garnish with olive oil and fresh herbs for extra flavor.
How long does the dip last once made?
The dip stays fresh for up to 5 days in the fridge when stored in an airtight container. Freezing is not recommended due to changes in texture and flavor.
What texture options are available for this dip?
Use a food processor for a smooth to slightly chunky texture, or mash by hand for a chunkier, rustic feel depending on your preference.
Are there any seasoning tips to enhance the dip’s flavor?
Adjust seasonings after blending. Adding crushed red pepper flakes and fresh herbs helps balance richness and brightness in the dip.
Can this dip be used beyond as a spread or appetizer?
Yes, it can be used as a flavorful topping for grilled proteins or as a spread for sandwiches and wraps to add a savory Mediterranean touch.
Why is resting the dip important?
Letting the dip rest allows the flavors to meld and enhances the overall taste and texture before serving.