
Baking mini cakes with silicone molds has become a game-changer for home bakers. These flexible molds make it easy to create perfectly shaped treats without the hassle of greasing or sticking. Plus, their heat resistance ensures even baking every time.
Using mini cake silicone molds lets us get creative with flavors and decorations while keeping portion sizes just right. Whether we’re making bite-sized birthday treats or elegant desserts for a gathering these molds deliver consistent results that impress.
In this recipe, we’ll guide you through simple steps to bake delicious mini cakes that come out flawless every time. With just a few ingredients and our tips you’ll enjoy hassle-free baking and delightful results that everyone will love.
Ingredients
To craft the perfect Mini Cake Silicone Mold Recipe, precise and quality ingredients are key. Below we break down the essential components to get started, along with optional add-ins to personalize our mini cakes.
Wet Ingredients
- 1/2 cup whole milk, room temperature
- 1/4 cup unsalted butter, melted and cooled
- 1 large egg, at room temperature
- 1 teaspoon pure vanilla extract
Dry Ingredients
- 3/4 cup all-purpose flour, sifted
- 1/2 teaspoon baking powder
- 1/4 teaspoon baking soda
- 1/8 teaspoon salt
- 1/2 cup granulated sugar
| Ingredient | Measurement | Notes |
|---|---|---|
| All-purpose flour | 3/4 cup | Sifted for lighter crumb |
| Baking powder | 1/2 teaspoon | Ensures rise |
| Baking soda | 1/4 teaspoon | Activates leavening |
| Salt | 1/8 teaspoon | Balances sweetness |
| Granulated sugar | 1/2 cup | Sweetens and adds texture |
Optional Add-ins and Toppings
- 1/4 cup mini chocolate chips or chopped nuts
- Zest of 1 lemon or orange for citrus aroma
- 1/4 cup dried cranberries or raisins
- Powdered sugar or glaze for finishing
Tools and Equipment
To achieve perfectly baked mini cakes using a silicone mold, having the right tools and equipment is essential. These items ensure precision, ease, and safety throughout our baking process.
Mini Cake Silicone Mold
The centerpiece of this recipe is the mini cake silicone mold. We recommend using a high-quality, food-grade silicone mold that is:
- Flexible yet sturdy to maintain shape
- Heat resistant up to 450°F (232°C) for even baking
- Non-stick to allow effortless release of cakes
- Dishwasher safe for easy cleanup
Using silicone molds with individual cavities sized around 2–3 inches diameter gives us consistent portion sizes and charming mini cake shapes that impress visually and in taste.
Mixing Bowls and Utensils
Having the right Mixing Bowls and Utensils makes combining ingredients efficient and mess-free.
| Item | Purpose | Recommended Features |
|---|---|---|
| Large mixing bowl | Combine wet and dry ingredients | Sturdy, non-slip base, ample size |
| Medium mixing bowl | For creaming butter and sugar | Smooth interior for easy mixing |
| Silicone spatula | Scrape batter thoroughly | Flexible, heat-resistant |
| Whisk | Aerate wet mixtures | Stainless steel, comfortable handle |
| Measuring cups and spoons | Accurate ingredient measurement | Clear markings, standard sizes |
We rely on these tools to create a smooth, evenly mixed batter essential for the soft and tender texture of our mini cakes.
Oven and Baking Thermometer
Maintaining the correct temperature is crucial for baking flawless mini cakes in silicone molds.
- Oven: Preheat to 350°F (175°C), the ideal temperature to bake mini cakes evenly without overbrowning.
- Baking thermometer: An instant-read or oven-safe thermometer helps verify oven temperature if accuracy is questionable.
We recommend checking oven calibration regularly to avoid undercooked or overly dry cakes. Using both tools ensures our mini cakes bake perfectly with a moist crumb and golden exterior.
Preparation
To bake perfect mini cakes using a silicone mold, proper preparation is essential. Let’s guide you step-by-step to get everything ready for a smooth and successful baking experience.
Preheating the Oven
We start by preheating the oven to 350°F (175°C). This temperature is optimal for baking mini cakes evenly while maintaining a moist texture. Use a reliable oven thermometer to verify the accuracy of your oven’s heat setting.
Tip: Avoid placing the mold in the oven before it reaches the desired temperature to ensure consistent baking.
| Step | Details |
|---|---|
| Set oven temperature | 350°F / 175°C |
| Check oven accuracy | Use baking thermometer |
| Preheat time | 10–15 minutes (until stable) |
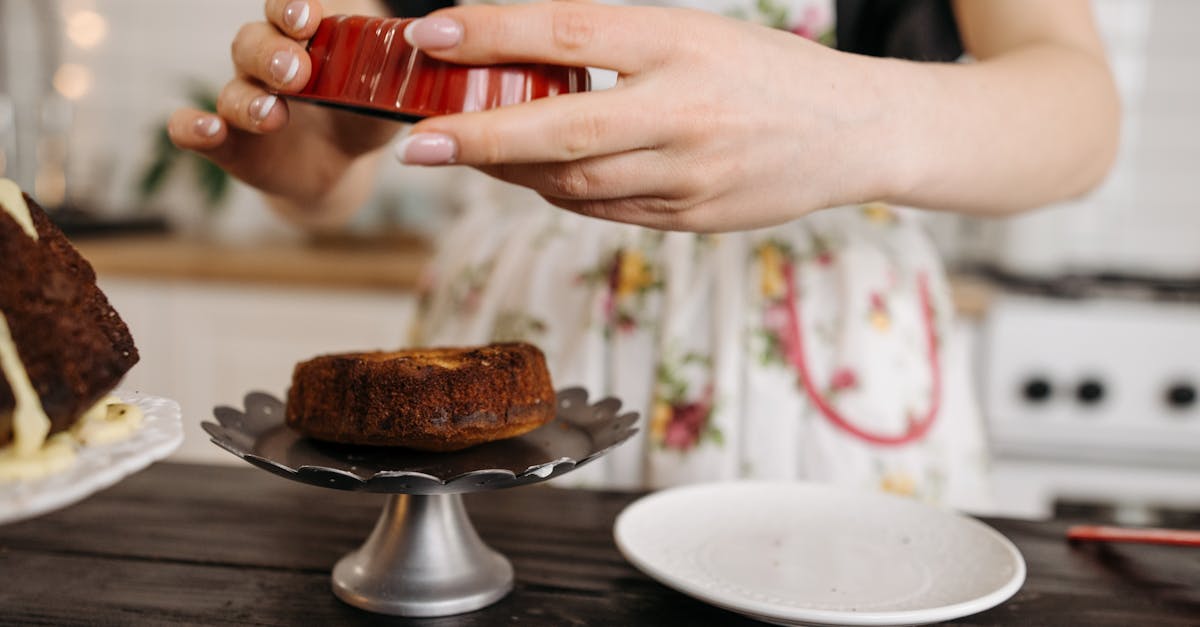
Preparing the Silicone Mold
Before pouring the batter, prepare your silicone mold carefully. While silicone is naturally non-stick, a light greasing helps guarantee easy removal.
- Place the silicone mold on a sturdy baking sheet for stability.
- Lightly grease each cavity with unsalted butter or vegetable oil using a pastry brush or paper towel.
- Optionally, dust with a pinch of flour and tap out the excess for an extra non-stick layer.
Pro Tip: Ensure the mold is completely dry before greasing to avoid moisture affecting cake texture.
Measuring Ingredients
Accurate measuring is crucial for mini cake consistency and texture. Use precise measuring tools and follow the ingredient list exactly.
| Ingredient | Measurement | Notes |
|---|---|---|
| Whole milk | 1 cup (240 ml) | Room temperature |
| Unsalted butter | 1/2 cup (113 g) | Melted and cooled |
| All-purpose flour | 1 1/2 cups (180 g) | Sifted for lightness |
| Granulated sugar | 3/4 cup (150 g) | Fine granules preferred |
| Eggs | 2 large | Room temperature, beaten |
| Baking powder | 1 1/2 tsp | Fresh for best rise |
We recommend leveling off dry ingredients with a knife and using a liquid measuring cup for liquids. Keep your wet and dry ingredients separate until mixing to avoid premature reactions.
With these preparation steps complete we are ready to whisk and pour our batter for baking.
Directions
Follow these precise steps to bake perfectly moist and flavorful mini cakes using your silicone mold. We’ll guide you through mixing the batter, pouring it accurately, baking at the ideal temperature, and removing the cakes effortlessly.
Mixing the Batter
- In a large mixing bowl, combine the dry ingredients: sifted all-purpose flour, baking powder, and salt. Mix thoroughly to ensure even distribution.
- In a separate bowl, whisk the wet ingredients: whole milk, melted unsalted butter, and vanilla extract.
- Gradually add the wet mixture into the dry ingredients, stirring gently with a silicone spatula. Avoid over-mixing to keep the batter light and airy.
- If using optional add-ins like chocolate chips or citrus zest, fold them in carefully at this stage.
- Ensure the final batter has a smooth consistency with no lumps.
Pouring Batter Into the Silicone Mold
- Lightly grease the food-grade silicone mold with a small amount of butter or non-stick spray if desired, although most high-quality molds do not require this.
- Use a small ladle or measuring cup to pour the batter evenly into each cavity.
- Fill each mold cavity about ⅔ full to allow room for the batter to rise.
- Tap the mold gently on the countertop to release any air bubbles, ensuring an even texture.
| Step | Detail |
|---|---|
| Grease Mold | Optional for easier release |
| Filling Level | ⅔ full in each cavity |
| Air Bubble Removal | Tap mold gently before baking |
Baking Instructions
- Preheat the oven to 350°F (175°C) and confirm with a baking thermometer for accuracy.
- Place the filled silicone mold on a sturdy baking sheet to provide stability.
- Bake in the center rack of the oven for 18 to 22 minutes.
- Check doneness by inserting a toothpick into the center of a mini cake; it should come out clean or with a few moist crumbs.
- Avoid opening the oven door frequently to maintain temperature consistency.
Cooling and Removing Mini Cakes
- Once baked, remove the silicone mold from the oven using oven mitts.
- Let the mini cakes cool in the mold for 10 minutes on a wire rack to firm up slightly.
- Gently press the bottom of each mold cavity to pop the cakes out easily without breaking.
- Transfer the mini cakes to the cooling rack to cool completely before decorating or serving.
By handling the cakes gently during this stage, we preserve their shape and texture, ready for your chosen toppings or presentation.
Decorating and Serving
Once our mini cakes have cooled and released perfectly from the flexible silicone mold, it’s time to transform them into eye-catching treats ready to impress. We will explore creative ways to frost, garnish, and store these delightful desserts to preserve their freshness and flavor.
Frosting Ideas
A well-chosen frosting elevates the texture and taste of our mini cakes silicone mold recipe. Here are some popular options to consider:
- Classic Buttercream: Rich and creamy, this frosting pairs well with vanilla, chocolate, or citrus-flavored mini cakes. Use softened unsalted butter, powdered sugar, and a splash of vanilla extract for a smooth finish.
- Cream Cheese Frosting: Slightly tangy and luscious, perfect for carrot or red velvet mini cakes. Combine softened cream cheese, butter, powdered sugar, and vanilla.
- Ganache Glaze: For a sleek, glossy topping, melt equal parts heavy cream and dark chocolate, then pour it over the cakes once slightly cooled.
- Whipped Cream Topping: Light and airy, ideal for fruit-flavored mini cakes. Sweeten heavy whipping cream with powdered sugar and vanilla, then whip to soft peaks.
| Frosting Type | Key Ingredients | Best Paired With | Flavor Profile |
|---|---|---|---|
| Buttercream | Unsalted butter, powdered sugar, vanilla | Vanilla, chocolate, citrus | Rich, smooth, sweet |
| Cream Cheese | Cream cheese, butter, powdered sugar | Carrot, red velvet | Tangy, creamy |
| Ganache | Dark chocolate, heavy cream | Chocolate, coffee | Decadent, glossy |
| Whipped Cream | Heavy cream, powdered sugar, vanilla | Fruit flavors | Light, fluffy, mildly sweet |
Garnishing Tips
To add visual appeal and texture to our mini cakes use garnishes thoughtfully:
- Fresh Fruit Slices: Strawberries, blueberries, or kiwi add vibrant color and natural sweetness.
- Edible Flowers: Pansies or violets bring elegance and a fresh floral note.
- Chopped Nuts: Toasted almonds, pistachios, or pecans enrich each bite with a satisfying crunch.
- Powdered Sugar Dusting: A light dust brightens the surface and complements rich frostings.
- Chocolate Shavings or Sprinkles: Use for a festive look and additional flavor contrast.
“Garnishing is where creativity meets presentation, so have fun experimenting to match the season or occasion.”
Storage Recommendations
To maintain the freshness and quality of our mini cakes after decorating, follow these storage guidelines:
| Storage Method | Ideal Duration | Conditions | Notes |
|---|---|---|---|
| Room Temperature | 1-2 days | Covered loosely | Best if unfrosted or with whipped cream frosting to prevent melting |
| Refrigerator | Up to 5 days | Airtight container | Prevents drying out; bring to room temp before serving |
| Freezer | Up to 1 month | Wrapped tightly in plastic wrap, then foil | Thaw overnight in refrigerator; frost after thawing if needed |
Proper storage ensures the mini cakes stay moist and flavorful while preserving the beautiful decorating work we’ve done.
Make-Ahead Tips
Preparing our mini cakes in advance lets us enjoy delicious treats anytime while maintaining their fresh, moist texture. Below are essential tips for freezing and reheating our mini cake silicone mold recipe results perfectly.
Freezing Mini Cakes
Freezing is a fantastic way to preserve the flavor and texture of our mini cakes for up to 3 months. Follow these steps to freeze like a pro:
- Cool completely: Ensure cakes are fully cooled before freezing to prevent sogginess.
- Wrap individually: Use plastic wrap to tightly wrap each mini cake. This protects against freezer burn.
- Use airtight containers: Place wrapped cakes inside an airtight freezer-safe container or heavy-duty freezer bags.
- Label and date: Mark packages with the freezing date to track freshness.
| Step | Action | Purpose |
|---|---|---|
| Cooling | Cool cakes 100% before freezing | Prevents moisture buildup |
| Wrapping | Wrap each cake tightly in plastic wrap | Protects flavor and shape |
| Container Storage | Place in airtight container or freezer bag | Prevents freezer burn |
| Labeling | Write the date and contents on packaging | Easy tracking of storage duration |
Tip: For best results, thaw mini cakes in the refrigerator overnight before serving or decorating.
Reheating Instructions
To enjoy our mini cakes fresh out of the freezer, reheating them gently maintains their soft crumb and rich flavor. Use one of the following methods:
- Microwave (quick)
Place a mini cake on a microwave-safe plate. Heat on medium power for 15-20 seconds. Check warmth and repeat in 5-second intervals as needed. Avoid overheating, which dries out the cake.
- Oven (recommended for best texture)
Preheat the oven to 300°F (150°C). Place mini cakes on a baking tray lined with parchment paper. Cover lightly with foil to retain moisture. Heat for 10-15 minutes until warmed through.
- Room temperature thaw
If time allows, thaw frozen mini cakes on the counter for 1-2 hours before serving. This gently brings them to the perfect softness.
Important: Avoid reheating mini cakes multiple times to maintain quality and freshness.
“Reheating gently preserves the delicate balance of moist crumb and tender crumb in our mini cakes baked in silicone molds.”
Using these Make-Ahead Tips ensures that every bite of our mini cakes delivers the same delicious experience as freshly baked ones.
Conclusion
Using mini cake silicone molds opens up endless opportunities to bake delightful treats with ease and precision. With the right ingredients, tools, and techniques, we can create perfectly portioned cakes that look as good as they taste.
By following simple steps and adding personal touches through decorations and flavors, baking mini cakes becomes a fun and rewarding experience. Plus, with make-ahead and storage tips, we can enjoy these sweet bites anytime without compromising freshness.
Let’s keep experimenting and savoring every delicious mini cake we bake!
Frequently Asked Questions
What are the benefits of using silicone molds for baking mini cakes?
Silicone molds are flexible, heat-resistant, and non-stick, ensuring even baking and easy cake removal. They allow creative shapes and portion control, making baking mini cakes convenient and enjoyable.
What ingredients are essential for baking mini cakes?
Key ingredients include whole milk, unsalted butter, flour, and sugar. These provide moisture, fat, structure, and sweetness necessary for a soft and flavorful mini cake.
Can I add extra flavors or toppings to mini cakes?
Yes, optional add-ins like chocolate chips or citrus zest can personalize flavor. Toppings such as powdered sugar, fresh fruit, or ganache enhance appearance and taste.
What tools do I need to bake mini cakes using silicone molds?
You’ll need a food-grade silicone mold, mixing bowls, a silicone spatula, measuring cups, and an oven preheated to 350°F (175°C) with a baking thermometer for accurate temperature control.
How should I prepare the silicone mold before baking?
Lightly grease the silicone mold to ensure easy cake removal without sticking, even though silicone is naturally non-stick.
How do I mix the batter properly for mini cakes?
Mix dry ingredients in one bowl and wet in another, then gently combine to avoid over-mixing. Fold in any optional add-ins carefully.
What is the recommended baking temperature and time for mini cakes?
Bake mini cakes at 350°F (175°C). Baking time varies by mold size, but checking for doneness with a toothpick after about 15-20 minutes is best.
How do I remove mini cakes from the silicone mold without damaging them?
Allow cakes to cool slightly, then gently flex the mold to pop cakes out. This preserves their shape and texture.
What decorating options are best for mini cakes?
Popular frostings include buttercream, cream cheese, ganache, and whipped cream. Garnishes like fresh fruit, nuts, or edible flowers add visual appeal.
How should I store mini cakes to keep them fresh?
Store at room temperature for up to two days, refrigerate for up to a week, or freeze for longer storage. Wrap tightly to prevent drying out.
Can I make mini cakes ahead of time and freeze them?
Yes, cool completely, wrap individually in plastic wrap, place in airtight containers, and label. Thaw gently or reheat carefully before serving.