
There’s something timeless about jotting down recipes in a beautifully crafted book. A custom leather recipe book combines elegance with practicality, making it the perfect way to preserve our favorite dishes. It’s more than just a notebook; it’s a keepsake that can be passed down through generations.
We love how leather adds a touch of sophistication while offering durability to withstand kitchen spills and daily use. Whether we’re organizing family recipes or creating a personalized gift, this custom recipe book helps us keep culinary memories alive in style. Let’s explore how to create one that’s uniquely ours and built to last.
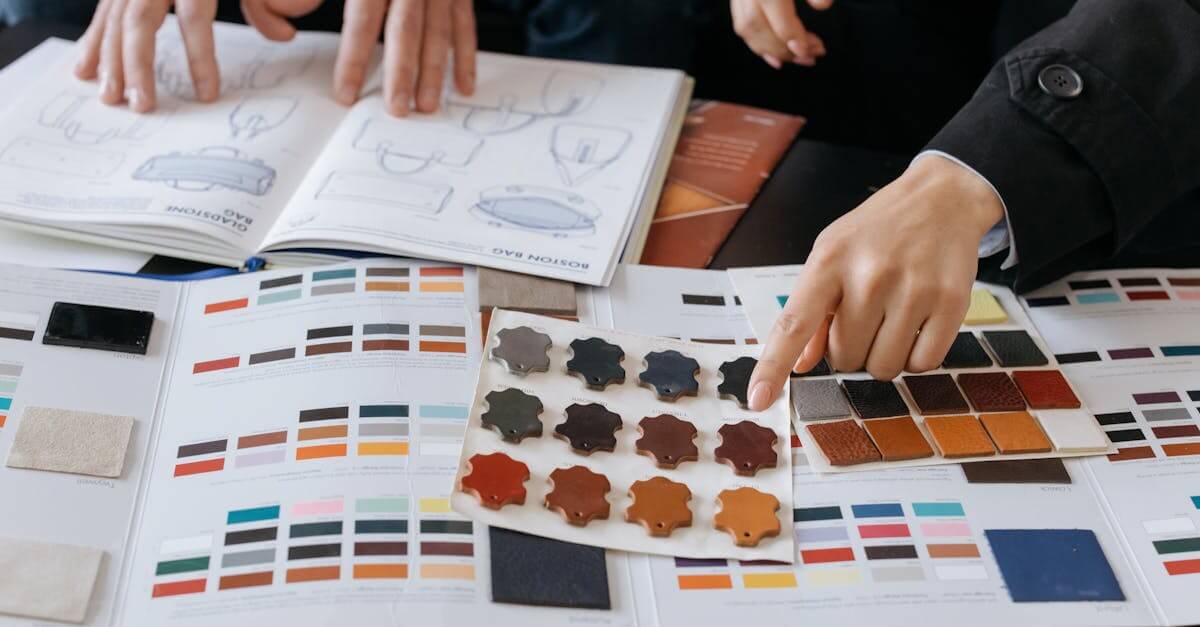
Materials Needed for Custom Leather Recipe Book
To craft a truly custom leather recipe book that embodies both elegance and durability, we need to gather high-quality materials carefully chosen for longevity and aesthetic appeal. Below, we outline the essential components and tools that set the foundation for our handcrafted keepsake.
Types of Leather Suitable for Recipe Books
Selecting the right leather is critical to ensure our recipe book withstands frequent kitchen use while maintaining its charm. Here are the top types we recommend:
| Leather Type | Description | Ideal Properties |
|---|---|---|
| Full-Grain Leather | The highest quality leather, showing natural markings | Durable, ages beautifully, water-resistant |
| Top-Grain Leather | Slightly sanded to remove imperfections | Smooth finish, strong, flexible |
| Vegetable-Tanned Leather | Tanned using natural tannins from plants | Rich patina over time, eco-friendly |
| Suede Leather | Soft, napped finish from the underside of the hide | Stylish but less resistant to spills |
| Distressed Leather | Treated for an aged, rugged look | Unique character, good durability |
We prefer full-grain or vegetable-tanned leather for their resilience and ability to develop a beautiful patina, perfectly complementing the timeless nature of our recipes.
Additional Supplies and Tools
Beyond leather, several specialized supplies and tools are essential for assembling and personalizing our recipe book:
- Acid-free paper or cardstock — ensures recipes resist yellowing over time.
- Binding materials — like strong thread, rivets, or screws for secure assembly.
- Cutting tools — rotary cutter, leather scissors, or craft knives for precision.
- Leather adhesive — flexible and waterproof glue for attaching pockets or embellishments.
- Burnishing tools — to smooth and polish leather edges for a professional look.
- Stamping and embossing set — for custom monograms or designs to add personality.
- Rulers and measuring tape — for accurate sizing of leather panels and pages.
- Hole punch — for binding holes, especially if using rings or cord.
“High-quality materials combined with our careful craftsmanship make the custom leather recipe book more than a kitchen accessory — it becomes a treasured heirloom.”
By assembling these materials, we set the stage to personalize our recipe book with both style and function, ready to hold our cherished culinary memories for years to come.
Preparing the Leather Cover
Creating a custom leather recipe book starts with preparing the leather cover carefully. This step ensures our cover is both functional and visually appealing, setting the foundation for a durable, elegant recipe book.
Measuring and Cutting the Leather
Accurate measuring and cutting are crucial for a perfect fit and professional finish. Here’s how to approach this step:
- Measure the dimensions of the recipe book pages including the binding thickness.
- Add an extra 1 inch (2.5 cm) margin on all sides to allow for wrapping and stitching.
- Use a steel ruler and a rotary cutter or sharp utility knife for precision cuts.
- Place the leather on a self-healing cutting mat to protect your work surface.
| Item | Measurement Details |
|---|---|
| Recipe book page size | e.g., 8.5″ x 11″ |
| Margin for leather cover | +1 inch (all sides) |
| Final leather piece size | Page size + 2 inches total width and height |
We recommend cutting the leather thicker than 2oz (approximately 0.8 mm) for durability without sacrificing flexibility. Ensuring clean edges now means no unsightly fraying later.
Conditioning and Treating the Leather
Conditioning the leather prepares it to withstand kitchen wear and enhances its natural beauty:
- Use a high-quality leather conditioner to soften the leather and prevent cracking.
- Apply conditioner evenly with a soft cloth using small circular motions.
- Let the leather absorb the conditioner for about 30 minutes.
- Optionally, treat the leather with a waterproofing spray to protect against spills.
- For a polished look, buff the surface lightly with a dry microfiber cloth.
Tip: Conditioning also brings out the rich tones of full-grain or vegetable-tanned leather, emphasizing the unique texture and making your recipe book truly stand out.
By carefully measuring, cutting, and conditioning the leather, we ensure our custom leather recipe book cover provides lasting protection and elegant charm, ready to safeguard treasured family recipes.
Designing the Recipe Book Layout
Designing the layout of our custom leather recipe book is a crucial step that ensures functionality and visual appeal. A thoughtfully planned layout balances aesthetics with usability, making it easy to access favorite recipes while showcasing our personal culinary journey.
Choosing Page Size and Format
Selecting the right page size and format sets the foundation for our recipe book’s design. We want a size that fits comfortably on kitchen counters yet provides ample space for writing and photos. Common sizes include:
| Page Size (inches) | Description | Ideal Use |
|---|---|---|
| 6 x 9 | Compact and portable | For short recipes or quick notes |
| 8.5 x 11 | Standard letter size | Ideal for detailed recipes |
| 7 x 10 | Balanced medium size | Combines portability and space |
We recommend using 8.5 x 11 inches for a classic, easy-to-read format that accommodates ingredient lists, instructions, and photographs without crowding the page. Choosing a portrait orientation supports traditional reading flow, while landscape can be used for wider recipe layouts or incorporating tables.
Print on acid-free, high-quality paper to prevent yellowing and ensure durability, especially in a kitchen environment.
Creating Templates for Recipe Pages
To maintain consistency and make filling out the book enjoyable, creating custom templates for recipe pages is essential. Our templates should include the following structured sections:
- Recipe Title: Highlighted in bold or decorative font for immediate recognition.
- Preparation Time and Servings: Positioned near the top for quick reference.
- Ingredients List: Clear bullet points or numbered lists for easy scanning.
- Step-by-Step Instructions: Numbered steps emphasizing concise, actionable language.
- Notes or Tips: Space reserved for personal modifications or cooking advice.
- Photo Placeholder: Optional area to insert a picture of the finished dish.
Here is a sample layout outline for clarity:
| Section | Description |
|---|---|
| Recipe Title | Bold, centered at the top |
| Prep Time & Serves | Small font, below the title |
| Ingredients | Left-aligned, bulleted list |
| Instructions | Numbered list, clear and concise steps |
| Notes | Italicized font, at page bottom or side margin |
| Photo Spot | Box or frame for recipe photo |
Using design software or printable templates, we can customize fonts, borders, and backgrounds to enhance the leather-bound book’s rustic or modern charm. Maintaining a consistent style throughout provides cohesion that elevates the overall presentation.
With these layout choices, our custom leather recipe book will not only protect our culinary heritage but also invite daily use and happiness in every meal creation.
Printing and Preparing Recipe Pages
To bring our custom leather recipe book to life, we focus on Printing and Preparing Recipe Pages with precision and quality. Choosing the right materials and techniques ensures our recipes remain clear and beautiful for years of use.
Selecting Paper Type and Weight
Selecting the right paper type and weight is essential for durability and easy handling in the kitchen. We want pages that can withstand frequent use, possible spills, and resist tearing.
- Acid-Free Paper: Prevents yellowing and preserves recipes longer.
- Weight: We recommend 80-100 lb (120-150 gsm) paper for a sturdy, professional feel that lies flat inside the recipe book.
- Finish: A matte or soft satin finish helps prevent glare and allows for easy writing or notes directly on the page.
| Paper Attribute | Recommendation | Purpose |
|---|---|---|
| Type | Acid-Free | Long-lasting, prevents fading |
| Weight | 80-100 lb (120-150 gsm) | Durable yet flexible |
| Finish | Matte or Satin | Reduces glare, writable surface |
Choosing this combination makes every recipe page feel substantial and practical, matching the elegance of the custom leather recipe book cover.
Printing Techniques for Recipe Pages
How we print our recipe pages directly impacts the clarity and longevity of the book.
- Inkjet Printing: Ideal for vibrant photos and color-rich layouts but may require quick drying time.
- Laser Printing: Provides sharp text and faster drying, perfect for text-heavy pages with minimal color.
- Double-Sided Printing: Saves space and creates a compact book; ensure your printer supports bleed-through prevention.
- High-Quality Resolution: Use at least 300 dpi for crisp text and images.
- Proofreading Before Printing: Always double-check pages for typos and layout consistency.
To protect printed pages:
- Use an archival spray fixative to seal inkjet prints from smudging.
- Optionally, insert transparent page protectors for extra spill resistance while preserving the texture and feel.
By carefully selecting paper and applying appropriate printing techniques, we ensure the recipe pages harmonize perfectly with our custom leather cover, creating a lasting kitchen companion.
Assembling the Custom Leather Recipe Book
Now that we have our carefully crafted leather cover and beautifully printed recipe pages, the final step is Assembling the Custom Leather Recipe Book. This process requires attention to detail to ensure durability and ease of use while maintaining the elegance that makes the book a treasured kitchen companion.
Binding Methods
Choosing the right binding method is crucial for both the functionality and aesthetic appeal of our custom leather recipe book. Here are our top recommendations:
| Binding Method | Description | Pros | Cons |
|---|---|---|---|
| Screw Post Binding | Uses metal posts to secure pages through punched holes | Easy to add/remove pages, sturdy | Slightly bulkier spine |
| Sewn Binding | Pages are stitched together with durable thread | Classic look, very strong | More labor-intensive |
| Ring Binder | Uses metal rings to hold pages, often with pre-punched holes | Flexible, allows complete page replacement | Less formal look, can wear out rings |
| Glue Binding (Perfect Binding) | Pages glued into spine with strong adhesive | Sleek and professional appearance | Less durable for heavy kitchen use |
We prefer screw post binding for its balance of durability and flexibility. It allows us to update or add new recipes over time, making the book a dynamic collection.
Attaching the Leather Cover to Pages
Once we finalize the binding method, attaching the leather cover to our recipe pages carefully ensures longevity and usability.
Step-by-step instructions for screw post binding:
- Punch holes through the acid-free recipe pages and leather cover using a leather hole punch and paper hole punch aligned precisely.
- Insert metal screw posts through the holes starting with the leather cover, then all recipe pages, and finally the back cover piece.
- Secure posts tightly with the screw caps to firmly hold all components together without restricting page turning.
- Optionally, add decorative leather corners on the cover edges for enhanced protection and vintage appeal.
- Apply a light coat of leather conditioner around the punched holes to maintain flexibility and prevent tearing.
Tips for a professional finish:
- Use a ruler and marking pencil to ensure perfectly aligned holes.
- Test hole placement by temporarily assembling a few pages before final punches.
- If the leather cover is thicker than 2oz, consider using longer posts for adequate space.
By following these steps, we transform our high-quality materials into a cohesive, elegant custom leather recipe book that stands the test of daily kitchen use and becomes an heirloom piece cherished across generations.
Adding Personal Touches and Customizations
To truly make our custom leather recipe book one-of-a-kind, incorporating personal touches and customizations elevates both its functionality and sentimental value. Let’s explore creative ways to imprint our culinary identity on this treasured keepsake.
Engraving and Embossing Options
Engraving and embossing allow us to add elegant, permanent personalization to the leather cover. These traditional craftsmanship techniques create a distinctive tactile and visual effect.
- Engraving uses precision tools or lasers to etch detailed designs or text into the leather surface. This method works best for:
- Names or initials
- Special dates (e.g., wedding anniversary, first recipe)
- Decorative borders or motifs (floral, kitchen-themed icons)
- Embossing presses a raised or recessed design into the leather using custom metal plates or stamps. This adds:
- A sophisticated, dimensional look
- Durable letterpress-style text or symbols
- Classic monograms or recipe book titles
| Customization Type | Description | Ideal Uses | Visual/Texture Effect |
|---|---|---|---|
| Engraving | Laser or tool etching | Text, detailed illustrations | Fine, precise etched lines |
| Embossing | Pressed raised or recessed | Titles, monograms, simple logos | Raised or indented textures |
We recommend selecting fonts and design elements that complement the leather’s natural grain and color, enhancing readability and style. For a truly personal touch, consider combining both techniques with tasteful, subtle accents.
Adding Pockets, Bookmarks, and Closures
Beyond aesthetics, thoughtful functional additions make our custom leather recipe book even more practical and user-friendly in the kitchen.
- Pockets:
Sew or glue a leather or fabric pocket inside the front or back cover to hold:
- Loose recipe cards
- Shopping lists
- Notes or clippings
Attach a leather ribbon or cord bookmark to mark favorite or frequently used recipes for quick access during cooking.
- Closures:
Secure the book with stylish and sturdy closures such as:
- Leather straps with snap buttons
- Magnetic clasps embedded in the cover
- Elastic bands for a flexible hold
| Feature | Purpose | Recommended Materials | Benefits |
|---|---|---|---|
| Pockets | Storage of supplementary items | Leather, fabric, or vinyl | Keeps loose papers organized |
| Bookmarks | Marks key recipes | Leather ribbons, cords | Easy retrieval during cooking |
| Closures | Protects pages and enhances design | Leather straps, snaps, magnets | Keeps book securely closed |
Implementing these details boosts the custom leather recipe book’s usability without compromising its elegance. Each element can be tailored in color, size, and style to harmonize perfectly with the leather cover and overall theme.
Care and Maintenance of Your Custom Leather Recipe Book
Proper care and maintenance of your custom leather recipe book ensure it remains both beautiful and functional for years to come. Here are the essential steps to preserve its quality and extend its lifespan:
Regular Cleaning
- Gently dust the leather cover with a soft, dry cloth weekly to remove surface dirt.
- For deeper cleaning use a damp cloth with a small amount of mild leather cleaner or saddle soap. Avoid using excess water which can damage leather.
- Always test any product on a small inconspicuous area first to ensure no discoloration occurs.
Conditioning the Leather
Leather naturally dries out over time especially in dry kitchen environments. Conditioning restores its suppleness and prevents cracking.
- Apply a high-quality leather conditioner every 3 to 6 months.
- Use a clean soft cloth to apply conditioner in circular motions.
- Let the leather absorb the conditioner for about 30 minutes then buff gently with a dry cloth to restore its shine.
Protection Against Spills and Stains
In a kitchen setting spills are inevitable, but you can minimize permanent damage:
- Wipe liquids off the surface immediately with a dry cloth.
- Consider applying a waterproofing spray specifically made for leather. This creates a protective barrier against moisture and stains.
- If stains occur avoid harsh chemicals or scrubbing; instead use a leather stain remover following the manufacturer’s instructions carefully.
Storage Tips
Proper storage protects your custom leather recipe book when not in use:
- Store it upright on a bookshelf away from direct sunlight. Prolonged sun exposure may cause fading.
- Keep it in a cool, dry place to avoid mold and mildew growth.
- Avoid placing heavy objects on top to prevent deforming the leather or pages.
Handling Guidelines
- Wash hands before handling to prevent transferring oils and dirt.
- Open and close the book gently to avoid stressing the binding or leather spine.
- Use bookmarks rather than folding page corners to preserve paper integrity.
| Care Aspect | Recommended Frequency | Key Tip |
|---|---|---|
| Dusting | Weekly | Use a soft dry cloth only |
| Cleaning | Every few months | Use mild leather cleaner; test first |
| Conditioning | Every 3 to 6 months | Apply conditioner and buff gently |
| Waterproofing Spray | Annually (optional) | Protects against spills and stains |
| Proper Storage | Continuous | Keep away from sunlight and moisture |
| Handling | Every use | Wash hands and open carefully |
“A well-maintained leather recipe book not only safeguards your cherished recipes but becomes a treasured heirloom full of culinary memories.”
By following these care and maintenance steps for your custom leather recipe book we ensure it continues to look elegant and withstand daily kitchen use for generations to come.
Conclusion
Crafting a custom leather recipe book is more than just a project—it’s a way to celebrate and preserve our culinary stories. By combining quality materials with thoughtful design and personalization, we create a keepsake that’s both beautiful and practical.
With proper care, this book will stand the test of time, becoming a treasured part of our kitchen and family traditions. It’s an investment in memories that we can enjoy every day and pass down for generations to come.
Frequently Asked Questions
What makes custom leather recipe books a good choice for preserving recipes?
Custom leather recipe books combine elegance and durability, making them ideal for everyday kitchen use. They protect recipes from spills and wear, serve as cherished keepsakes, and can be passed down through generations.
What types of leather are best for a custom recipe book?
Full-grain and vegetable-tanned leathers are preferred for their durability and aesthetic appeal. A thickness of over 2oz ensures the cover is sturdy enough for frequent handling.
What materials are needed to make a custom leather recipe book?
You’ll need high-quality leather, acid-free paper, binding supplies (like screw posts), cutting tools, leather conditioner, and optional stamping or embossing kits for personalization.
How should I prepare the leather cover for my recipe book?
Measure and cut the leather precisely to fit your chosen page size. Condition the leather to enhance beauty and durability, and consider waterproofing to protect against kitchen spills.
What is the recommended page size and layout for a recipe book?
An 8.5 x 11-inch page size is ideal for readability and space. Include sections for the recipe title, prep time, ingredients, steps, notes, and a photo placeholder for a balanced, user-friendly layout.
What type of paper and printing method should I use?
Use acid-free paper weighing 80-100 lb with a matte or satin finish to reduce glare. Laser printing is recommended for clarity and longevity, but inkjet is also acceptable if using quality inks.
What binding method works best for durability and appearance?
Screw post binding is ideal due to its strength and flexibility. It allows easy addition or removal of pages while maintaining a professional, elegant finish.
How can I personalize my custom leather recipe book?
Add engravings or embossing with names, dates, or motifs on the cover. Incorporate practical features like pockets, bookmarks, and closures to enhance usability and personal connection.
What maintenance does a leather recipe book require?
Regular cleaning, conditioning, and protecting from spills keep the leather supple and beautiful. Store it properly and treat stains quickly to ensure longevity.
Why is caring for the leather recipe book important?
Proper care preserves the book’s durability and appearance, ensuring it remains a treasured heirloom full of culinary memories for generations.