
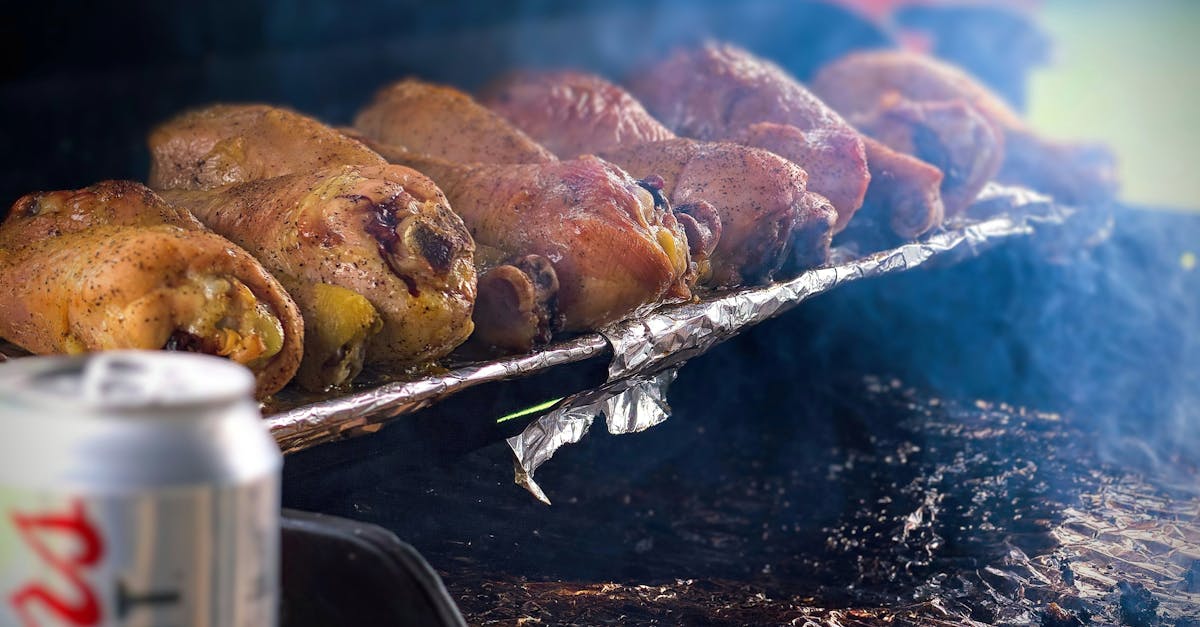
Gluten-free sandwiches don’t have to be boring or bland. Whether you’re avoiding gluten for health reasons or simply want to try something new, these recipes bring flavor and creativity to your lunch or snack time. We’ve gathered a variety of tasty options that use delicious gluten-free breads and fresh ingredients to keep every bite satisfying.
Ingredients
To craft delicious gluten-free sandwiches that satisfy every craving, we focus on selecting the right combinations of gluten-free bread, fresh fillings, and vibrant sauces. Below, we break down the essentials for building irresistible sandwiches without gluten.
Gluten-Free Bread Options
Choosing the perfect gluten-free bread foundation is key to sandwich success. Here are some popular choices we recommend that offer taste and texture similar to traditional bread:
- Gluten-free sandwich bread (made from rice flour, tapioca, or sorghum)
- Lettuce wraps (crisp and refreshing, perfect for low-carb options)
- Corn tortillas (soft and pliable, great for wraps or pressed sandwiches)
- Gluten-free bagels or rolls (for hearty, filling sandwiches)
- Seeded gluten-free wraps (adds crunch and flavor)
| Type | Texture | Best For |
|---|---|---|
| Gluten-free sandwich bread | Soft, slightly chewy | Classic sandwiches |
| Lettuce wraps | Crisp, fresh | Light, low-carb options |
| Corn tortillas | Soft, flexible | Wraps, quesadilla-style |
| Gluten-free bagels/rolls | Dense, chewy | Hearty, robust fillings |
| Seeded gluten-free wraps | Slightly crunchy | Flavorful veggie wraps |
Fillings and Toppings
Now that our bread choice is ready, we layer in vibrant, tasty fillings to boost flavor and texture. The variety allows us to create sandwiches that suit all preferences:
- Fresh vegetables: lettuce, tomatoes, cucumbers, avocado, sprouts, roasted peppers
- Proteins: grilled chicken, turkey breast, tuna salad (with gluten-free mayo), hard-boiled eggs, smoked salmon
- Cheeses: sharp cheddar, creamy goat cheese, sliced mozzarella, dairy-free alternatives
- Crunch elements: pickles, olives, nuts (like walnuts or pecans), gluten-free crispy bacon
- Herbs & spices: basil, cilantro, dill, freshly ground black pepper
Sauces and Condiments
A well-chosen sauce elevates every gluten-free sandwich, adding moisture and bold flavors. We prefer using gluten-free condiments to keep the sandwiches safe and flavorful:
- Mayonnaise (regular or gluten-free flavored varieties)
- Mustard (whole grain, Dijon, or honey mustard)
- Hummus (classic or flavored like roasted red pepper)
- Pesto (basil or sun-dried tomato, check for gluten-free status)
- Gluten-free BBQ sauce
- Avocado spread or guacamole
- Vinaigrette dressings (light balsamic or lemon-based)
Pro Tip: Always verify the gluten-free certification on store-bought sauces and condiments to avoid hidden gluten sources and keep your sandwiches truly gluten-free.
Equipment Needed
To craft the perfect gluten free sandwiches, having the right equipment is essential. This ensures efficiency, safety, and true enjoyment while preparing these flavorful creations. Here is a detailed list of tools we recommend for assembling our favorite gluten-free sandwiches:
- Cutting Board: Use a clean, sturdy cutting board dedicated to gluten-free food prep to avoid cross-contamination.
- Sharp Knife: A high-quality chef’s knife or serrated knife helps slice gluten-free bread and fresh ingredients cleanly.
- Spreader or Butter Knife: For smoothly applying gluten free sauces and spreads like hummus or pesto.
- Toaster or Panini Press: Choose a toaster that can handle gluten-free bread without crumbs mixing or a panini press for warm pressed sandwiches.
- Mixing Bowls: For tossing vegetables, mixing fillings, or preparing condiments.
- Measuring Spoons: Precision is key to flavor balancing, especially for homemade sauces or spice blends.
- Gluten-Free Wrap Warmer (Optional): Keeps gluten-free wraps warm and pliable for folding or rolling.
| Equipment | Purpose | Notes |
|---|---|---|
| Cutting Board | Safe cutting surface | Dedicated gluten-free board advised |
| Sharp Knife | Slicing bread and ingredients | Serrated blade preferred for bread |
| Spreader/Butter Knife | Applying spreads and sauces | Smooth and precise application |
| Toaster/Panini Press | Toasting or pressing sandwiches | Avoid cross-contamination |
| Mixing Bowls | Ingredient preparation and mixing | Various sizes recommended |
| Measuring Spoons | Accurate measurement of sauces and spices | Critical for consistent flavor |
| Wrap Warmer (Optional) | Keeps gluten-free wraps soft and warm | Ideal for soft wrap sandwiches |
Pro Tip: To maintain gluten free integrity, always clean all equipment thoroughly before use, especially if shared with gluten-containing foods.
By using the right tools, we ensure our gluten free sandwich experience is seamless and delicious every time.
Make-Ahead Tips
Preparing gluten-free sandwiches in advance saves time and ensures a quick, satisfying meal whenever hunger strikes. Here are our top make-ahead strategies to keep your sandwiches fresh, flavorful, and ready to enjoy.
Choose the Right Bread for Storage
- Use dense gluten-free sandwich bread or seeded gluten-free wraps for better texture retention.
- Avoid bread types prone to drying out quickly, such as gluten-free bagels or very soft rolls.
- Store bread in airtight containers or resealable freezer bags to maintain moisture.
Prepare Ingredients Separately
- Slice and portion fillings like vegetables, proteins, and cheeses ahead of time.
- Keep wet ingredients (tomatoes, pickles, cucumbers) separate from bread to prevent sogginess.
- Store sauces and condiments in small containers for easy assembly.
Optimal Assembly Timing
- Assemble sandwiches just before eating for best freshness.
- For pre-assembled sandwiches, wrap tightly in plastic wrap and refrigerate.
- Let sandwiches rest at room temperature for 10 minutes before consumption if refrigerated.
Freezing Guidelines
| Item | Freezing Method | Thawing Instructions | Notes |
|---|---|---|---|
| Gluten-Free Bread | Wrap tightly in plastic, place in bag | Thaw at room temperature, toast before use | Maintains texture if properly stored |
| Prepared Sandwiches | Wrap individually, freeze up to 1 month | Thaw in fridge overnight, avoid refreezing | Best for heartier ingredients |
| Sauces/Condiments | Freeze in ice cube trays | Defrost cubes as needed | Keeps sauces fresh and portioned |
Additional Tips
- Use lettuce wraps or sturdy greens as alternatives for sandwiches intended for next-day consumption—they keep ingredients crisp and gluten-free.
- Apply a thin layer of butter or mayonnaise on bread before adding wet ingredients as a moisture barrier.
- Label all containers with preparation dates to ensure freshness and food safety.
“Planning ahead with proper storage and mindful assembly transforms our gluten-free sandwiches from ordinary to extraordinary — always fresh, always delicious.”
By mastering these make-ahead tips, we guarantee a stress-free sandwich experience without compromising on texture or taste.
Instructions
Follow these clear steps to create delicious gluten-free sandwiches that are flavorful and fresh every time.
Preparing the Bread
- Choose your gluten-free bread type based on the sandwich style (e.g. sandwich bread, seeded wraps, or corn tortillas).
- If using store-bought gluten-free bread, toast lightly to improve texture and prevent sogginess.
- For wraps, warm them gently in a microwave or on a skillet for 10–15 seconds to increase pliability.
- Always use a dedicated cutting board and sharp knife for bread to avoid cross-contamination.
- If you prep sandwiches in advance, store bread in airtight containers or resealable bags to keep moisture locked in.
| Bread Type | Preparation Tip | Storage Advice |
|---|---|---|
| Sandwich Bread | Lightly toast before assembling | Airtight container at room temperature |
| Seeded Gluten-Free Wraps | Warm slightly before use | Plastic wrap or container to avoid drying |
| Corn Tortillas | Heat briefly on dry skillet | Wrap in a clean towel to retain softness |
Assembling the Sandwich
- Lay out your gluten-free bread or wrap on the clean surface.
- Spread your chosen gluten-free sauce or condiment evenly using a spreader to add moisture and flavor.
- Layer fresh fillings: start with proteins, then add cheeses, crisp vegetables, and herbs for vibrant taste and texture balance.
- Add crunchy elements like nuts or seeds last to maintain their texture.
- Season with salt, pepper, or spices to your preference.
- Close the sandwich carefully to avoid fillings slipping out.
Pro Tip: Keep wet ingredients (like tomatoes or pickles) separate until just before eating to prevent bread from becoming soggy.
Optional Cooking or Toasting
- Toast or grill your sandwich in a toaster oven, panini press, or skillet for 3 to 5 minutes until golden and warm through.
- Use light pressure when pressing the sandwich to avoid crushing delicate gluten-free bread.
- Wrap the sandwich in parchment paper or foil during toasting to retain moisture and ease cleanup.
- For wraps, briefly warm after assembly to meld flavors without making the wrap too soft.
By following these steps we can ensure every gluten-free sandwich is perfect in taste and texture without compromise.
Directions for Popular Gluten Free Sandwich Recipes
Here are step-by-step directions for some of our favorite gluten free sandwiches. These recipes combine delicious fresh ingredients with perfect gluten-free bread options to create satisfying meals any time of day.
Classic Turkey and Avocado Sandwich
- Select your bread: Choose two slices of dense gluten-free sandwich bread for sturdiness.
- Toast the bread: Lightly toast the slices to improve texture and add crunch.
- Prepare the avocado: Slice half an avocado thinly, sprinkling with a pinch of salt and pepper.
- Layer fillings:
- Spread 1 tablespoon of gluten-free mayonnaise evenly on both toasted bread slices.
- Add 3-4 slices of roasted turkey breast on one slice.
- Layer the avocado slices over the turkey.
- Add 2 tomato slices and a handful of fresh spinach leaves.
- Assemble the sandwich: Place the other slice of bread on top with the mayo side down.
- Serve or wrap: For extra warmth, press the sandwich briefly in a panini press. Serve immediately or wrap tightly for later.
Vegan Chickpea Salad Sandwich
- Choose the base: Use a seeded gluten-free wrap or gluten-free sandwich bread.
- Make the chickpea salad:
- Rinse and drain 1 cup canned chickpeas.
- Mash chickpeas with a fork until chunky.
- Mix in 2 tablespoons vegan mayonnaise, 1 teaspoon Dijon mustard, chopped celery (1/4 cup), and chopped red onion (2 tablespoons).
- Season with salt, pepper, and a squeeze of lemon juice.
- Prepare the bread or wrap: Warm the wrap slightly for pliability or toast sandwich bread lightly.
- Assemble:
- Spread the chickpea salad evenly.
- Add layers of crisp lettuce and sliced cucumber.
- Fold or close: Fold the wrap or sandwich and slice in half.
Grilled Chicken and Pesto Sandwich
- Bread selection: Pick gluten-free sandwich rolls or bagels.
- Prepare the chicken: Grill or pan-sear a 4 oz chicken breast until fully cooked and juicy.
- Toast the bread: Warm the rolls or bagels using a toaster or oven.
- Spread pesto: Generously spread about 1 tablespoon of gluten-free pesto on the bottom half of the bread.
- Layer ingredients:
- Place the grilled chicken on top of the pesto.
- Add slices of fresh mozzarella cheese (2 oz).
- Layer in roasted red peppers or sun-dried tomatoes.
- Close sandwich: Place the top half of the bread and optionally warm the sandwich in a panini press for 2-3 minutes.
BLT with Gluten-Free Bacon and Bread
- Cook bacon: Fry 4-5 slices gluten-free bacon until crisp. Drain on paper towels.
- Bread choice: Select two slices of hearty gluten-free sandwich bread.
- Toast the bread: Lightly toast for a crunchier texture.
- Layer sandwich:
- Spread 1 tablespoon gluten-free mayonnaise on one slice.
- Add 3-4 leafs of crisp romaine lettuce.
- Place the bacon evenly over the lettuce.
- Add 2-3 thick slices of ripe tomato.
- Top and serve: Cover with the second slice of bread and press gently. Cut in half and serve fresh.
| Recipe | Bread Type | Key Filling Ingredients | Sauce/Spread | Optional Cooking Method |
|---|---|---|---|---|
| Classic Turkey and Avocado | Gluten-free sandwich bread | Turkey, avocado, tomato, spinach | Gluten-free mayonnaise | Panini press (optional) |
| Vegan Chickpea Salad | Seeded wrap or sandwich bread | Chickpeas, celery, red onion, lettuce, cucumber | Vegan mayonnaise, Dijon mustard | – |
| Grilled Chicken and Pesto | Sandwich rolls or bagels | Grilled chicken, mozzarella, roasted red peppers | Gluten-free pesto | Panini press (optional) |
| BLT with Gluten-Free Bacon | Gluten-free sandwich bread | Gluten-free bacon, romaine, tomato | Gluten-free mayonnaise | – |
By following these detailed directions for each sandwich, we ensure vibrant flavors, perfect textures, and truly gluten-free enjoyment every time.
Serving Suggestions
To elevate our gluten free sandwiches experience, we focus on thoughtful serving ideas that enhance flavor, presentation, and enjoyment. Here are our top recommendations for serving these wholesome sandwiches:
Pair With Complementary Sides
Adding a side dish not only completes the meal but balances textures and flavors. Consider these gluten free sides that pair beautifully with our sandwiches:
- Crisp vegetable sticks like carrots, celery, and cucumber with a creamy dip
- Fresh fruit salad featuring seasonal options such as berries, melon, or apples
- Light gluten free chips or popcorn for crunch without gluten concerns
- Pickled vegetables or olives to add a tangy contrast
Drinks to Accompany
Refreshing beverages help cleanse the palate and boost enjoyment. We recommend:
- Sparkling water infused with lemon or fresh herbs
- Iced herbal teas such as mint or hibiscus
- Freshly squeezed fruit juices like orange or apple
- Gluten free beers or ciders for adult gatherings
Presentation Tips
The visual appeal makes our gluten free sandwiches even more inviting. Use these tips to serve with style:
- Slice sandwiches diagonally for an appealing triangular shape
- Arrange on a wooden cutting board or colorful plate to add rustic charm
- Garnish plates with fresh herbs, small salad greens, or edible flowers
- Stack layers to showcase fillings and vibrant colors clearly
Temperature Serving Suggestions
Our sandwiches shine at the right temperature. Follow this guide to serve optimally:
| Sandwich Type | Recommended Serving Temperature | Notes |
|---|---|---|
| Cold sandwiches (e.g., Turkey) | Chilled or room temperature | Keep refrigerated until serving |
| Warm sandwiches (e.g., Panini) | Warm, around 130°F (54°C) | Serve immediately after toasting |
| Wraps and rolls | Room temperature | Wraps stay soft and pliable when served |
Accompaniments to Enhance Flavor
Consider classic condiments and extras that maintain gluten free integrity:
- Gluten free mayonnaise, mustard, or aioli
- Homemade or store-bought pesto and hummus
- Slices of pickles or avocado for creaminess
- Fresh sprouts or microgreens for a peppery finish
“Serving our gluten free sandwiches with complementary sides and drinks creates a complete and delightful dining experience.”
By selecting thoughtful sides, beverages, and presentation methods, we transform our gluten free sandwiches into meals that satisfy all senses.
Storing and Leftover Tips
Proper storing and handling of gluten-free sandwiches ensure they stay fresh and delicious for later enjoyment. Here are our best practices to preserve the quality and flavor of your gluten-free creations.
Storing Gluten-Free Sandwiches
- Wrap tightly in plastic wrap or place in an airtight container immediately after assembly to prevent air exposure and drying.
- For sandwiches with moist ingredients, store fillings separately from the bread to avoid sogginess.
- Use dense gluten-free breads or seeded wraps as they retain moisture better and resist becoming overly dry.
- Refrigerate sandwiches at a temperature of below 40°F (4°C) to keep ingredients fresh and safe.
Best Practices for Leftovers
- Consume leftovers within 24 to 48 hours for optimal taste and texture.
- Avoid freezing fully assembled sandwiches with wet ingredients; instead, freeze bread and fillings separately.
- Reheat sandwiches gently with a toaster oven or panini press to refresh texture without drying.
Freezing Guidelines for Gluten-Free Sandwich Components
| Component | Storage Method | Recommended Duration | Notes |
|---|---|---|---|
| Gluten-Free Bread | Freeze in airtight bags | Up to 3 months | Slice before freezing for easy use |
| Prepared Fillings | Freeze in airtight containers | Up to 1 month | Avoid freezing fresh veggies; best with cooked proteins or spreads |
| Fully Assembled Sandwich | Generally not recommended | N/A | Moisture causes sogginess upon thawing |
Tips to Maintain Freshness and Texture
- Use paper towels inside storage containers to absorb excess moisture.
- For crunchy elements like lettuce or pickles, add just before eating.
- When reheating, use moderate heat to avoid drying out gluten-free bread, which tends to be more fragile than traditional bread.
“Storing gluten-free sandwiches properly is essential to preserving their delightful texture and taste that make each bite satisfying.”
By following these tips we ensure our gluten-free sandwiches remain just as vibrant and appetizing as when first made, making them perfect for meal prep or quick lunches on busy days.
Conclusion
Gluten-free sandwiches open up a world of tasty possibilities without compromising on flavor or texture. With the right ingredients, tools, and techniques, we can create satisfying meals that cater to our dietary needs and culinary curiosity. Whether for a quick lunch or a leisurely snack, these recipes and tips help us enjoy every bite confidently.
By embracing fresh fillings, vibrant sauces, and smart preparation methods, gluten-free sandwiches become anything but boring. Let’s keep experimenting and savoring the delicious variety that gluten-free options bring to our tables.
Frequently Asked Questions
What types of gluten-free bread can I use for sandwiches?
You can use gluten-free sandwich bread, lettuce wraps, corn tortillas, gluten-free bagels or rolls, and seeded gluten-free wraps. Each type works well for different sandwich styles.
How do I prevent my gluten-free sandwich from becoming soggy?
Keep wet ingredients like sauces and tomatoes separate from the bread until just before eating, and store fillings and bread separately if making sandwiches ahead.
Are there specific sauces that are gluten-free?
Yes, gluten-free options include mayonnaise, mustard, hummus, pesto, BBQ sauce, and vinaigrettes. Always check labels for gluten-free certification.
What tools are essential to make gluten-free sandwiches?
Use a dedicated cutting board, sharp knife, spreader, toaster or panini press, mixing bowls, and measuring spoons. Clean equipment thoroughly to avoid cross-contamination.
Can I make gluten-free sandwiches in advance?
Yes, use dense bread or wraps, store ingredients separately, keep everything airtight, and assemble sandwiches close to mealtime for best texture and freshness.
How should I store leftover gluten-free sandwiches?
Wrap tightly in plastic or use airtight containers. Keep moist ingredients separate and consume leftovers within 24-48 hours for optimal quality.
Is lightly toasting gluten-free bread recommended?
Yes, lightly toasting gluten-free bread improves texture and flavor, making your sandwich more enjoyable.
What are some good side dishes to serve with gluten-free sandwiches?
Try crisp vegetable sticks, fresh fruit salad, gluten-free chips, or pickled vegetables for a tasty and balanced meal.
Can gluten-free sandwiches be heated or grilled?
Absolutely! Use a toaster oven or panini press to warm or grill sandwiches, which enhances texture and flavor.
How do I keep gluten-free wraps soft and pliable?
Use a wrap warmer or warm them lightly before assembling to maintain softness and prevent cracking.