
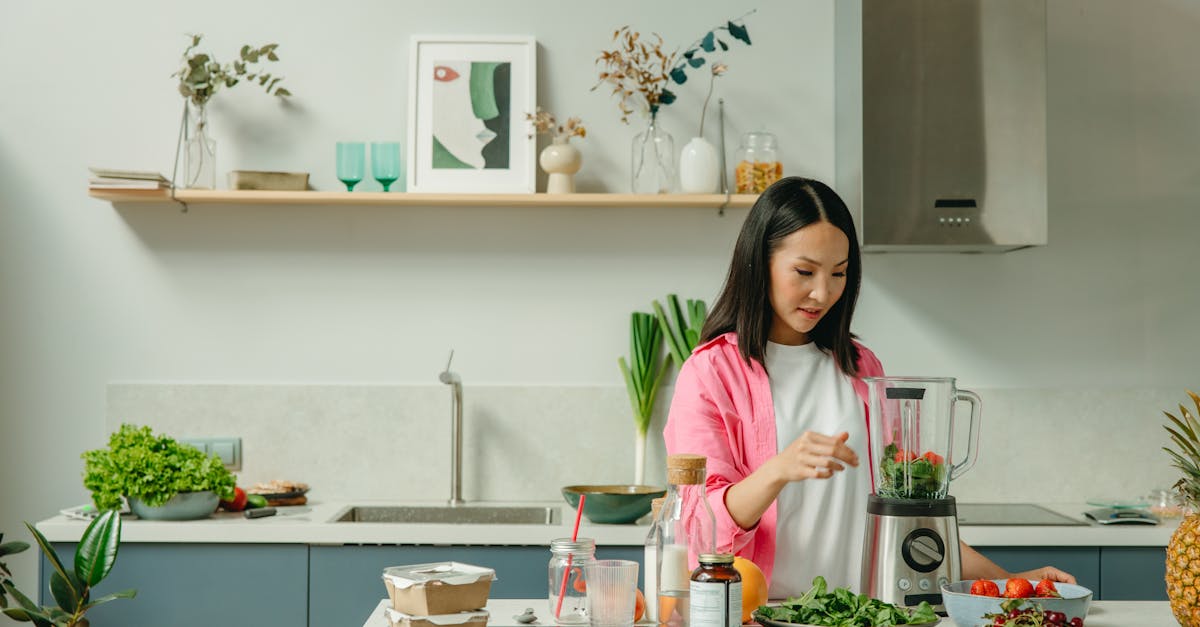
Silicone molds have revolutionized the way we prepare healthy snacks and meals. Their flexibility and non-stick surface make them perfect for creating portion-controlled treats that are both nutritious and visually appealing. Whether you’re whipping up energy bites, mini frittatas, or frozen fruit pops, silicone molds help us maintain a balanced diet without sacrificing flavor or creativity.
Using silicone molds encourages us to experiment with wholesome ingredients like fresh fruits, veggies, nuts, and whole grains. Plus, they’re easy to clean and reusable, making them an eco-friendly choice for our kitchen. Let’s explore some delicious and health-conscious recipes that make the most of these versatile tools, helping us stay on track with our wellness goals while enjoying every bite.
Ingredients
To craft healthy recipes for silicone molds we focus on nutrient-dense and wholesome ingredients that suit both sweet and savory options. Below we outline the most common staples and highlight specific components for our favorite recipes.
Common Healthy Ingredients for Silicone Molds
We rely on these versatile, healthful basics when working with silicone molds, building a solid foundation for all kinds of snacks and bites:
- Oats (rolled or quick) – provide fiber and texture
- Chia Seeds – boost omega-3s and add binding
- Greek Yogurt – offers protein and creaminess
- Eggs – essential for structure, especially in frittatas and baked items
- Natural Sweeteners like honey, maple syrup, or dates – for gentle sweetness without refined sugars
- Fresh or Frozen Fruits – add natural flavor and antioxidants
- Nuts and Nut Butters – bring healthy fats and richness
- Whole-Grain Flours (almond, coconut, or oat flour) – improve nutrition and texture
- Unsweetened Cocoa Powder – for antioxidative benefits and chocolate flavor
We keep a balance between flavor and nutrition ensuring every ingredient measures up to our healthy goals.
Specific Ingredients for Sweet Recipes
For our sweet creations using silicone molds, we emphasize ingredients that provide natural sweetness, texture variety, and nourishing benefits:
- Mashed Bananas – natural sweetness and moisture
- Coconut Milk or Almond Milk – dairy-free creaminess
- Vanilla Extract – enhances sweetness without calories
- Cinnamon and Nutmeg – warming spices that add depth
- Dried Fruits (raisins, cranberries, chopped apricots) – chewy bursts of flavor
- Dark Chocolate Chips (70% or higher cacao) – antioxidants and richness
| Ingredient | Role | Health Benefit |
|---|---|---|
| Mashed Bananas | Sweetener and binder | Potassium and fiber |
| Coconut/Almond Milk | Creaminess | Low calorie, dairy-free option |
| Vanilla Extract | Flavor enhancement | No calories, aromatic flavor |
| Cinnamon/Nutmeg | Spice | Blood sugar regulation |
| Dried Fruits | Texture and sweetness | Vitamins and antioxidants |
| Dark Chocolate Chips | Sweetness and richness | Antioxidants and minerals |
Specific Ingredients for Savory Recipes
For savory silicone mold recipes such as mini quiches, frittatas, or veggie bites, we prioritize fresh vegetables, herbs, and protein sources to maintain flavor and wellness:
- Baby Spinach or kale – packed with iron and vitamins
- Cherry Tomatoes – juicy acidity balance
- Red Bell Peppers – color and vitamin C
- Onions and Garlic – savory depth and immune benefits
- Low-Fat Cheese (feta, mozzarella, or cheddar) – calcium and flavor
- Lean Proteins like chopped chicken, turkey, or tofu – muscle-supporting elements
- Fresh Herbs (basil, parsley, chives) – fresh aroma and antioxidants
- Ground Flaxseed – adds fiber and omega-3
| Ingredient | Purpose | Nutritional Highlight |
|---|---|---|
| Baby Spinach/Kale | Greens | Iron and vitamin K |
| Cherry Tomatoes | Juiciness | Vitamin C and antioxidants |
| Red Bell Peppers | Color & Flavor | Vitamin A and C |
| Onions and Garlic | Savory base | Immune support compounds |
| Low-Fat Cheese | Creaminess & Protein | Calcium and protein |
| Lean Proteins | Structure & Satiety | High-quality protein |
| Fresh Herbs | Flavor | Antioxidants and aroma |
| Ground Flaxseed | Fiber & Omega-3 | Digestive health and heart benefits |
Using these well-chosen ingredients in our healthy recipes for silicone molds helps us create diverse, flavorful dishes tailored to your wellness goals.
Equipment Needed
To create healthy recipes for silicone molds successfully, having the right equipment ensures ease, precision, and the best results. Below we outline essential tools that complement the use of silicone molds and enhance our cooking experience.
Types of Silicone Molds
Silicone molds come in various shapes and sizes, each suited for different healthy snacks and meals. Choosing the right type is key to matching our recipe goals:
| Mold Type | Ideal Use | Features |
|---|---|---|
| Mini Muffin Molds | Mini frittatas, energy bites | Small, individual portions |
| Ice Cube Trays | Frozen fruit pops, smoothie cubes | Compact, easy to portion, multi-cavity |
| Chocolate Molds | Dark chocolate bites, nut clusters | Detailed shapes, easy release |
| Baking Molds (Cups) | Healthy muffins, egg cups | Heat resistant, flexible bottom |
| Novelty Shapes | Kid-friendly snacks, portion-controlled bites | Fun shapes to encourage healthy eating |
We recommend selecting molds labeled food-grade silicone for safe cooking at various temperatures, typically from -40°F to 446°F (-40°C to 230°C). Their non-stick nature allows us to pop out treats with minimal effort and maintain portion control effortlessly.
Additional Kitchen Tools
Using silicone molds alongside complementary kitchen tools streamlines the preparation process and enhances our healthy cooking routine. These items help measure, mix, and present ingredients efficiently:
- Mixing Bowls: Various sizes to combine wet and dry ingredients thoroughly. Transparent or glass bowls help track consistency.
- Measuring Cups and Spoons: Precise measurements maintain recipe balance and nutritional accuracy.
- Spatulas (Silicone or Rubber): Flexible for scraping batter into molds without waste.
- Whisks or Electric Mixers: To blend ingredients evenly, especially for frittatas or sweet batters.
- Piping Bags or Squeeze Bottles: For filling molds neatly, particularly useful for chocolate or energy bite mixtures.
- Baking Sheet or Tray: Placing silicone molds on a sturdy surface ensures stability when transferring to oven or freezer.
- Cooling Rack: Allows us to cool baked goods evenly after removal from molds.
- Refrigerator and Freezer Space: Essential for setting or chilling no-bake and frozen treats.
Combining these kitchen essentials with the versatility of silicone molds supports our health-conscious culinary endeavors by simplifying every step from preparation to presentation.
Prep Work
Before diving into our healthy recipes for silicone molds, proper preparation sets the foundation for flawless results. Let’s focus on key steps to get both the silicone molds and ingredients ready for optimal cooking and ease.
Preparing the Silicone Molds
- Wash the molds thoroughly with warm soapy water before first use to remove any manufacturing residues. Rinse well and dry completely.
- Lightly grease the mold cavities using a small amount of coconut oil or a non-stick cooking spray. This step enhances the easy release of delicate items like mini frittatas or energy bites.
- Place the silicone molds on a sturdy baking sheet or tray before filling. This keeps them stable during transport to the oven or freezer, preventing spills or misshaping.
- Ensure molds are made with food-grade silicone for safety and durability during baking, freezing, or microwaving.
- Avoid filling molds beyond ¾ full to prevent overflow and uneven cooking.
Prepping Ingredients
To complement the ease of silicone molds, preparing ingredients carefully supports taste and texture balance:
| Ingredient Type | Prep Steps | Notes |
|---|---|---|
| Dry Staples | Measure oats, flours, and seeds accurately | Use measuring cups/spoons for precision |
| Fresh Produce | Wash, peel, chop, or puree fruits and vegetables | Small uniform pieces ensure even cooking |
| Proteins & Dairy | Crack eggs, grate cheese, and drain yogurts | Use fresh lean proteins for health benefits |
| Natural Sweeteners | Mash bananas, measure honey or maple syrup | Adjust sweetness cautiously for health |
| Flavor Enhancers | Measure vanilla extract, cocoa powder, herbs | Fresh herbs add natural aroma and nutrition |
- Mix dry and wet ingredients separately before combining to avoid clumps or uneven distribution.
- For sticky or delicate mixtures, consider using a piping bag or spoon with a small offset spatula to fill molds neatly.
- Keep cold ingredients chilled until use to maintain freshness and prevent premature melting.
Healthy Recipes For Silicone Molds
Exploring healthy recipes for silicone molds unlocks a world of nutritious, flavorful options that are both visually appealing and easy to prepare. Below, we share a delicious sweet recipe that perfectly showcases the versatility of silicone molds for wholesome snacks.
Sweet Recipe 1: Fruit and Yogurt Bites
These Fruit and Yogurt Bites are a perfect blend of natural sweetness and creamy texture. They are packed with probiotics from Greek yogurt and antioxidants from fresh fruit. Making them in silicone molds ensures effortless portion control and easy removal.
Ingredients
- 1 cup plain Greek yogurt (preferably low-fat)
- 1/2 cup mixed fresh berries (blueberries, raspberries, strawberries), finely chopped
- 1 tablespoon chia seeds
- 1 tablespoon honey or pure maple syrup
- 1 teaspoon vanilla extract
Instructions
- In a medium bowl, combine the Greek yogurt, honey, and vanilla extract. Stir until smooth and well mixed.
- Gently fold in the chopped mixed berries and chia seeds. The chia seeds add fiber and help bind the mixture.
- Spoon the mixture into each cavity of the silicone mold, filling them about 3/4 full to allow space for expansion when freezing.
- Tap the mold gently on the countertop to remove any air bubbles and level the mixture.
- Place the silicone mold on a flat baking sheet and transfer it to the freezer.
- Freeze for at least 4 hours or until completely set.
- Once frozen, pop the bites out of the molds and serve immediately or store in an airtight container in the freezer for up to 2 weeks.
Nutritional Highlights per bite
| Nutrient | Amount |
|---|---|
| Calories | 40 kcal |
| Protein | 3 g |
| Fiber | 1 g |
| Sugar (natural) | 5 g |
| Fat | 1 g |
Enjoy these nutrient-dense fruit and yogurt bites as a refreshing snack or a guilt-free dessert that fits perfectly into our health-conscious lifestyle.
Sweet Recipe 2: Oatmeal Energy Bars
These oatmeal energy bars are a perfect healthy treat prepared effortlessly using silicone molds. They combine wholesome oats, natural sweetness, and a crunchy texture to fuel us throughout the day.
Ingredients
- 2 cups rolled oats
- 1/2 cup natural almond butter (or peanut butter)
- 1/3 cup honey or maple syrup
- 1/4 cup unsweetened shredded coconut
- 1/4 cup dark chocolate chips (optional but recommended)
- 1/4 cup flaxseed meal
- 1/4 cup milk (coconut, almond, or dairy)
- 1 tsp vanilla extract
- 1/2 tsp ground cinnamon
- Pinch of sea salt
Instructions
- Prepare the silicone molds: Lightly grease each cavity with coconut oil or use a non-stick spray. Place the mold on a baking sheet for stability.
- Mix dry ingredients: In a large bowl, combine rolled oats, flaxseed meal, shredded coconut, cinnamon, and sea salt. Stir until evenly blended.
- Combine wet ingredients: In a separate bowl, whisk together almond butter, honey, milk, and vanilla extract until smooth and well incorporated.
- Blend mixtures: Pour the wet ingredients into the dry oat mixture. Stir thoroughly until all oats are coated and the batter becomes sticky.
- Add chocolate chips: Fold in dark chocolate chips gently to avoid breaking them.
- Fill molds: Spoon the mixture evenly into the silicone mold cavities, pressing down gently to compact well and prevent air pockets.
- Chill: Place the filled silicone mold in the refrigerator for at least 2 hours or until bars are firm enough to remove without crumbling.
- Remove and serve: Carefully pop out the bars. Store them in an airtight container in the fridge for up to one week.
| Ingredient | Amount | Purpose |
|---|---|---|
| Rolled oats | 2 cups | Base, fiber source |
| Natural almond butter | 1/2 cup | Binder, healthy fats |
| Honey or maple syrup | 1/3 cup | Natural sweetener |
| Unsweetened shredded coconut | 1/4 cup | Texture, flavor |
| Dark chocolate chips | 1/4 cup | Optional sweetness, richness |
| Flaxseed meal | 1/4 cup | Omega-3 fatty acids, fiber |
| Milk (plant or dairy) | 1/4 cup | Moisture, binding |
| Vanilla extract | 1 tsp | Flavor enhancement |
| Ground cinnamon | 1/2 tsp | Warm spice, subtle sweetness |
| Sea salt | Pinch | Balances sweetness |
Pro Tip: Using silicone molds makes removal simple and keeps the bars intact without extra greasing or parchment paper. This enhances convenience while maintaining the bars’ shape perfectly.
Savory Recipe 1: Mini Veggie Frittatas
These Mini Veggie Frittatas are a perfect healthy recipe for silicone molds, delivering savory flavor and nutrient-rich ingredients in a convenient, portion-controlled format. Let’s prepare these protein-packed bites that are ideal for breakfast or a light snack.
Ingredients
- 6 large eggs, whisked
- 1/4 cup skim milk or unsweetened almond milk
- 1/2 cup baby spinach, chopped
- 1/3 cup cherry tomatoes, quartered
- 1/4 cup red bell pepper, finely diced
- 1/4 cup low-fat shredded cheese (cheddar or mozzarella)
- 2 tablespoons red onion, finely chopped
- 1 tablespoon ground flaxseed (optional, for fiber)
- 1/2 teaspoon garlic powder
- 1/4 teaspoon salt
- 1/4 teaspoon black pepper
- Cooking spray or olive oil for greasing molds
Instructions
- Preheat the oven to 350°F (175°C). Lightly grease the silicone mini muffin molds with cooking spray or a small amount of olive oil. Place the molds on a sturdy baking sheet for easy handling.
- In a large mixing bowl, whisk together the eggs and milk until fully combined and slightly frothy.
- Add the chopped spinach, cherry tomatoes, red bell pepper, red onion, and ground flaxseed to the egg mixture. Stir gently to distribute the vegetables evenly throughout.
- Season the mixture with garlic powder, salt, and black pepper. Mix thoroughly.
- Using a spoon or a piping bag, fill each silicone mold cavity about 3/4 full with the veggie and egg mixture to allow room for rising.
- Sprinkle a small amount of shredded cheese on top of each filled mold to add a melty, savory finish.
- Place the baking sheet with molds in the oven and bake for 18 to 22 minutes or until the frittatas are set and lightly golden on top.
- Remove from the oven and let the frittatas cool for 5 minutes. Gently pop them out of the silicone molds. Serve warm or refrigerate for a grab-and-go protein-packed snack.
| Step | Temperature | Time | Notes |
|---|---|---|---|
| 1 | 350°F | – | Preheat oven and grease molds |
| 7 | 350°F | 18 to 22 min | Bake until set and golden |
| 8 | Room Temp | 5 min | Cool before removing from molds |
These Mini Veggie Frittatas are a versatile healthy recipe for silicone molds, easily customizable with your favorite veggies and spices while providing a satisfying balance of protein and fiber.
Savory Recipe 2: Quinoa and Veggie Bites
These Quinoa and Veggie Bites offer a nutritious and flavorful way to enjoy wholesome ingredients using our silicone molds. Packed with protein and vibrant vegetables, they make an ideal healthy snack or light meal.
Ingredients
- 1 cup cooked quinoa, cooled
- 1/2 cup finely chopped bell peppers (red or yellow)
- 1/2 cup grated zucchini, squeezed dry
- 1/4 cup chopped fresh spinach
- 1/4 cup finely diced red onion
- 2 large eggs, beaten
- 1/3 cup shredded low-fat cheddar cheese
- 1/4 cup whole wheat breadcrumbs
- 1 clove garlic, minced
- 1 teaspoon dried oregano
- 1/2 teaspoon ground black pepper
- 1/2 teaspoon sea salt
- 1 tablespoon olive oil (for greasing molds)
Instructions
- Preheat the oven to 375°F (190°C). Lightly grease each cavity of the silicone mold with olive oil to prevent sticking and place the mold on a baking sheet for support.
- In a large mixing bowl, combine the cooked quinoa, bell peppers, zucchini, spinach, and red onion. Stir well to distribute the vegetables evenly.
- Add the beaten eggs, shredded cheddar, breadcrumbs, minced garlic, oregano, black pepper, and salt to the veggie mixture. Mix thoroughly until all ingredients are well incorporated.
- Using a spoon or piping bag, fill each silicone mold cavity about 3/4 full. Avoid overfilling to ensure even baking and easy removal.
- Place the baking sheet with the filled silicone molds in the oven. Bake for 20-25 minutes or until the bites are firm to the touch and lightly golden on top.
- Remove from the oven and let the quinoa bites cool for 5 minutes before gently popping them out of the molds.
- Serve warm or at room temperature. These bites pair well with a side of Greek yogurt dip or a fresh green salad.
| Ingredient | Quantity | Prep Detail |
|---|---|---|
| Cooked quinoa | 1 cup | Cooled |
| Bell peppers (red/yellow) | 1/2 cup | Finely chopped |
| Zucchini | 1/2 cup | Grated and squeezed dry |
| Fresh spinach | 1/4 cup | Chopped |
| Red onion | 1/4 cup | Finely diced |
| Eggs | 2 large | Beaten |
| Low-fat cheddar cheese | 1/3 cup | Shredded |
| Whole wheat breadcrumbs | 1/4 cup | |
| Garlic | 1 clove | Minced |
| Dried oregano | 1 teaspoon | |
| Ground black pepper | 1/2 teaspoon | |
| Sea salt | 1/2 teaspoon | |
| Olive oil | 1 tablespoon | For greasing molds |
These protein-packed quinoa and veggie bites are perfectly suited for our flexible silicone molds, ensuring easy release and consistent shape every time.
Cooking and Setting Directions
Mastering the Cooking and Setting Directions is essential to unlock the full potential of healthy recipes for silicone molds. Below we outline clear steps for baking, freezing, and removing your nutritious creations with ease.
Baking in Silicone Molds
When baking with silicone molds, follow these guidelines for consistent results:
- Preheat the oven to the temperature specified in the recipe, typically between 325°F to 375°F (163°C to 190°C).
- Place the silicone mold on a sturdy baking sheet for stability during baking.
- Fill each cavity with the prepared mixture without overfilling—leave about 1/4 inch space at the top to allow for expansion.
- Insert the baking sheet with molds into the preheated oven.
- Bake for the recommended time, commonly 15 to 25 minutes, depending on the recipe.
- To test doneness, insert a toothpick or skewer into the center; it should come out clean or with minimal crumbs.
| Step | Temperature Range | Baking Time | Notes |
|---|---|---|---|
| Preheat Oven | 325°F to 375°F (163°C to 190°C) | — | Follow recipe guidelines |
| Baking Duration | — | 15 to 25 minutes | Verify with toothpick test |
| Fill Level | — | Leave 1/4 inch space | Prevents overflow and uneven cooking |
Important: Always avoid exceeding the maximum temperature limit of your silicone molds, typically up to 428°F (220°C), to prevent damage.
Freezing in Silicone Molds
Silicone molds excel for freezer-friendly recipes. Follow these steps for optimal setting:
- Pour the prepared healthy mixture evenly into each mold cavity, leaving a tiny gap at the top.
- Place the silicone mold on a flat tray or baking sheet to maintain stability.
- Transfer the tray to the freezer.
- Freeze for minimum 4 hours or until contents are firm.
- For best results, cover the mold loosely with plastic wrap or foil to prevent freezer odors from affecting the food.
| Step | Freezer Temperature | Setting Time | Notes |
|---|---|---|---|
| Pour mixture | 0°F (-18°C) or below | — | Leave slight space for expansion |
| Freeze duration | 0°F (-18°C) or below | At least 4 hours | Longer for larger or denser bites |
| Cover | — | Optional | Use plastic wrap foil to prevent odors |
Freezing in silicone molds offers easy portion control and quick access to nutritious snacks.
Tips for Removing Food from Silicone Molds
Removing your healthy delights intact is simple with these expert tips:
- Allow baked items to cool completely in the mold on a rack before removal.
- For frozen treats, you can remove them directly from the mold or let sit at room temperature for a few minutes to loosen.
- Gently push from the bottom of each cavity, supporting the sides with your fingers to maintain shape.
- If food sticks, briefly dip the mold’s bottom in warm water to loosen before pushing food out.
- Avoid sharp tools that can damage the mold; instead, use silicone or plastic spatulas.
“The flexibility and non-stick nature of silicone molds revolutionize preparation and presentation for health-conscious recipes.”
By following these Cooking and Setting Directions, we ensure our healthy recipes in silicone molds come out perfectly cooked, set, and ready to enjoy.
Storage and Serving Suggestions
Proper storage and serving techniques ensure our healthy recipes for silicone molds retain their freshness, texture, and taste. Let’s dive into best practices for keeping these molded snacks delicious and ready to enjoy.
How to Store Molded Snacks
Storing your molded snacks correctly preserves their nutritional value and prevents spoilage. Here are essential tips:
- Use airtight containers to keep moisture and odors out.
- Label containers with date and contents for easy tracking.
- Most molded snacks can be refrigerated for 3-5 days or frozen for up to 3 months depending on ingredients.
| Storage Method | Duration | Ideal For | Tips |
|---|---|---|---|
| Refrigerator | 3-5 days | Mini frittatas, yogurt bites | Place parchment paper between layers to prevent sticking |
| Freezer | Up to 3 months | Fruit pops, energy bars, quinoa bites | Use freezer-safe containers or bags; thaw in fridge overnight |
For fragile snacks like fruit and yogurt bites, freeze on a tray first before transferring to containers to avoid squashing.
Serving Ideas for Healthy Molded Treats
Serving these snacks can be just as creative as making them. Here are flavorful and nutritious ways to present our silicone mold creations:
- Pair savory bites like mini frittatas or veggie bites with a fresh side salad or light vinaigrette drizzle.
- Offer frozen fruit pops as refreshing treats on warm days — serve with mint leaves for an extra health boost.
- Sprinkle oatmeal energy bars with chopped nuts or a drizzle of natural nut butter for added texture and protein.
- Create a colorful platter mixing sweet and savory shaped snacks to make mealtime fun and visually appealing.
“Presentation is key — using silicone molds allows us to craft bite-sized, portion-controlled treats that look as good as they taste.”
By mastering proper storage and serving, we maximize the health benefits and enjoyment of our healthy recipes for silicone molds every time.
Make-Ahead Tips
To maximize convenience and maintain the freshness of our healthy recipes for silicone molds we can prepare many recipes ahead of time without sacrificing flavor or texture. Efficient make-ahead strategies help us stay on track with wholesome eating even on busy days.
Preparing Recipes in Advance
When preparing recipes in advance, timing and proper storage are key. We recommend the following steps to ensure our silicone mold snacks retain their nutrient quality and texture:
- Complete all mixing and molding steps as directed in each recipe.
- For baked items like mini frittatas or oatmeal bars, allow them to cool completely before storing.
- Avoid adding toppings or glazes that might get soggy when stored.
- Use airtight containers to protect from air exposure and moisture.
- Label containers with the date to monitor freshness.
By prepping recipes up to 3 days in advance for refrigerated storage, we create a ready-to-go supply of healthy snacks. This practice helps reduce last-minute cooking stress and supports portion control.
Freezing and Thawing Instructions
Freezing is an excellent option to extend the shelf life of many healthy recipes for silicone molds especially items like frozen fruit pops or energy bites.
| Step | Instructions |
|---|---|
| Freezing | Arrange molded snacks in a single layer on a baking tray and freeze until solid to prevent sticking together. Transfer to airtight freezer bags or containers. |
| Storage Duration | Most items can be frozen for up to 3 months without losing quality. |
| Thawing | Thaw in the refrigerator overnight for best texture preservation. For a quick thaw, leave at room temperature for 30 minutes. Avoid microwaving to prevent texture loss. |
“Pro Tip: To preserve delicate shapes and prevent freezer burn, seal molds tightly and minimize air exposure.”
By mastering freezing and thawing we can keep our make-ahead silicone mold recipes fresh and ready for anytime enjoyment without compromising the wholesome goodness.
Conclusion
Silicone molds open up a world of possibilities for creating healthy snacks and meals that fit our busy lifestyles. Their versatility, ease of use, and eco-friendly nature make them an essential tool in the kitchen. By embracing these molds, we can enjoy nutritious, delicious dishes that support our wellness goals without sacrificing flavor or convenience.
With the right ingredients, preparation, and storage techniques, silicone molds help us stay on track with healthy eating while adding fun and creativity to our meals. Let’s keep experimenting and making the most of these handy kitchen helpers to nourish ourselves and those we care about.
Frequently Asked Questions
What are the benefits of using silicone molds for healthy snacks?
Silicone molds are flexible, non-stick, and reusable, making them ideal for creating portion-controlled, nutritious snacks. They help with easy release, reduce waste, encourage ingredient experimentation, and are eco-friendly due to their durability and ease of cleaning.
What ingredients work best with silicone mold recipes?
Nutrient-dense ingredients like oats, chia seeds, Greek yogurt, eggs, fruits, nuts, whole-grain flours, and natural sweeteners are great. Sweet recipes often use bananas, almond milk, and dark chocolate chips, while savory ones include vegetables, herbs, lean proteins, and low-fat cheese.
What types of silicone molds are suitable for cooking?
Common types include mini muffin molds, ice cube trays, chocolate molds, baking molds, and novelty shapes. Choose food-grade silicone molds for safety, and select the mold type that fits your recipe’s needs, whether baking or freezing.
How should I prepare silicone molds before use?
Wash molds thoroughly and lightly grease each cavity. Place them on a stable baking sheet to prevent spills and avoid overfilling to ensure even cooking or setting of your snacks.
Can silicone molds be used for both baking and freezing?
Yes, silicone molds are safe for baking and freezing. Preheat your oven as required, and for freezing, ensure snacks are set properly before removing them from the molds to maintain shape and texture.
What kitchen tools complement silicone molds for healthy cooking?
Useful tools include mixing bowls, measuring cups, spatulas, whisks, piping bags, baking sheets, and cooling racks. These help with precise measurements, mixing, and easy filling, resulting in better-prepared snacks.
How do I store snacks made in silicone molds?
Store snacks in airtight containers, label them with dates, and keep them in the refrigerator or freezer depending on the recipe. Follow storage timelines for freshness, typically up to a few days refrigerated and several weeks frozen.
Can I prepare silicone mold recipes in advance?
Yes, make-ahead preparation is encouraged. Cool baked items completely, avoid soggy toppings, use airtight containers, and freeze if needed. Proper thawing helps maintain texture and flavor for convenient snack options.
How do I remove food from silicone molds without damage?
Allow the food to cool or set fully, then gently flex the silicone mold to release the snack. Avoid sharp utensils that can damage the mold’s surface to maintain its non-stick quality and durability.
Are silicone molds eco-friendly for cooking?
Yes, silicone molds are reusable, easy to clean, and reduce reliance on disposable liners or paper. Their longevity and safety for repeated use make them a sustainable choice for healthy cooking.