
Chipmunk recipes might sound unusual at first but they actually celebrate a fun and creative approach to cooking with nuts and seeds—ingredients chipmunks love. These recipes focus on wholesome, natural flavors inspired by what chipmunks gather in the wild. From crunchy nut mixes to sweet seed bars, we’ll explore tasty treats that are both nutritious and easy to make.
Ingredients for Chipmunk Recipes
To capture the essence of chipmunk recipes, we focus on wholesome ingredients that reflect the natural diet of chipmunks. These include nutritious nuts and seeds, fresh fruits and vegetables, and other organic foods that come together to create tasty, crunchy, and healthful treats.
Nuts and Seeds
Nuts and seeds are the cornerstone of any chipmunk-inspired recipe. Their rich textures and flavors mimic the natural foraging habits of chipmunks. We recommend using a variety of nuts and seeds to enhance both taste and nutritional value.
| Ingredient | Preparation | Quantity | Notes |
|---|---|---|---|
| Almonds | Raw or lightly chopped | 1 cup | Adds crunch and sweetness |
| Walnuts | Chopped | 1/2 cup | Provides a buttery texture |
| Sunflower Seeds | Shelled | 3/4 cup | Great source of healthy fats |
| Pumpkin Seeds | Raw or roasted | 1/2 cup | Adds subtle nuttiness |
| Chia Seeds | Whole | 2 tablespoons | Boosts fiber and omega-3s |
| Flaxseeds | Ground | 2 tablespoons | Enhances nutritional profile |
Fruits and Vegetables
For natural sweetness and vibrant colors, chipmunk recipes use fresh and dried fruits along with crisp vegetables. These ingredients balance the richness of nuts and seeds while delivering essential vitamins and antioxidants.
- Fresh Fruits: Apples (diced), berries (blueberries or raspberries), grapes (halved)
- Dried Fruits: Cranberries, raisins, apricots (chopped finely)
- Vegetables: Carrots (grated or sliced thin), celery (chopped), bell peppers (diced)
These fruits and vegetables add natural sugars, moisture, and a refreshing crunch that complements the nutty base.
Other Natural Foods
To round out our chipmunk recipes, we include other natural ingredients that enhance flavor and bind components together while preserving wholesome qualities.
- Honey or Maple Syrup: Natural sweeteners that add moisture and depth.
- Oats: Rolled or quick oats for texture and fiber.
- Coconut Flakes: Unsweetened, for a mild tropical note.
- Natural Spices: Cinnamon or nutmeg, lightly sprinkled to elevate flavor profiles.
- Greek Yogurt (optional): Adds creaminess and a protein boost when binding bars or snacks.
By combining these thoughtfully chosen ingredients, we aim to create recipes that embody the essence of chipmunk nutrition—simple, natural, and delightfully tasty.
Tools and Equipment Needed
To create delicious and nutritious chipmunk recipes at home, having the right tools and equipment is essential. These items ensure efficiency, consistency, and ease throughout the preparation process.
Food Processor or Grinder
A food processor or grinder is indispensable when working with nuts and seeds. These tools help us transform whole nuts like almonds, walnuts, and seeds such as sunflower or pumpkin into fine textures, pastes, or butters, depending on the recipe. They also preserve the natural oils and flavors essential to authentic chipmunk-inspired dishes.
- Choose a food processor with a strong motor and sharp blades.
- Opt for a grinder attachment if you prefer a more controlled texture.
- Ensure easy-to-clean parts to save time after preparing sticky mixtures.
Mixing Bowls
Using various sizes of Mixing Bowls is crucial for combining ingredients efficiently. From tossing fresh fruits and nuts to blending wet ingredients like honey or coconut flakes, bowls provide the space needed for thorough mixing.
- Glass or stainless steel bowls are recommended for durability and easy cleaning.
- Multiple bowls allow us to prep different components simultaneously.
- Nesting bowls save storage space in our kitchen.
Storage Containers
Proper Storage Containers preserve the freshness and crunchiness of our chipmunk recipes, especially nut mixes and seed bars. Airtight containers prevent exposure to air and moisture, maintaining optimal texture and flavor.
| Type | Recommended Use | Material |
|---|---|---|
| Airtight plastic or glass containers | Storing nut mixes, seed bars | BPA-free plastic or tempered glass |
| Mason jars | Keeping dry ingredients like oats or chia seeds | Glass |
| Resealable bags | Portable snack packs | Food-grade plastic |
Investing in quality Storage Containers ensures that the natural goodness of our wholesome ingredients lasts longer, matching the chipmunk-inspired spirit of freshness and simplicity.
Preparation Steps
To master chipmunk recipes, we begin with precise preparation of ingredients. Following these steps ensures that each component shines with natural flavor and texture.
Cleaning and Sorting Ingredients
We start by cleaning all nuts, seeds, fruits, and vegetables thoroughly to remove dust, debris, and any impurities. Here’s how we approach this crucial stage:
- Nuts and seeds: Rinse under cool running water, then spread on a clean towel to air dry completely before use. This prevents moisture-related spoilage.
- Fresh fruits and vegetables: Wash under cold water while gently scrubbing tougher skins, like carrots or apples. For berries, soak briefly in salted water to remove pests and then rinse.
- Dried fruits: Inspect closely for any crystallized sugar or stuck-together pieces. Separate gently if needed.
Sorting involves discarding damaged or discolored pieces to maintain recipe quality and appearance. We prefer selecting whole, uniformly sized ingredients for even cooking or mixing.
Prepping Nuts and Seeds
Proper preparation of nuts and seeds unlocks their full potential in chipmunk-inspired recipes. Follow these steps:
| Step | Description |
|---|---|
| Roasting (Optional) | Spread nuts/seeds on a baking sheet; roast at 325°F for 10-15 minutes until fragrant. |
| Grinding or Chopping | Use a food processor for butters or finely ground textures, or hand chop for crunch. |
| Toasting Spices/Nuts | Toast spices or nuts briefly on medium heat to enhance aroma before mixing. |
| Soaking (Optional) | Soak nuts overnight for recipes needing softer texture or better nutrient absorption. |
We caution against over-roasting which can cause bitterness and nutrient loss. Adjust roasting time depending on nut type.
Preparing Fruits and Vegetables
Fresh fruits and crisp vegetables bring natural sweetness and essential vitamins to our nut and seed-based dishes. Our preparation includes:
- Peeling and slicing: Remove skins where necessary, then slice fruits and vegetables into uniform pieces for easy blending or layering.
- Drying excess moisture: Pat items dry with a paper towel to prevent soggy textures in bars or mixes.
- Pureeing or mashing: For seed bars or natural spreads, blend fruits like bananas or applesauce until smooth.
- Dicing for crunch: Chop apples, carrots, or celery finely to combine with nuts for a delightful texture contrast.
By carefully prepping each ingredient we keep the essence of chipmunk recipes vibrant and wholesome with every bite.
Cooking and Assembly Instructions
Let’s dive into the step-by-step Cooking and Assembly Instructions to create delicious and nutritious chipmunk recipes. These methods highlight simplicity while maximizing the wholesome flavors inspired by chipmunk diets.
Making Chipmunk Snacks
- Roast the Nuts and Seeds:
Preheat the oven to 325°F. Spread almonds, walnuts, sunflower seeds, and pumpkin seeds evenly on a baking sheet. Roast for 10-12 minutes until golden and aromatic, stirring halfway for even cooking.
- Prepare the Binding Mixture:
In a small saucepan over low heat, combine ¼ cup organic honey with 2 tablespoons of coconut oil. Stir gently until melted and well-blended.
- Combine Dry Ingredients:
In a large mixing bowl, add the roasted nuts, seeds, ½ cup oats, 2 tablespoons flaxseeds, and 2 tablespoons chia seeds. Mix thoroughly.
- Mix Wet and Dry:
Pour the warm honey-oil mixture over the dry ingredients. Stir rapidly to coat everything evenly and create a sticky, crumbly texture.
- Press and Cool:
Transfer the mixture onto a parchment-lined baking sheet. Press firmly into a flat, even layer about ½ inch thick. Refrigerate for at least 2 hours until set.
- Cut into Bars or Clusters:
Use a sharp knife to cut into bars or break apart into clusters. Store in an airtight container to keep fresh and crunchy.
Preparing Homemade Chipmunk Feed Mix
- Select and Clean Ingredients:
Prepare 1 cup each of raw sunflower seeds, pumpkin seeds, and chopped almonds. Rinse and dry all nuts and seeds to remove dust or residues.
- Add Fruits and Extras:
Chop dried apples, raisins, and cranberries finely (about ½ cup total). Include 2 tablespoons of unsweetened coconut flakes for added texture.
- Mix Thoroughly:
Combine all ingredients in a large bowl. Add a pinch of cinnamon or nutmeg for a subtle spice according to taste.
- Portion and Store:
Portion the feed mix into small resealable bags or glass jars. Label with the date to ensure freshness. This mix should last 2-3 weeks when stored in a cool dry place.
| Ingredient | Quantity | Preparation |
|---|---|---|
| Sunflower seeds | 1 cup | Rinsed and dried |
| Pumpkin seeds | 1 cup | Rinsed and dried |
| Chopped almonds | 1 cup | Raw and chopped |
| Dried apples/raisins | ½ cup | Finely chopped |
| Coconut flakes | 2 tablespoons | Unsweetened |
| Cinnamon/nutmeg | Pinch | Optional spice |
Creating Seasonal Treats
- Choose Fresh Seasonal Fruits and Vegetables:
Use crisp apples, carrots, or berries from the current season. Wash thoroughly and slice into bite-sized pieces.
- Prepare a Nut and Seed Butter Base:
Blend 1 cup roasted almonds and ½ cup sunflower seeds in a food processor until smooth and creamy, scraping down sides as needed.
- Combine and Sweeten:
In a bowl, mix the nut-seed butter with 2 tablespoons organic honey and 1 teaspoon vanilla extract until smooth.
- Assemble Treats:
Dip fruit slices or vegetable sticks into the butter mixture. Optionally, roll dipped pieces in crushed flaxseeds or crushed nuts for texture.
- Chill and Serve:
Place the treats on a parchment-lined tray. Refrigerate for 30 minutes to set. Serve fresh as a seasonal delight rich in natural flavors and nutrients.
“Seasonality enhances flavor and nutrition,” making these treats not only delightful but also aligned with the natural rhythms that inspire our chipmunk recipes.
Storage and Serving Tips
Properly storing and serving chipmunk recipes ensures that their fresh, natural flavors and nutritional benefits are preserved. Let’s explore the best ways to keep these treats fresh and ready for wild chipmunks.
Proper Storage Methods
To maintain the crispness and wholesome taste of our chipmunk-inspired snacks, we must store them correctly:
- Airtight Containers: Use glass jars or BPA-free plastic containers with tight-fitting lids to prevent moisture and air exposure.
- Cool, Dry Places: Keep stored treats in a pantry or cupboard away from direct sunlight and heat sources to avoid spoilage.
- Refrigeration: For recipes containing fresh fruits or seed butters, refrigeration extends freshness up to 7 days.
- Freezing: Nut and seed bars can be frozen in resealable bags for up to 3 months without compromising texture.
| Storage Method | Suitable For | Recommended Duration | Storage Tips |
|---|---|---|---|
| Airtight containers | Dry nut mixes and seed bars | Up to 2 weeks | Keep in cool, dark place |
| Refrigeration | Fresh fruit treats, nut butters | Up to 1 week | Use sealed containers to prevent odors |
| Freezing | Nut and seed bars | Up to 3 months | Wrap tightly, thaw at room temperature |
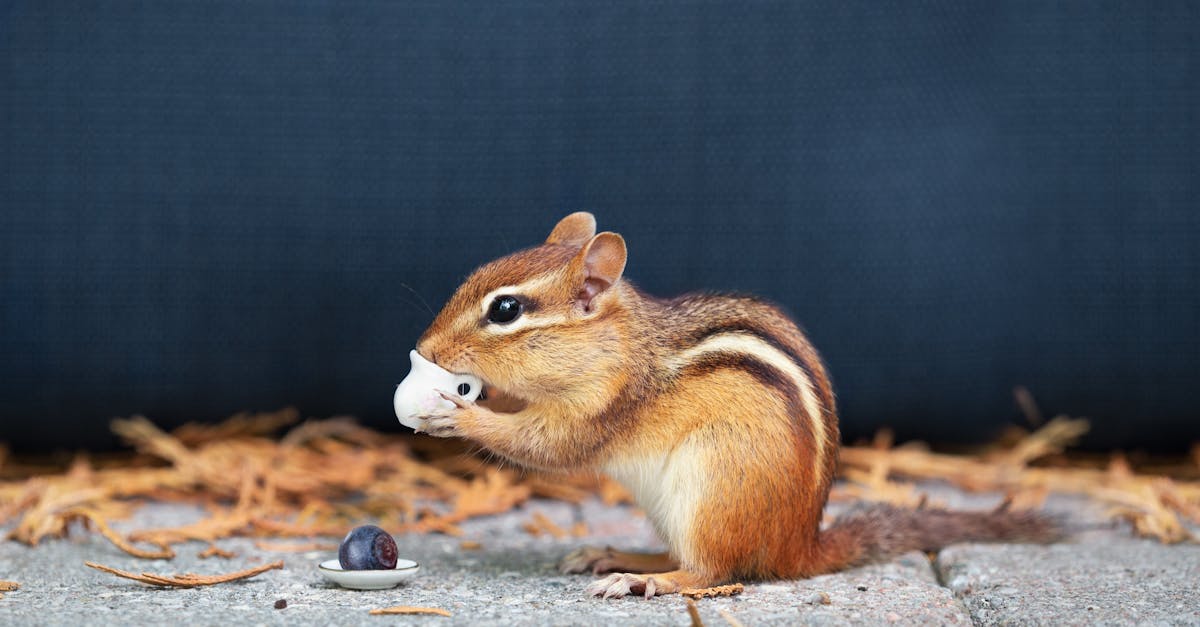
Serving Suggestions for Wild Chipmunks
When offering our chipmunk recipes to wild chipmunks we want to encourage natural foraging behaviors and safe feeding:
- Scatter Small Portions: Spread nut and seed mixes in shaded spots near trees or bushes to mimic natural feeding patterns.
- Use Shallow Dishes: Present sticky seed bars or fruit treats on shallow, flat dishes to keep them accessible and prevent choking hazards.
- Rotate Offerings: Vary the types of snacks every few days to provide a balanced diet resembling the chipmunks’ natural variety.
- Avoid Overfeeding: Offer about 2-3 small servings per feeding session to encourage chipmunks to forage naturally.
“Offering wholesome chipmunk treats mimics their natural diet, supporting their health and vitality in the wild.”
Safety and Feeding Guidelines
Our priority is the wellbeing of wild chipmunks. Follow these essential safety and feeding guidelines:
- No Salt or Sugars Added: Avoid recipes containing processed sugars or salts that could harm chipmunks.
- Supervise Initial Feeding: Observe chipmunk reactions to new recipes and discontinue if adverse behaviors appear.
- Keep Feeding Areas Clean: Remove leftover food within 24 hours to prevent mold growth and discourage pests.
- Limit Feeding Frequency: Feed no more than twice a week to encourage natural foraging and prevent dependency.
| Feeding Guideline | Recommended Practice |
|---|---|
| Additives | Use only natural ingredients, exclude salt and sugar |
| Feeding Frequency | Maximum twice weekly |
| Observation | Monitor chipmunks closely during new feeding |
| Cleanliness | Remove uneaten food within 24 hours |
By following these storage and serving tips we maintain the integrity and healthfulness of our chipmunk recipes while supporting the wellbeing of these delightful wild neighbors.
Conclusion
Exploring chipmunk recipes opens up a world of natural flavors and wholesome ingredients that are both nutritious and delicious. By embracing simple, fresh components and mindful preparation, we can create treats that honor the spirit of chipmunk diets while appealing to our own tastes.
With the right tools and thoughtful storage, these recipes become easy to make and enjoy anytime. Whether for ourselves or to share with the wild chipmunks around us, these snacks offer a perfect blend of health and flavor that’s hard to resist.
Frequently Asked Questions
What are chipmunk recipes?
Chipmunk recipes are natural, wholesome snacks inspired by the diet of chipmunks, focusing on nuts, seeds, fruits, and vegetables. They emphasize simple, nutritious ingredients with natural flavors.
Which nuts and seeds are used in chipmunk recipes?
Common nuts and seeds include almonds, walnuts, sunflower seeds, pumpkin seeds, chia seeds, and flaxseeds. These provide taste, texture, and essential nutrients.
What tools do I need to make chipmunk recipes at home?
Basic tools include a food processor or grinder, mixing bowls, and airtight storage containers like mason jars, resealable bags, or glass/plastic containers.
How do I prepare the ingredients for these recipes?
Clean and sort nuts, seeds, fruits, and vegetables. Optional steps include roasting, grinding, soaking nuts and seeds, and peeling or drying fruits and vegetables as needed.
What are some simple chipmunk snacks I can make?
You can prepare crunchy nut mixes, sweet seed bars, or seasonal treats using nut butter, honey, coconut oil, and fresh fruits or vegetables with optional spices.
How should I store chipmunk recipes?
Store them in airtight containers in a cool, dry place. Some recipes may require refrigeration or freezing to maintain freshness and crunchiness.
Can I feed these recipes to wild chipmunks?
Yes, but offer small portions in shallow dishes, avoid added salt or sugar, supervise feedings, and keep feeding areas clean for their safety and wellbeing.
Why avoid added salts and sugars in chipmunk recipes?
Chipmunks have sensitive diets; added salts or sugars can harm their health. Natural ingredients provide all necessary nutrients without risks.
How do chipmunk recipes promote health?
They offer natural, nutrient-rich foods with healthy fats, vitamins, and minerals while avoiding artificial additives, supporting chipmunks’ natural dietary needs.
Are chipmunk recipes easy to prepare?
Yes, they focus on simple steps like roasting, grinding, mixing, and assembling straightforward, wholesome ingredients for quick, tasty treats.