
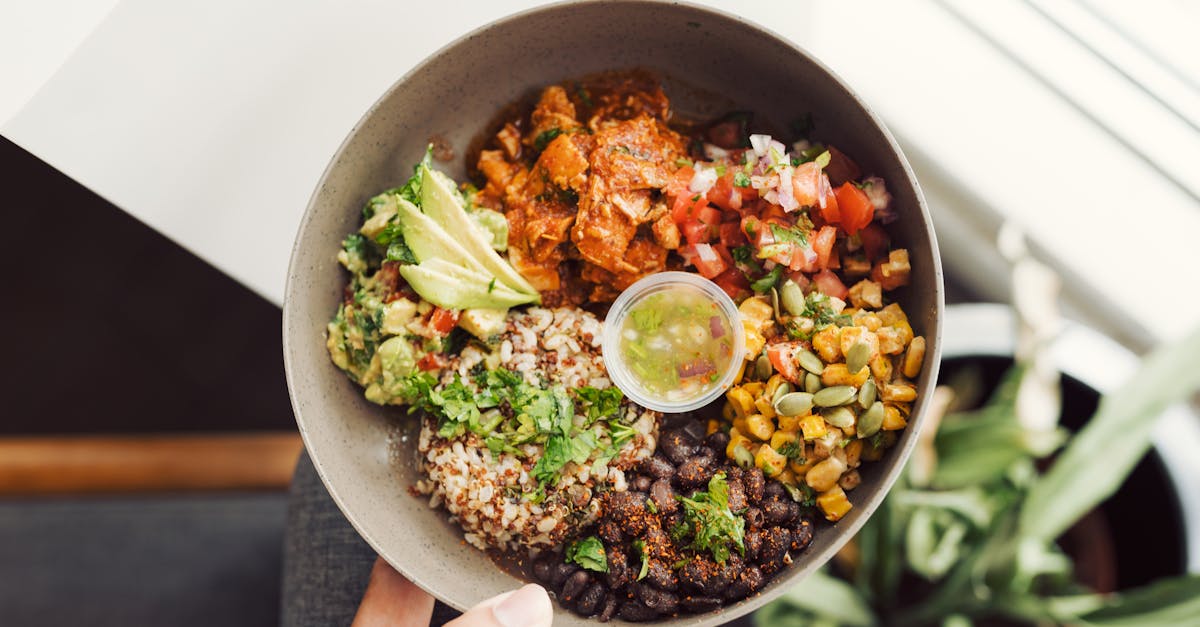
Canning black bean and corn salsa is a fantastic way to preserve the fresh flavors of summer all year round. This vibrant salsa combines the sweetness of corn with the hearty texture of black beans, creating a versatile dip or topping that’s perfect for any occasion. Whether we’re gearing up for a party or just want a tasty snack on hand, homemade canned salsa brings convenience without sacrificing flavor.
We love how this recipe lets us control the ingredients, ensuring a fresh and wholesome salsa free from preservatives. Plus, canning it means we can enjoy that zesty, colorful mix anytime without worrying about spoilage. Let’s dive into a simple, reliable method to create our own canned black bean and corn salsa that’s bursting with bold, satisfying taste.
Ingredients
To create our canning black bean and corn salsa, we carefully select ingredients that maintain vibrant flavors and ensure safe preservation. Below you’ll find everything we need to make a fresh, tasty, and shelf-stable salsa.
Fresh Ingredients
Using quality fresh ingredients is key to a flavorful salsa that sings with sweet corn and hearty black beans.
- 4 cups fresh yellow corn kernels (about 6 ears, husked and cleaned)
- 2 cups cooked black beans (or one 15-ounce can, drained and rinsed)
- 1 medium red bell pepper, diced
- 1 medium green bell pepper, diced
- 1 small red onion, finely chopped
- 2 medium tomatoes, seeded and diced
- 2 cloves garlic, minced
- 1 jalapeño pepper, seeded and minced (optional for heat)
- 1/4 cup fresh cilantro, chopped
Canning Ingredients
To safely preserve our salsa with proper acidity and flavor balance, we need these essential canning ingredients:
| Ingredient | Purpose | Amount |
|---|---|---|
| White vinegar (5%) | Adds acidity to prevent spoilage | 1 cup |
| Fresh lime juice | Enhances freshness and acidity | 1/4 cup |
| Water | Adjusts consistency | 1/2 cup |
| Canning salt | Enhances flavor without additives | 1 tablespoon |
| Sugar | Balances acidity and sharpness | 2 teaspoons |
Spices and Seasonings
Our blend of spices ensures that every jar bursts with balanced zest and warmth.
- 1 teaspoon ground cumin
- 1/2 teaspoon smoked paprika
- 1/2 teaspoon black pepper
- 1/4 teaspoon crushed red pepper flakes (optional for extra heat)
- 1/2 teaspoon dried oregano
These spices deepen the flavor profile, giving our salsa an irresistible complexity that keeps us coming back for more.
Equipment Needed
To successfully preserve our Black Bean and Corn Salsa through canning, having the right equipment is essential. These tools ensure safety and quality while making the process efficient and enjoyable.
Canning Equipment
We need specialized canning supplies to create a safe and shelf-stable salsa. Here’s what we use:
- Water Bath Canner: A large pot with a rack to process jars in boiling water, critical for preserving high-acid foods like salsa.
- Canning Jars: Mason or Ball jars made for canning, typically half-pint or pint sizes.
- Two-Piece Canning Lids: Flat lids with sealing compound and separate screw bands.
- Jar Lifter: To safely remove hot jars from boiling water without risk of burns.
- Lid Lifter (Magnetic Tool): To pick up sterilized lids without contaminating them.
- Funnel (Wide-Mouth): For easy filling of jars without spilling.
- Bubble Remover/Headspace Tool: To remove air bubbles and measure headspace accurately.
- Clean Towels: For wiping jar rims and handling hot jars.
| Equipment | Purpose |
|---|---|
| Water Bath Canner | Boiling water processing of sealed jars |
| Canning Jars | Holding salsa in sterilized airtight jars |
| Two-Piece Canning Lids | Sealing jars to preserve freshness |
| Jar Lifter | Safe handling of hot jars |
| Lid Lifter | Sterile handling of lids |
| Funnel | Preventing spills and ensuring clean filling |
| Bubble Remover Tool | Removing trapped air for proper sealing |
| Clean Towels | Wiping jar rims and safe handling |
Cooking Tools
Having the right Cooking Tools helps us prepare our salsa with ease and precision:
- Large Heavy-Bottomed Pot: For cooking the salsa mixture evenly without scorching.
- Cutting Board and Sharp Knife: To finely chop vegetables like onions, peppers, and cilantro.
- Measuring Cups and Spoons: Essential for accurate ingredient measurements, especially vinegar, salt, and spices.
- Mixing Spoon or Silicone Spatula: For stirring salsa during cooking.
- Colander or Strainer: To rinse black beans and corn thoroughly before cooking.
- Blender or Food Processor (Optional): To slightly puree part of the salsa for desired texture.
“Using proper tools ensures our Black Bean and Corn Salsa maintains its fresh flavors and shelf-stability, making the canning process smooth and safe.“
Our preparation will be easier and more enjoyable with these essential pieces of equipment perfectly suited for canning and cooking this vibrant salsa.
Preparing the Salsa
Now that we’ve gathered all the fresh produce and essential ingredients, let’s dive into preparing the black bean and corn salsa. This step-by-step process ensures the vibrant flavors blend perfectly and set the stage for safe, delicious canning.
Washing and Chopping Vegetables
We start by thoroughly washing all the fresh vegetables to remove dirt and any residues. Use cold running water, focusing on corn, bell peppers, tomatoes, jalapeños, onions, and cilantro.
Next, we carefully chop the vegetables:
- Corn kernels: Cut the corn off the cob with a sharp knife for tender, crisp kernels.
- Bell peppers: Remove the seeds and dice into small, uniform pieces.
- Tomatoes: Chop roughly but remove excess juices to avoid watery salsa.
- Jalapeños: Seed or keep seeds depending on your preferred heat level; finely chop.
- Onions: Dice finely for even distribution of flavor.
- Cilantro: Chop coarsely just before mixing to retain freshness.
This precise chopping ensures every bite delivers consistent texture and flavor.
Mixing Ingredients
In a large heavy-bottomed pot, combine the chopped vegetables with canned black beans (rinsed and drained) and the sweet corn kernels. Add the following liquids and seasonings to the pot:
| Ingredient | Measurement |
|---|---|
| White vinegar | 1 cup |
| Lime juice | ½ cup |
| Water | ½ cup |
| Canning salt | 1 tablespoon |
| Sugar | 1 tablespoon |
Sprinkle in the carefully blended spices — cumin, smoked paprika, black pepper, crushed red pepper flakes, and oregano — which create the complex, irresistible flavor our salsa is known for.
Slowly stir the mixture over medium heat, bringing it to a gentle simmer. This melds the flavors and prepares the salsa for safe canning.
Adjusting Seasonings
Once the salsa simmers and thickens slightly, we taste and adjust seasonings. This step is essential to balance acidity, sweetness, and spice to our liking.
If the salsa feels too tart, add a bit more sugar, half a teaspoon at a time. For more heat, sprinkle extra crushed red pepper flakes. If it needs brightness, a splash more lime juice will do.
Remember this guideline for seasoning adjustments:
| Seasoning | Adjustment Tip |
|---|---|
| Sugar | Adds sweetness to balance vinegar |
| Lime juice | Boosts tanginess and freshness |
| Crushed red pepper | Increases heat gradually |
| Salt | Enhances overall flavor and depth |
By carefully balancing the seasonings, we achieve a salsa that is fresh, vibrant, and perfectly suited for canning so those summer flavors last all year long.
Canning Preparation
Proper canning preparation ensures our Black Bean and Corn Salsa stays fresh and safe for long-term storage. Let’s get our workspace, jars, and equipment ready for the best preservation results.
Sterilizing Jars and Lids
Before filling, Sterilizing Jars and Lids is essential to prevent contamination and ensure a strong seal. Here’s our step-by-step process:
- Wash jars and lids with hot soapy water. Rinse well to remove all soap residue.
- Inspect jars for cracks or chips; discard damaged ones to avoid breakage during canning.
- Boil jars in a large pot of water for at least 10 minutes or run them through a dishwasher cycle on high heat.
- Keep jars hot until ready to fill by leaving them in hot water or a warm oven set to 200°F (93°C).
- Place lids in a small pot of simmering (not boiling) water for 5 minutes. This softens the sealing compound.
- Use sanitized tongs or a lid lifter to remove lids from hot water, avoiding direct hand contact.
“Sterilized jars and lids help maintain the salsa’s vibrant flavor and prevent spoilage.”
Preparing Water Bath Canner
A water bath canner is crucial for safely processing our salsa, reaching temperatures needed to kill bacteria and create a vacuum seal. Here’s how we prepare it:
- Fill the water bath canner with enough water to cover jars by at least 1 to 2 inches.
- Place the canner on the stove and bring the water to a gentle boil while sterilizing jars.
- Use a rack or trivet in the bottom of the canner to prevent jars from touching the direct heat surface.
- Have your jar lifter, funnel, and other tools nearby for seamless transfer of hot jars.
- Adjust the stove heat so the water continues to boil gently without aggressive bubbling that might jar the jars.
| Equipment | Purpose | Preparation Step |
|---|---|---|
| Water Bath Canner | For processing jars with boiling water | Fill with water 1–2 inches above jars, bring to boil |
| Rack/Trivet | Prevents jars from direct heat | Place at bottom of canner |
| Jar Lifter | Safe jar handling | Keep close for removing jars |
| Funnel | Easy jar filling | Have ready for filling jars |
Tip: We start heating the water before filling jars to minimize temperature shock and jar breakage.
By sterilizing jars and prepping our water bath canner correctly, we guarantee a safe, flavorful, shelf-stable Black Bean and Corn Salsa you’ll enjoy all year.
Canning Process
Properly following the Canning Process is essential for preserving our black bean and corn salsa safely while maintaining its vibrant flavors. Let’s walk through each critical step to ensure a successful and shelf-stable result.
Filling the Jars
First, we fill sterilized canning jars with the hot salsa mixture. Use a wide-mouth funnel to pour the salsa in, leaving a precise 1/2 inch headspace at the top of each jar. This space is vital for the proper sealing and expansion during processing.
- Pour the salsa slowly to avoid splashing.
- Leave 1/2 inch headspace for safe sealing.
- Wipe the jar rims clean with a damp, lint-free cloth to remove any residue.
Removing Air Bubbles
Next, it is critical to remove trapped air bubbles inside the jar, which can affect preservation and sealing quality. Use a non-metallic spatula or bubble remover tool and gently slide it along the inside edges of the jar.
- Insert the tool and move slowly to release air bubbles.
- Check for bubbles trapped under vegetables or beans.
- Adjust headspace if necessary once bubbles rise.
Sealing the Jars
After ensuring no air bubbles remain, we place the sanitized lids and screw bands on the jars.
- Place the flat lid on the jar rim, centering it carefully.
- Screw the metal band down until fingertip tight — not too tight, to allow air to escape during processing.
- Double-check the rims are clean and the lids are properly positioned before processing.
Processing in Water Bath
Finally, we process the jars in a boiling water bath canner to guarantee a safe, long-term seal and prevent spoilage. Follow these key points:
| Step | Details |
|---|---|
| Water level | Submerge jars at least 1 inch above lids |
| Water temperature | Maintain a rolling boil throughout |
| Processing time | Process jars for 15 minutes (adjust per altitude) |
| Cooling | Remove jars carefully after processing and cool on a towel |
- Use the jar lifter to lower jars slowly into boiling water.
- Ensure water covers jars completely by at least 1 inch.
- Start timing when water returns to a full boil.
- After processing, lift jars and place on a towel without tilting.
- Leave jars undisturbed for 12–24 hours to allow seals to set.
“A proper* water bath* processing is the key to preserving the bright flavors of our black bean and corn salsa safely.”
By carefully following these steps, our canned black bean and corn salsa will stay fresh, flavorful, and ready for enjoyment long after summer’s bounty is gone.
Cooling and Storing
After processing our canned black bean and corn salsa, proper cooling and storing are crucial steps to maintain safety and preserve its vibrant flavors for months to come.
Cooling Time
Once we’ve removed the jars from the water bath canner, we place them on a clean towel or cooling rack to cool undisturbed for 12 to 24 hours at room temperature. During this time, the jars will make a gentle “ping” sound as the lids seal, signaling the formation of a strong vacuum seal.
- Do not tighten lids after processing; the seal forms during the cooling period.
- Avoid stacking jars while cooling to ensure even temperature distribution.
- Check seals by pressing the center of each lid. A properly sealed lid will not flex up or down.
Storing Guidelines
Once our salsa jars are fully cooled and sealed, we follow these storage guidelines to retain freshness and safety:
| Storage Condition | Duration | Storage Tips |
|---|---|---|
| Cool, dark pantry | Up to 12 months | Keep away from direct sunlight |
| Refrigerated after opening | 7 to 10 days | Use clean utensils to avoid contamination |
| Frozen (for longer storage) | Up to 6 months | Transfer salsa to airtight freezer containers |
“Proper storage protects our salsa’s fresh flavors and ensures food safety throughout the year.”
If any jars fail to seal, refrigerate and consume within 7 days or reprocess within 24 hours using new lids. Always label jars with the date of canning for easy tracking.
Serving Suggestions
Our canned black bean and corn salsa offers endless versatility. Here are some delicious ways to enjoy this vibrant, tangy salsa:
As a Classic Dip
Scoop your salsa with tortilla chips for a quick snack or party platter. The crisp corn and hearty black beans paired with the spice blend create a lively flavor that pairs perfectly with chips.
Topping for Tacos and Burritos
Add a generous spoonful to tacos, burritos, or quesadillas. The salsa’s fresh texture and balanced acidity enhance grilled meats, avocado slices, and melted cheese, elevating any Mexican-inspired dish.
Salad Enhancer
Use the salsa as a zesty salad topper. Combine it with leafy greens, grilled chicken, or quinoa to create a nutritious and colorful meal packed with flavor.
Side for Grilled Meats and Seafood
Serve alongside grilled steak, chicken, or fish to add freshness and depth. The tangy bite of lime and vinegar in the salsa balances smoky char flavors beautifully.
Baked Potato or Sweet Potato Topping
Spread over baked potatoes or roasted sweet potatoes with a dollop of sour cream or Greek yogurt. The salsa adds crunch and a bit of spice, turning an ordinary side into a vibrant dish.
Ingredient in Casseroles and Rice Bowls
Mix into casseroles or layered rice bowls for added texture and bold flavor. It complements beans, corn, tomatoes, and spices commonly found in Southwestern dishes.
| Serving Idea | Suggested Pairings | Flavor Highlights |
|---|---|---|
| Chips and Dip | Tortilla chips | Crunchy, fresh, zesty |
| Taco and Burrito Topping | Grilled meats, avocado, cheese | Tangy, spicy, hearty |
| Salad Topper | Leafy greens, chicken, quinoa | Fresh, vibrant, nutritious |
| Side for Grilled Meats | Steak, chicken, fish | Smoky, balanced acidity |
| Baked Potato Topping | Sour cream, Greek yogurt | Creamy, spicy, crunchy |
| Casserole or Rice Bowl Mix | Beans, corn, tomatoes, Southwest spices | Bold, layered, textured |
“Our black bean and corn salsa transforms simple dishes into flavorful delights. Keeping a jar ready ensures we always have a fresh, brighten-up option at hand.”
By trying these serving ideas, we can make the most of our home-canned salsa, turning everyday meals into exciting, colorful experiences.
Conclusion
Canning black bean and corn salsa is a fantastic way to keep the fresh flavors of summer within reach all year long. With just a few simple steps and the right tools, we can create a delicious, versatile salsa that enhances any meal.
Having this homemade salsa ready means we’re always prepared to add a burst of flavor to snacks and dishes without worrying about preservatives or spoilage. It’s a rewarding process that brings convenience and taste together in every jar.
Frequently Asked Questions
What are the main ingredients in black bean and corn salsa?
The main ingredients include fresh corn, black beans, bell peppers, onion, tomatoes, garlic, jalapeño, and cilantro, combined with vinegar, lime juice, salt, sugar, and spices like cumin and smoked paprika.
Why should I can black bean and corn salsa?
Canning preserves the fresh summer flavors year-round, prevents spoilage, allows control over ingredients, and ensures a preservative-free, shelf-stable product.
What equipment do I need for canning this salsa?
You need a water bath canner, canning jars with lids, jar lifter, lid lifter, funnel, bubble remover, clean towels, and standard kitchen tools like pots, knives, and mixing spoons.
How do I ensure my salsa jars seal properly?
Fill jars with hot salsa leaving 1/2 inch headspace, remove air bubbles, wipe jar rims clean, apply lids securely, and process in a boiling water bath for the recommended time.
How long can canned black bean and corn salsa be stored?
Store sealed jars in a cool, dark place for up to 12 months. Once opened, keep refrigerated and use within 7 to 10 days.
Can I freeze black bean and corn salsa?
Yes, freezing is an option for longer storage, but use freezer-safe containers and note that texture may slightly change after thawing.
How do I know if a jar did not seal correctly?
If the lid doesn’t pop when pressed or the seal is loose, the jar did not seal properly. Refrigerate and consume the salsa soon or reprocess it.
What are some ways to serve canned black bean and corn salsa?
Use it as a dip with chips, a topping for tacos or baked potatoes, a salad booster, side for grilled meats, or an ingredient in casseroles and rice bowls.