
Wild plum wine is a delightful way to capture the unique flavors of nature’s bounty. This homemade wine brings out the rich, tangy sweetness of wild plums, offering a refreshing alternative to traditional fruit wines. Perfect for those who love experimenting with natural ingredients, it’s a rewarding project that connects us to the outdoors.
Making wild plum wine lets us enjoy a taste that’s both vibrant and complex. Whether you’re a seasoned winemaker or a curious beginner, this recipe guides you through the process with simple steps and accessible ingredients. Let’s dive into crafting a batch that’s full of character and perfect for sharing with friends.
Ingredients
To craft our wild plum wine, we carefully gather ingredients that highlight the fruit’s natural tartness and depth. Using fresh and quality components sets the foundation for a wine bursting with vibrant flavors and a smooth finish. Here are the essential ingredients we need for this rewarding winemaking journey:
- 5 pounds of ripe wild plums, washed and pitted
- 2 pounds of granulated sugar, to balance the tartness
- 1 gallon of water, preferably filtered for purity
- 1 teaspoon of yeast nutrient, to support fermentation
- 1 packet of wine yeast (Lalvin EC-1118 or similar), ensures a robust fermentation
- 1 Campden tablet (optional), crushed to sterilize and prevent unwanted bacteria
- 1 teaspoon of acid blend, enhances the wine’s brightness
- 1 teaspoon of pectic enzyme, breaks down fruit pulp for a clearer wine
| Ingredient | Quantity | Purpose |
|---|---|---|
| Wild plums | 5 pounds | Main fruit, provides flavor |
| Granulated sugar | 2 pounds | Sweetens and fuels fermentation |
| Water | 1 gallon | Dilutes and balances concentration |
| Yeast nutrient | 1 teaspoon | Supports healthy yeast growth |
| Wine yeast | 1 packet | Drives fermentation |
| Campden tablet | 1 (crushed, opt.) | Sanitizes and stabilizes must |
| Acid blend | 1 teaspoon | Enhances acidity and flavor |
| Pectic enzyme | 1 teaspoon | Clears wine by breaking down pectin |
Each ingredient plays a crucial role in shaping our wild plum wine’s flavor profile and clarity. By measuring precisely and preparing thoughtfully we ensure a successful fermentation that captures the essence of wild plums in every sip.
Equipment Needed
To craft wild plum wine that truly captures the vibrant flavor of ripe wild plums, having the right equipment is essential. Below is a detailed list of tools we rely on to ensure a smooth and successful winemaking process.
Primary Fermentation Tools
- Primary fermenter: A food-grade plastic bucket with a tight-fitting lid, typically around 5 gallons. This is where the initial fermentation happens.
- Glass or plastic carboy: For secondary fermentation and clarification.
- Airlock and bung: To allow gases to escape during fermentation while preventing oxygen and contaminants from entering.
- Hydrometer: To measure specific gravity and track fermentation progress and alcohol content.
- Thermometer: To maintain ideal fermentation temperature between 65-75°F.
Preparation and Mixing Utensils
- Large stirring spoon: Preferably food-grade plastic or stainless steel, used for mixing ingredients thoroughly.
- Straining bag or fine mesh strainer: To hold the crushed wild plums during fermentation, making pressing easier.
- Measuring cups and spoons: For accurate measurement of sugar, yeast nutrient, acids, and enzymes.
Cleaning and Sanitizing
- Sanitizer: A no-rinse sanitizing solution to ensure all equipment is free of contaminants.
- Clean cloths or paper towels: For drying and wiping equipment before use.
Bottling Equipment
- Siphon hose with racking cane: For transferring wine without introducing oxygen.
- Bottle filler: To control filling and minimize spilling.
- Wine bottles and corks or caps: Clean, sterilized bottles suited for wine storage.
- Corker or capper: Depending on your bottle closure preference.
| Equipment | Purpose |
|---|---|
| Primary fermenter | Initial fermentation space |
| Glass/plastic carboy | Secondary fermentation and wine clarification |
| Airlock and bung | Gas escape with oxygen protection |
| Hydrometer | Track specific gravity and alcohol content |
| Thermometer | Maintain ideal fermentation temperature |
| Large stirring spoon | Mixing ingredients |
| Straining bag/mesh strainer | Contain fruit pulp during fermentation |
| Measuring cups and spoons | Accurate measurement of additives |
| Sanitizer | Sanitize all equipment |
| Siphon hose & racking cane | Transferring wine to avoid oxidation |
| Bottle filler | Controlled wine bottling |
| Wine bottles & corks/caps | Final storage of wild plum wine |
| Corker or capper | Secure bottle closures |
We strongly recommend sanitizing every piece of equipment before use to ensure a clean fermentation environment, which is key to producing a crisp and flavorful wild plum wine.
Preparing the Wild Plums
Proper preparation of the wild plums is essential for crafting a flavorful and well-balanced wine. Let’s carefully select, clean, and pit the plums to unlock their full potential in our wild plum wine recipe.
Selecting the Plums
We begin by choosing ripe wild plums that showcase vibrant color and firm flesh. The best plums will be:
- Deeply colored, ranging from dark purple to rich red
- Free from bruises, cuts, or mold
- Slightly soft to the touch but not mushy
- Freshly harvested for optimal flavor intensity
| Criteria | Description |
|---|---|
| Color | Dark purple to rich red |
| Texture | Slightly soft but firm |
| Quality | No bruises or mold |
| Freshness | Recently picked for best taste |
Choosing high-quality wild plums ensures that our wine captures the authentic essence and natural sweetness of the fruit.
Washing and Cleaning
Next, we thoroughly wash the wild plums to remove dirt, insects, and any chemicals from their skin. To do this:
- Place the plums in a colander or large bowl.
- Rinse under cool running water, gently rubbing each plum with our hands.
- If desired, soak the plums for 5 minutes in a solution of water and a splash of vinegar to disinfect.
- Rinse again thoroughly with clean water to remove residual vinegar.
Keeping the skins intact during washing is critical as they contribute to the wine’s color, flavor, and tannins.
Pitting the Plums
Removing seeds is crucial to avoid any bitter flavors in our wine. Follow these steps:
- Lay the cleaned plum on a cutting board.
- Slice the fruit lengthwise around the pit with a sharp knife.
- Twist gently to separate the halves.
- Use the knife or fingers to carefully remove the pit without damaging the flesh.
We do not discard the skins and pulp—instead, they go directly into the fermenter to preserve the full body and character of our wild plum wine.
“Pit the plums promptly after washing to prevent oxidation and loss of vibrant flavors.“
By meticulously preparing the wild plums through selecting, washing, and pitting we set a strong foundation for a rich, well-rounded wild plum wine.
Making the Wild Plum Wine
Crafting wild plum wine is a rewarding process that captures the vibrant essence of the fruit. Let’s dive into the detailed steps to prepare the must and activate fermentation with precision.
Preparing the Must
We begin by transforming our carefully selected wild plums into the foundation of our wine—the must.
- Crush the Plums: Place the washed, pitted wild plums into the sanitized primary fermenter. Use a potato masher or similar tool to gently crush the fruit, releasing juice but leaving skins intact to enhance color and flavor.
- Dissolve the Sugar: Measure and add granulated sugar as specified in our recipe. Pour a small quantity of warm water (about 1 cup) into the sugar and stir vigorously until completely dissolved. This ensures uniform sweetness and fermentation balance.
- Add Water: Pour the remaining water (usually around 2 gallons depending on batch size) into the fermenter to dilute the must to the ideal concentration.
- Incorporate Acid Blend and Pectic Enzyme: Add the acid blend to balance tartness and the pectic enzyme to break down fruit pulp, improving juice extraction and clarity.
- Mix Thoroughly: Stir the must thoroughly but gently to combine all ingredients evenly without introducing excess oxygen.
- Test the Specific Gravity: Use a hydrometer to record the starting specific gravity (SG). This value helps us track fermentation progress and estimate final alcohol content.
| Ingredient | Purpose | Measurement |
|---|---|---|
| Crushed Wild Plums | Base fruit flavor and color | As per recipe |
| Granulated Sugar | Provides fermentable sugars | 3 to 4 pounds |
| Water | Dilutes must to optimal concentration | 2 gallons |
| Acid Blend | Balances tartness | 1 tsp |
| Pectic Enzyme | Breaks down fruit pulp for clarity | 1 tsp |
Adding Yeast and Other Ingredients
After preparing the must, our next critical step is to introduce the living agents that will transform sugars into alcohol.
- Sanitize Your Hands and Tools: Always sanitize before handling yeast or fermentation additives to avoid contamination.
- Add Yeast Nutrient: Sprinkle the yeast nutrient to boost yeast activity and ensure a healthy fermentation.
- Rehydrate the Wine Yeast: Follow the package instructions to rehydrate your selected wine yeast (such as Lalvin ICV D47 or EC-1118). Using quality wine yeast ensures consistent and robust fermentation.
- Add the Yeast to the Must: Pour the rehydrated yeast evenly over the surface of the must.
- Add a Campden Tablet: Crush and add one Campden tablet to eliminate wild bacteria and unwanted yeasts. Wait at least 24 hours before pitching the cultured yeast to allow the sulfites to dissipate.
- Cover and Secure: Fit the fermenter with an airlock and bung to allow CO2 to escape while preventing oxygen ingress.
- Maintain Temperature: Keep the fermenting must at 65°F to 75°F for optimal yeast performance.
This careful addition of yeast and fermentation aids sets the stage for a clean, vigorous fermentation that unlocks the true character of the wild plums.
| Step | Detail |
|---|---|
| Sanitize | Hands, tools, fermenter equipment |
| Yeast Nutrient | 1 tsp added to the must |
| Rehydrated Wine Yeast | As per package instructions |
| Campden Tablet | 1 tablet crushed and added |
| Fermentation Temperature | 65°F to 75°F |
| Airlock | Attached to primary fermenter |
Fermentation Process
The Fermentation Process is the transformative stage where the wild plum must evolves into wine. By carefully managing each step, we unlock the vibrant flavors and aromas unique to wild plum wine.
Primary Fermentation
In this phase, our goal is to jumpstart active fermentation and extract the fullest flavor from the wild plums.
- Transfer the prepared must into a sanitized primary fermenter, leaving enough headspace for foaming.
- Cover the fermenter with a breathable cloth or lid fitted with an airlock to allow CO₂ to escape but prevent contaminants.
- Maintain a stable temperature between 65°F to 75°F (18°C to 24°C). This range encourages a healthy yeast activity without stressing the culture.
- Stir the must vigorously twice daily to aerate the juice and keep the skins in suspension. Aeration feeds yeast growth and helps release color and tannins.
- Monitor the specific gravity using a hydrometer daily. Active fermentation typically lasts 5 to 7 days until gravity drops near 1.030.
- When the vigorous bubbling subsides and sediment starts to settle, it’s time to transfer to secondary fermentation.
| Step | Action | Details |
|---|---|---|
| Transfer must | Use sanitized primary fermenter | Adequate headspace to allow foaming |
| Cover | Breathable cloth or airlock lid | Prevent contamination |
| Temperature control | Maintain 65°F to 75°F | Optimal yeast activity |
| Stirring | Twice daily | Aerates juice and releases flavor |
| Gravity monitoring | Daily with hydrometer | Track fermentation progress |
| Duration | 5 to 7 days | Until activity slows |
Secondary Fermentation
This stage refines the wine, clearing sediments and developing complexity.
- Rack the wine by siphoning it gently into a sanitized glass carboy, leaving sediment behind. This separation enhances clarity and prevents off-flavors.
- Attach a sanitized airlock and bung to the carboy to maintain an anaerobic environment.
- Store the carboy in a cool location around 60°F to 65°F (15°C to 18°C) to encourage slow, steady fermentation.
- Let the wine ferment for 3 to 6 weeks, occasionally checking specific gravity. The ideal final gravity is near 0.990 to 1.000, indicating fermentation completion.
- After fermentation ceases, allow the wine to settle and clarify naturally before bottling.
| Step | Action | Details |
|---|---|---|
| Racking | Siphon into glass carboy | Leave sediment behind |
| Seal | Attach sanitized airlock and bung | Maintain anaerobic conditions |
| Temperature | Store at 60°F to 65°F | Promotes slow, even fermentation |
| Duration | 3 to 6 weeks | Monitor gravity for accuracy |
| Clarification | Allow settling before bottling | Enhances wine clarity |
By mastering both primary and Secondary Fermentation, we harness the full essence of wild plums to create a rich, vibrant wine perfect for savoring or sharing.
Bottling and Aging
Bottling and aging mark the final stages in crafting our wild plum wine. These steps preserve the wine’s fresh flavors and deepen its complexity over time.
Bottling the Wine
We begin bottling once the wine’s fermentation is complete, and the specific gravity remains stable near 0.990 to 1.000 for several days. This indicates that sugars have fully converted into alcohol and the wine is ready to be sealed.
- Sanitize all bottles, corks, and siphoning equipment thoroughly to prevent contamination.
- Use a clean siphon tube to transfer the wine gently from the carboy into bottles, avoiding sediment.
- Leave about 1 inch (2.5 cm) of headspace in each bottle to allow slight expansion.
- Seal bottles immediately with natural corks or high-quality synthetic corks for long-term storage.
- Label each bottle with the bottling date and wine type for tracking during aging.
| Step | Action | Notes |
|---|---|---|
| Fermentation Check | Confirm stable specific gravity | 0.990 to 1.000 over 3 days |
| Sanitization | Clean bottles and equipment | Use sulfite solution or sanitizer |
| Siphoning | Transfer wine to bottles | Avoid disturbing sediment |
| Fill Level | Leave appropriate headspace | About 1 inch (2.5 cm) |
| Corking | Seal bottles securely | Use natural or synthetic corks |
| Labeling | Mark date and wine type | Helps monitor aging progress |
Aging Instructions
Aging enhances the wild plum wine’s aroma and smooths out harsh edges. We recommend aging the wine for a minimum of 6 months in a cool dark place with consistent temperature around 55°F (13°C).
- Store bottles horizontally to keep corks moist and airtight.
- Avoid exposure to sunlight and temperature fluctuations.
- Taste the wine periodically after 6 months, then every 3 months, to observe its evolving profile.
- For best complexity and balance, consider aging up to 12 to 18 months depending on personal taste.
“Patience is key in winemaking. Allowing our wild plum wine to age properly will reward us with rich, vibrant flavors that capture the essence of the plums in every sip.“
| Aging Duration | Temperature | Storage Position | Flavor Development |
|---|---|---|---|
| 6 months | 55°F (13°C) | Horizontal | Initial softening and aroma lift |
| 12 months | 55°F (13°C) | Horizontal | Increased complexity and balance |
| 18 months + | 55°F (13°C) | Horizontal | Deep rich flavors, smooth finish |
By following these bottling and aging steps, we ensure our wild plum wine matures beautifully, ready to delight in every glass.
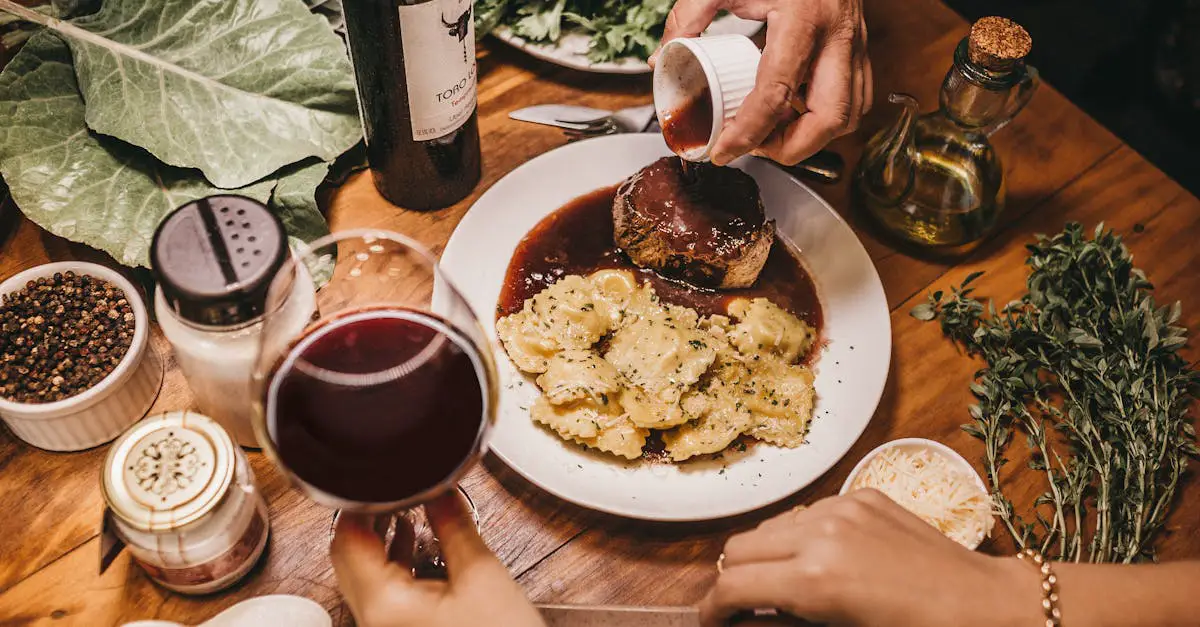
Serving Suggestions
To fully appreciate the wild plum wine, we recommend serving it slightly chilled between 50°F and 60°F (10°C to 15°C). This temperature range highlights the wine’s vibrant fruit flavors and balanced acidity, enhancing your tasting experience without dulling its aromatic complexity.
Food Pairings
Wild plum wine pairs exquisitely with both savory and sweet dishes. These pairings will elevate the wine’s natural tartness and richness:
- Cheese: Soft cheeses like Brie or Camembert complement the wine’s fruity notes
- Meat: Roast duck, pork tenderloin, or spiced lamb enhance its depth
- Desserts: Almond tart, spiced pastries, or dark chocolate balance the wine’s tartness
Glassware Recommendations
Using the right glassware invites the wine’s full personality to shine:
| Glass Type | Purpose | Benefit |
|---|---|---|
| Tulip-shaped glass | Concentrates aromas | Enhances the wild plum fragrance |
| White wine glass | Slightly narrower rim | Preserves acidity and fresh fruit notes |
| Small red wine glass | If served slightly warmer or aged wines | Accentuates complexity and body |
Serving Tips
- Pour wild plum wine carefully to avoid disturbing any sediment that may have developed during aging.
- Let the wine breathe for 10–15 minutes to open its bouquet before serving.
- Garnish with a fresh plum slice or a sprig of mint for an inviting presentation.
Storage After Opening
To maintain freshness after opening, store the bottle upright in the refrigerator and consume within 3 to 5 days. Use a vacuum stopper to prolong its vibrant flavors.
“Serving wild plum wine at the right temperature with complementary dishes transforms every sip into a memorable celebration of natural flavors.”
These serving suggestions help us unlock the full potential of our handcrafted wild plum wine allowing us to share a truly delightful experience with friends and family.
Troubleshooting Tips
When crafting wild plum wine, occasional challenges may arise. Here are key troubleshooting tips to help us identify and resolve common issues efficiently.
1. Slow or Stuck Fermentation
If fermentation slows down or stops prematurely, check the following factors:
- Temperature: Ensure fermentation temperature stays between 65°F and 75°F. Too low temperatures hinder yeast activity.
- Yeast Nutrient: Confirm that we added enough yeast nutrient during preparation to support a healthy yeast population.
- Oxygen Levels: Aerate the must thoroughly during the first 48 hours to promote yeast growth.
- Sugar Levels: Use a hydrometer to check if specific gravity is stuck above 1.010 after 1 week.
| Common Causes | Solutions |
|---|---|
| Low temperature | Move fermenter to warmer spot (65°F–75°F) |
| Insufficient nutrients | Add yeast nutrient according to package instructions |
| Inadequate oxygen | Stir must gently for 2–3 days to introduce oxygen |
| Excessively high sugar | Dilute must with water to lower sugar concentration |
“Patience is key. Sometimes gently stirring or warming the must revives yeast activity.”
2. Off or Unpleasant Flavors
Off-flavors can spoil the taste of our wild plum wine. Watch for:
- Bitter taste: Often caused by leaving plum pits in the must. Always separate pits before fermentation.
- Sulfury smell: May result from using Campden tablets incorrectly or from yeast stress.
- Vinegary flavors: Indicates bacterial contamination due to poor sanitation.
Solutions:
- Remove pits before crushing.
- Use Campden tablets exactly as directed and allow time before adding yeast.
- Sanitize all equipment thoroughly before use.
- Maintain proper temperature to avoid stressing yeast.
3. Cloudy Wine After Fermentation
If our finished wine appears hazy instead of clear, consider:
- Incomplete settling: Allow more time for solids to settle during secondary fermentation.
- Excess pectin: Increase pectic enzyme dosage next time to reduce pectin haze.
- Insufficient racking: Rack the wine carefully off sediment multiple times.
| Potential Cause | Recommended Action |
|---|---|
| Slow sedimentation | Extend secondary fermentation by 2 weeks |
| Pectin haze | Add extra pectic enzyme during must prep |
| Sediment disturbance | Rack wine gently to separate clear liquid |
4. Low Alcohol Content
If the final wine lacks expected alcohol strength, verify these points:
- Sugar levels: Measure original gravity to ensure enough fermentable sugar was present.
- Fermentation completeness: Check final gravity should be approximately 0.998 to 1.010.
- Yeast strain: Ensure we use robust wine yeast capable of fermenting the sugar fully.
| Alcohol Content Factor | Ideal Range or Check |
|---|---|
| Original Specific Gravity | 1.080 to 1.100 |
| Final Specific Gravity | 0.998 to 1.010 |
| Yeast Selection | Wine yeast with alcohol tolerance >14% |
5. Excessive Sweetness or Overly Dry Wine
Balancing sweetness and dryness is crucial:
- If wine tastes too sweet, fermentation may have stopped early or sugar was added excessively.
- If too dry, backsweetening with sugar or fruit juice after fermentation completes can adjust sweetness.
Tip: Always measure specific gravity before bottling and consider blending or backsweetening cautiously after stabilization.
By following these troubleshooting tips closely, we maintain control over our wild plum wine crafting and ensure a vibrant, flavorful, and balanced final product every time.
Conclusion
Crafting wild plum wine is a truly rewarding journey that connects us with nature’s bounty. With the right ingredients, equipment, and attention to detail, we can create a vibrant wine that captures the unique flavors of wild plums.
Whether we’re seasoned winemakers or just starting out, this recipe offers a perfect balance of guidance and creativity. Sharing a bottle with friends makes all the effort worthwhile, turning every sip into a celebration of craftsmanship and natural goodness.
Frequently Asked Questions
What ingredients are essential for making wild plum wine?
You need ripe wild plums, granulated sugar, water, yeast nutrient, wine yeast, a Campden tablet, acid blend, and pectic enzyme. Each helps balance flavor, support fermentation, and enhance the wine’s taste.
What equipment do I need for wild plum winemaking?
Essential equipment includes a primary fermenter, glass/plastic carboy, airlock and bung, hydrometer, thermometer, and bottling tools. Sanitizing all tools is crucial for a clean fermentation process.
How do I prepare wild plums for winemaking?
Select ripe, blemish-free plums. Wash thoroughly and pit them to avoid bitterness. Keep skins and pulp to enrich flavor, color, and body for a better wine.
What is the ‘must’ in winemaking?
Must is the crushed fruit mixture with sugar, water, acid blend, and enzymes. It’s the base for fermentation, where yeast converts sugars into alcohol.
How do I add yeast and fermentation aids properly?
Sanitize tools, add yeast nutrient, rehydrate wine yeast, and use a Campden tablet to kill unwanted bacteria. Maintain proper fermentation temperatures for best results.
What are the stages of fermentation for wild plum wine?
There are two stages: primary fermentation (5-7 days) in a fermenter with stirring and temperature control, and secondary fermentation (3-6 weeks) in a sealed carboy to refine wine clarity and flavor.
How should I bottle and age wild plum wine?
Sanitize bottles and tools, carefully transfer the wine to avoid sediment, seal well, and age in a cool, dark place for at least 6 months to develop complexity.
What is the ideal serving temperature for wild plum wine?
Serve slightly chilled between 50°F and 60°F to highlight fruity flavors and balanced acidity.
What foods pair well with wild plum wine?
Pair it with soft cheeses, roast meats, and desserts to complement its natural tartness and vibrant flavors.
How do I troubleshoot slow or stuck fermentation?
Check temperature, yeast health, and nutrient levels. Gently stir and adjust conditions to encourage fermentation restart.
What causes cloudy wine and how do I fix it?
Cloudiness may result from incomplete fermentation or poor sanitation. Racking wine off sediment and proper filtration can clear it.
How can I prevent off-flavors in my wine?
Maintain strict sanitation, control fermentation temperature, and use quality ingredients to avoid undesirable tastes.
How should I store wild plum wine after opening?
Reseal tightly and refrigerate. Consume within a few days to maintain freshness and flavor.
Can beginners make wild plum wine successfully?
Yes, the process is suitable for beginners with careful attention to ingredients, equipment, and fermentation steps for rewarding results.