
Beach plums are a hidden gem along the East Coast, bursting with tart and sweet flavors that make them perfect for preserves. Harvested from coastal shrubs, these small fruits pack a punch of unique taste that you won’t find in your typical jam. Making beach plum preserves lets us capture the essence of summer and enjoy it year-round.
Our beach plum preserves recipe is simple and rewarding, turning these wild fruits into a luscious spread that complements everything from toast to cheese boards. Whether you’re a seasoned jam maker or trying preserves for the first time, this recipe guides us through every step with confidence. Let’s dive in and bring a taste of the coast right into our kitchens.
Ingredients
To craft our Beach Plum Preserves, we gather fresh and simple ingredients that highlight the vibrant tartness and natural sweetness of beach plums. Here is everything we need to create luscious preserves bursting with coastal flavor.
- 4 cups fresh beach plums, washed and pitted
- 2 cups granulated sugar – this balances the tartness perfectly
- 1/4 cup fresh lemon juice – enhances pectin activation and brightens flavor
- 1/2 cup water – to help soften the fruit during cooking
- 1 packet (1.75 oz) fruit pectin – ensures proper setting of the preserves
| Ingredient | Quantity | Note |
|---|---|---|
| Fresh beach plums | 4 cups | Washed and pitted |
| Granulated sugar | 2 cups | Adjust to taste if desired |
| Fresh lemon juice | 1/4 cup | Use freshly squeezed |
| Water | 1/2 cup | To soften fruit while cooking |
| Fruit pectin | 1 packet (1.75 oz) | Powdered, for proper gel |
“Good preserves begin with quality ingredients. Using ripe, flavorful beach plums sets the foundation for a perfect batch.”
By measuring carefully and preparing these ingredients in order, we set ourselves up for smooth and successful cooking, capturing the essence of summer with every jar.
Equipment Needed
To create the perfect Beach Plum Preserves, having the right equipment on hand is essential for a smooth and successful process. Each item plays a crucial role in ensuring safety, precision, and quality throughout the jam-making experience.
Essential Tools for Making Beach Plum Preserves
- Large Heavy-Bottomed Saucepan: Use this to cook the plums and sugar mixture evenly without scorching.
- Food Mill or Fine Mesh Sieve: This helps separate the plum skins and seeds from the pulp, giving your preserves a smooth texture.
- Measuring Cups and Spoons: Accurately measure ingredients like sugar, lemon juice, and water for perfect balance.
- Wooden Spoon or Heat-Resistant Spatula: For stirring the preserves gently without scratching your cookware.
- Candy or Jam Thermometer: Monitor the temperature precisely to know when your preserves reach the gel stage.
- Canning Jars with Lids and Bands: Sterilized jars are necessary for safely storing your preserves long-term.
- Jar Lifter and Funnel: Makes filling hot jars easier and safer by preventing spills and burns.
- Large Pot for Water Bath Canning: Needed to process sealed jars and ensure shelf stability.
| Equipment | Purpose |
|---|---|
| Large Heavy-Bottomed Saucepan | Even cooking, prevent burning |
| Food Mill or Fine Mesh Sieve | Smooth texture by straining pulp |
| Measuring Cups and Spoons | Accurate ingredient measurement |
| Wooden Spoon/Heat-Resistant Spatula | Gentle stirring without damage |
| Candy or Jam Thermometer | Monitor cooking temperature for setting |
| Sterilized Canning Jars & Lids | Safe storage and preservation |
| Jar Lifter & Funnel | Safe and clean jar filling |
| Large Pot for Water Bath Canning | Proper jar processing for long-term storage |
Tips for Equipment Preparation
- We recommend sterilizing jars and lids by boiling them in water for 10 minutes before use.
- Keep your wooden spoon or spatula dry when stirring hot preserves to prevent moisture dilution.
- Use a jam thermometer to avoid under or overcooking, crucial for the ideal Beach Plum Preserve consistency.
Preparing the Beach Plums
To create perfect beach plum preserves, it all starts with properly preparing the fruit. Our careful handling of the beach plums ensures maximum flavor and a smooth texture in the final product.
Washing and Sorting
We begin by thoroughly washing the beach plums under cold running water. This step removes any dirt, sand, or debris picked up during harvesting. After washing, we gently pat them dry using a clean kitchen towel to prevent excess water from diluting the preserve mixture.
Next, we sort the plums by removing any that are bruised, overly soft, or damaged. Using only firm and ripe beach plums is vital for the best flavor and consistent gel setting. Sorting helps us avoid any off-tastes or textural issues caused by spoiled fruit.
| Step | Details |
|---|---|
| Wash | Cold running water, gently clean all fruit |
| Dry | Pat dry with a clean towel |
| Sort | Remove bruised, soft, or damaged plums |
| Select | Use only firm, ripe beach plums |
Removing Stems and Pits
Before cooking, we remove the tough stems. We do this by pinching or cutting off the stem ends with a small paring knife.
Next, the critical step is pitting the fruit. Because beach plums are small and round, pitting can be a bit tricky. We slice the plums in half and use a teaspoon to carefully scoop out the pits. This ensures we avoid any bitter flavors and improve the texture of our preserves.
If desired, for an ultra-smooth preserve, we can pass the pitted fruit through a food mill or fine mesh sieve after cooking, which separates any remaining skins and solids cleanly.
“Removing pits thoroughly is essential for smooth preserves with a pure, tangy flavor that captures the essence of the coast.“
| Step | Technique |
|---|---|
| Remove stems | Pinch off or cut with paring knife |
| Slice fruit | Cut plums in halves |
| Pit fruit | Scoop out pit using a teaspoon |
| Optional milling | Use food mill or sieve post-cooking |
By taking these careful preparatory steps, we lay the foundation for crafting rich, bright, and smooth beach plum preserves that will delight every palate.
Making the Preserves
Let’s transform our carefully prepared beach plums into luscious, vibrant preserves. Each step is crucial for developing that perfect balance of sweetness, tartness, and the ideal spreadable texture.
Cooking the Plums
Place the 4 cups of washed and pitted beach plums and 1/2 cup of water into a large heavy-bottomed saucepan. Heat the mixture over medium heat, stirring occasionally with a wooden spoon or heat-resistant spatula. Allow the fruit to soften and release its juices, which usually takes about 10 to 15 minutes. Watch carefully to prevent scorching, and once the plums have broken down and started bubbling vigorously, remove the pot from heat.
| Step | Action | Time | Notes |
|---|---|---|---|
| 1 | Add plums and water | Immediate | Use heavy-bottomed pan |
| 2 | Heat on medium, stir | 10 to 15 minutes | Watch for boiling gently |
| 3 | Plums soften and break down | End of cooking | Fruit juices should release |
Adding Sugar and Pectin
Return the saucepan to medium-high heat. Slowly stir in the 2 cups of granulated sugar, making sure it dissolves completely into the hot fruit mixture. Next, sprinkle in the packet of fruit pectin, stirring briskly to avoid lumps. Add 1/4 cup of fresh lemon juice at this point to enhance natural pectin action and to brighten the flavor. Bring the mixture to a full rolling boil that cannot be stirred down. Maintain this boil for 1 minute, stirring constantly to ensure a consistent set.
Checking Consistency
To test the set of our beach plum preserves, follow this quick method:
- Place a small plate in the freezer before you start cooking.
- After boiling for a minute with sugar and pectin, spoon a small amount of preserves onto the chilled plate.
- Let it sit for 1-2 minutes, then push the edge with your finger.
If the preserves wrinkle and hold their shape without running, they have reached the perfect consistency.
| Indicator | Result | Action |
|---|---|---|
| Wrinkles when pushed | Set is achieved | Move to jar filling stage |
| Runs or spreads | Needs more cooking | Boil additional 1–2 minutes |
This consistency check guarantees that when we jar the preserves, they will have that perfect spreadable texture we desire without being too runny or overly stiff.
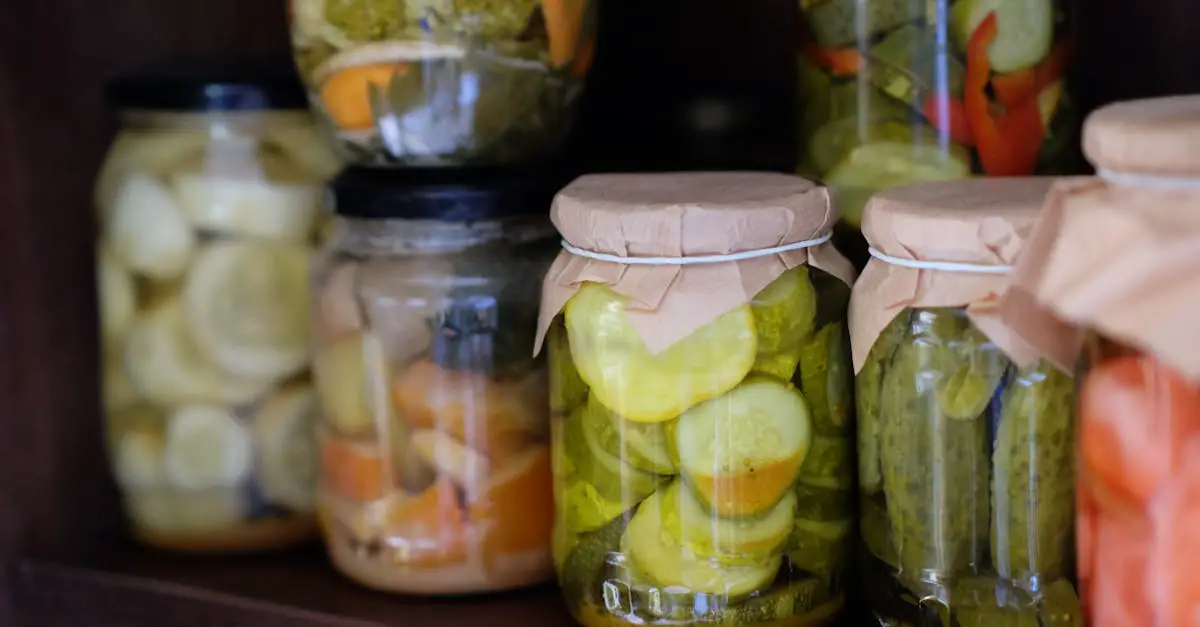
Sterilizing Jars and Canning
Proper sterilizing and canning are crucial steps to preserve the vibrant flavors and freshness of our Beach Plum Preserves. Let’s walk through the essential process to ensure safety and long-lasting quality.
Preparing the Jars
We start by sterilizing the jars to eliminate any bacteria, yeast, or fungi that could spoil the preserves.
- Wash jars and lids thoroughly in hot, soapy water. Rinse well.
- Place jars in a large pot and cover completely with water.
- Bring the water to a rolling boil and boil for 10 minutes.
- Keep jars submerged and hot until ready to fill; this prevents cracking when hot preserves are added.
- Simmer the lids separately in hot (not boiling) water for 5 minutes to soften sealing compound.
| Step | Action | Time | Temperature |
|---|---|---|---|
| Clean jars and lids | Wash with hot soapy water | – | Hot water |
| Sterilize jars | Boil submerged in water | 10 minutes | 212°F (100°C) |
| Warm lids | Simmer in hot water | 5 minutes | Below boiling |
| Keep jars hot | Leave submerged until use | – | Hot water |
Filling and Sealing Jars
Next, we transfer our hot Beach Plum Preserves into the prepared jars, ensuring a secure seal.
- Use a jar funnel to pour preserves into each sterilized jar, leaving a 1/4-inch headspace at the top.
- Remove any air bubbles by gently running a non-metallic spatula or chopstick along the inside edges.
- Wipe jar rims with a clean damp cloth to ensure no residue interferes with sealing.
- Place lids on jars, then screw on bands until finger-tight—do not overtighten.
Processing the Jars
The final step guarantees a hermetic seal and preservation stability through water bath canning.
- Place filled jars on a rack in a large pot with simmering water that covers them by at least 1 inch.
- Bring water to a full rolling boil.
- Process jars for 10 minutes at boiling point to destroy spoilage microorganisms.
- After processing, carefully remove jars with a jar lifter and place them upright on a towel to cool undisturbed.
- Leave jars to cool for 12 to 24 hours. You’ll hear the satisfying “pop” sound of lids sealing as they cool.
- Check seals by pressing the center of each lid; it should not flex or pop.
- Remove bands for storage and label jars with date and contents.
| Step | Action | Time | Details |
|---|---|---|---|
| Water bath preparation | Submerge jars with 1 inch water | – | Rack recommended |
| Boil water | Full rolling boil | 10 minutes | Maintains 212°F (100°C) |
| Cooling jars | Remove and cool undisturbed | 12-24 hours | Listen for sealing “pop” |
Following these steps ensures our Beach Plum Preserves stay fresh and safe for months, capturing summer’s vibrant taste for any time of year.
Storing and Shelf Life
Proper storing of our Beach Plum Preserves is essential to maintain their vibrant flavor and ensure long-lasting quality. Once the jars have been sealed and cooled after the water bath canning, here are the key steps and guidelines to follow:
Cool and Store in a Dark, Cool Place
After removing the jars from the water bath, allow them to cool undisturbed for 12 to 24 hours at room temperature. We recommend keeping the preserves away from direct sunlight and heat sources, storing them in a pantry or cupboard with a consistent cool temperature between 50°F to 70°F (10°C to 21°C).
Check the Seal
Before storing, confirm that each jar has sealed properly. The lid should be concave and will not flex up and down when pressed. If the seal is defective, refrigerate and consume those jars within 2 to 3 weeks.
Unopened Jar Shelf Life
When sealed and stored correctly, Beach Plum Preserves can last for:
| Storage Condition | Shelf Life |
|---|---|
| Pantry (cool, dark place) | Up to 12 months |
| Refrigerator (unopened) | Up to 18 months |
After Opening
Once opened, the preserves should be refrigerated and are best consumed within 3 to 4 weeks for optimal freshness and flavor. Always use a clean spoon to avoid contamination and extend shelf life.
Freezing Option
For longer storage beyond a year, we can freeze the preserves in airtight, freezer-safe containers. This method preserves flavor and texture for up to 12 months but may affect jar quality if canned jars are frozen.
Tip: Label jars with the date of preparation to track freshness and rotation easily.
By carefully following these storage tips, we ensure our Beach Plum Preserves remain delightful and safe to enjoy as a sweet reminder of summer anytime.
Serving Suggestions
Our Beach Plum Preserves bring a delightful burst of coastal flavor that pairs beautifully with a variety of dishes. Here are some of our favorite ways to enjoy this vibrant preserve:
- Spread it on toast or warm biscuits. The rich sweetness balanced with tartness makes for a perfect morning treat or afternoon snack.
- Swirl into yogurt or oatmeal. Add a spoonful to breakfast bowls for an extra layer of flavor and natural sweetness.
- Pair with cheese. Serve alongside a cheese platter featuring creamy brie, tangy goat cheese, or sharp cheddar. The preserves contrast wonderfully with salty and savory cheeses.
- Glaze for meats. Use as a glaze for pork chops or roasted chicken to introduce a fruity acidity and deep color.
- Mix in desserts. Top vanilla ice cream or fold into cake batters and cupcakes for a unique fruity twist.
- Enhance cocktails. Stir a teaspoon into sparkling water or cocktails for a refreshing coastal note.
| Serving Idea | Recommended Pairings | Flavor Enhance |
|---|---|---|
| Toast and Biscuits | Butter, cream cheese | Sweet and tart |
| Yogurt or Oatmeal | Granola, fresh fruit | Bright fruity sweetness |
| Cheese Platter | Brie, goat cheese, sharp cheddar | Contrast of sweet and savory |
| Meat Glaze | Pork, chicken | Fruity acidity and depth |
| Dessert Add-in | Ice cream, cakes, cupcakes | Fruity complexity |
| Cocktail Ingredient | Sparkling water, gin, vodka | Refreshing taste burst |
“Our Beach Plum Preserves transform simple meals into coastal-inspired delights, perfect for every occasion.”
We encourage experimenting with these ideas or creating your own unique ways to highlight the complex yet harmonious flavor of our homemade beach plum preserves.
Conclusion
Making beach plum preserves is a rewarding way to bring a touch of the coast into our homes. With a few simple ingredients and the right techniques, we can create a delicious treat that captures the vibrant flavors of summer.
Whether we enjoy them on toast, paired with cheese, or as a glaze, these preserves add a unique twist to everyday meals. Keeping them stored properly ensures that their fresh taste stays with us for months to come.
Let’s embrace the joy of homemade preserves and savor the natural goodness of beach plums all year long.
Frequently Asked Questions
What are beach plums?
Beach plums are small, tart, and sweet fruits native to the East Coast. They are popular for making preserves due to their unique coastal flavor.
What ingredients do I need for beach plum preserves?
You’ll need 4 cups of washed and pitted beach plums, 2 cups of sugar, 1/4 cup of fresh lemon juice, 1/2 cup of water, and 1 packet of fruit pectin.
What equipment is essential for making beach plum preserves?
Key tools include a heavy-bottomed saucepan, food mill or fine mesh sieve, measuring cups, wooden spoon, candy thermometer, sterilized canning jars with lids, jar lifter, funnel, and a large pot for water bath canning.
How do I prepare beach plums for preserves?
Wash plums under cold water, remove bruised or damaged ones, pit and slice the fruit, and optionally pass cooked fruit through a food mill for smoothness.
How do I know when my beach plum preserves are set?
The preserves are set when the mixture reaches a rolling boil and thickens to a spreadable consistency. You can perform a plate test by chilling a spoonful and checking its firmness.
How do I sterilize jars for canning?
Wash jars and lids, boil them in water for 10 minutes, and keep them hot until ready to fill to ensure a sterile environment for preserving.
What is the water bath canning process?
Fill sterilized jars with preserves, seal them with lids, and submerge in boiling water for the recommended time to create a vacuum seal and preserve freshness.
How should I store beach plum preserves?
Store sealed jars in a cool, dark place for up to 12 months, refrigerate after opening and consume within 3-4 weeks. Freezing is also an option for longer storage.
What are some serving ideas for beach plum preserves?
Try spreading them on toast or biscuits, mixing into yogurt or oatmeal, pairing with cheese, glazing meats, adding to desserts, or enhancing cocktails for a coastal twist.
Can beginners make beach plum preserves successfully?
Yes, the recipe is simple and rewarding, suitable for both beginners and experienced jam makers, with detailed steps ensuring great results every time.