
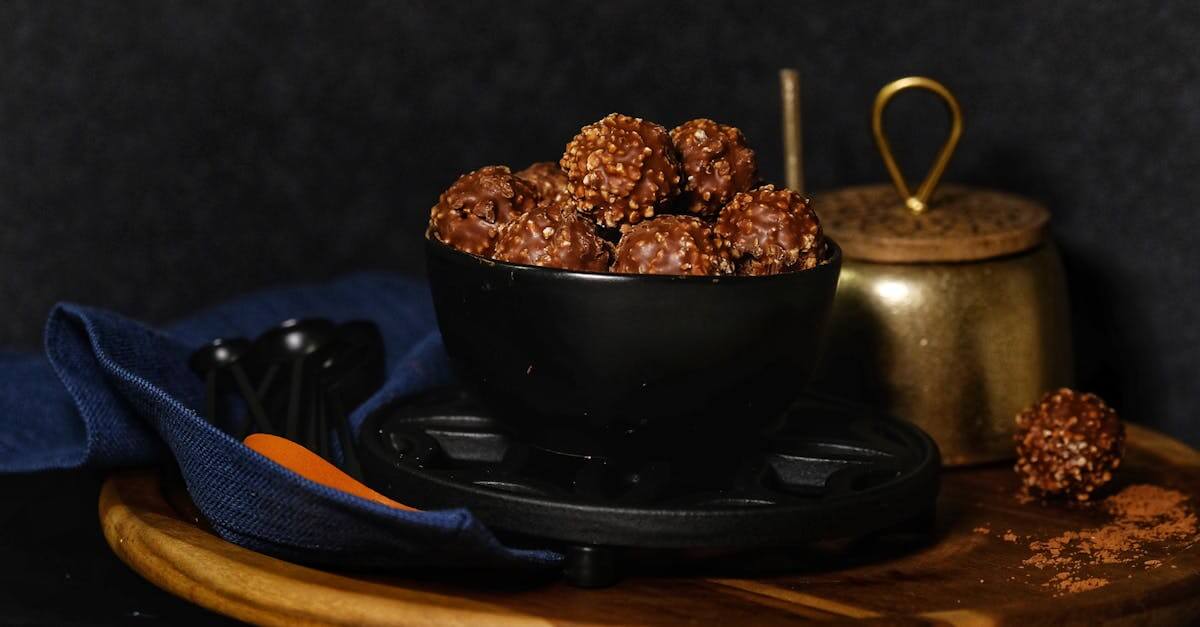
There’s something truly irresistible about the rich blend of chocolate and maple. Our Chocolate Covered Maple Cream Candy recipe brings together these two classic flavors in a delightful treat that’s perfect for any occasion. With its smooth, creamy center and decadent chocolate coating, this candy offers a perfect balance of sweetness and texture.
Maple cream candy has roots in traditional North American confectionery, where pure maple syrup is transformed into a luscious filling. By coating it in chocolate, we add an extra layer of indulgence that elevates this classic treat. Whether you’re making these candies for a holiday gift or a special dessert, they’re sure to impress with every bite.
Ingredients
To create our Chocolate Covered Maple Cream Candy, we carefully select ingredients that bring out the rich maple flavor and create a smooth, creamy texture balanced by a decadent chocolate shell.
For the Maple Cream Filling
- 2 cups pure maple syrup (preferably Grade A dark or amber for a bold flavor)
- 1/4 cup heavy cream (adds richness to the filling)
- 1 tbsp unsalted butter (for smoothness and gloss)
- 1/2 tsp vanilla extract (enhances the natural maple flavor)
- 1/4 tsp salt (balances sweetness)
For the Chocolate Coating
- 12 oz high-quality dark or semi-sweet chocolate (chopped or chocolate chips, for melting)
- 1 tbsp coconut oil or vegetable shortening (for a glossy, smooth finish on the chocolate)
| Ingredient | Quantity | Notes |
|---|---|---|
| Pure Maple Syrup | 2 cups | Choose Grade A dark or amber |
| Heavy Cream | 1/4 cup | Adds richness |
| Unsalted Butter | 1 tbsp | For smoothness |
| Vanilla Extract | 1/2 tsp | Enhances maple flavor |
| Salt | 1/4 tsp | Balances sweetness |
| Dark or Semi-Sweet Chocolate | 12 oz | High-quality for coating |
| Coconut Oil or Veg. Shortening | 1 tbsp | Improves chocolate shine and texture |
Tools and Equipment
To create our Chocolate Covered Maple Cream Candy with precision and ease, we rely on a set of essential tools and equipment. Each item plays a critical role in ensuring the texture, flavor, and appearance turn out perfectly smooth and indulgent.
Essential Tools
- Heavy-bottomed Saucepan
We use a heavy-bottomed saucepan to cook the maple cream mixture. This ensures even heat distribution, preventing scorching during the delicate caramelization of the maple syrup and cream.
- Candy Thermometer
Achieving the correct temperature is crucial for the perfect consistency of the maple cream center. A reliable candy thermometer allows us to monitor the cooking temperature accurately, hitting the target around 234°F (soft ball stage).
- Electric Mixer or Stand Mixer
After cooking, the maple cream mixture needs vigorous beating to develop its smooth, creamy texture. We prefer using an electric or stand mixer to achieve consistent results faster.
- Mixing Bowls
Sturdy mixing bowls are necessary for combining extracts and cooling the maple cream mixture.
- Baking Sheet or Silicone Mat
To set the candy before coating, we pour the mixture onto a lined baking sheet or silicone mat. This prevents sticking and allows easy removal once firm.
- Sharp Knife or Candy Cutter
For cutting the set maple cream into uniform pieces, a sharp knife or candy cutter is vital for clean edges.
- Double Boiler or Microwave-Safe Bowl
Melting the chocolate coating gently is best done with a double boiler or microwave-safe bowl to avoid burning the chocolate.
- Dipping Tools or Forks
We use dipping tools or forks to coat the maple cream pieces evenly in melted chocolate, ensuring full coverage without mess.
- Wire Rack
A wire rack allows excess chocolate to drip off and the candies to set uniformly.
- Parchment Paper
Useful for placing dipped candies while the chocolate sets, preventing sticking and aiding cleanup.
Equipment Summary
| Tool/Equipment | Purpose | Notes |
|---|---|---|
| Heavy-bottomed Saucepan | Even heat cooking of maple cream mixture | Prevents scorching |
| Candy Thermometer | Temperature monitoring for precise cooking | Target 234°F (soft ball stage) |
| Electric/Stand Mixer | Beating to develop smooth, creamy texture | Speeds up consistency |
| Mixing Bowls | Combining extracts and cooling mixture | Use heat-resistant bowls |
| Baking Sheet/Silicone Mat | Molding and setting maple cream | Non-stick surface preferred |
| Sharp Knife/Candy Cutter | Cutting set maple cream into pieces | Clean, uniform cuts required |
| Double Boiler/Microwave Bowl | Gently melting chocolate | Avoids burning chocolate |
| Dipping Tools/Forks | Coating maple cream pieces with chocolate | Ensures even coverage |
| Wire Rack | Draining excess chocolate | Uniform setting |
| Parchment Paper | Preventing sticking during chocolate setting | Easy cleanup |
Utilizing these specialized tools simplifies the process and elevates the quality of our Chocolate Covered Maple Cream Candy. We recommend preparing and organizing all equipment before starting, so each step flows smoothly from cooking to coating.
Instructions
Follow these detailed steps to create our Chocolate Covered Maple Cream Candy with perfect texture and rich flavor. Precision and patience will reward us with an irresistible treat.
Preparing the Maple Cream Filling
- Combine Ingredients: In a heavy-bottomed saucepan, mix pure maple syrup, heavy cream, unsalted butter, vanilla extract, and salt.
- Heat Slowly: Place over medium heat and stir constantly until the butter melts and the mixture is smooth.
- Monitor Temperature: Attach a candy thermometer and bring the mixture to 234°F (112°C), the firm ball stage essential for the perfect cream consistency.
- Cool and Beat: Remove from heat and let cool slightly to about 110°F (43°C). Transfer to a mixing bowl and beat with an electric mixer on high until the mixture thickens, becomes lighter in color, and starts to lose its gloss. This may take 8–10 minutes.
| Step | Temperature | Description |
|---|---|---|
| Heating to firm ball | 234°F (112°C) | Achieves candy firmness |
| Cooling before beating | 110°F (43°C) | Ensures proper texture and workability |
Forming the Candy Centers
- Prepare Surface: Line a baking sheet with parchment paper or a silicone mat.
- Shape the Cream: Use a small cookie scoop or spoon to portion the maple cream mixture into uniform, bite-sized rounds—or spread it evenly and cut into squares after chilling.
- Chill: Refrigerate the formed centers for at least 1 hour to firm up before dipping.
- Keep Covered: Store in a cool place to prevent softening.
Melting the Chocolate
- Choose Chocolate: Use high-quality dark or semi-sweet chocolate for a balanced sweetness that complements the maple.
- Melt Gently: Melt chocolate with coconut oil or vegetable shortening in a double boiler or microwave-safe bowl.
- Check Consistency: Stir frequently until smooth and glossy, avoiding overheating (optimal melting temperature is 110°F (43°C)).
- Stay Fluid: Maintain chocolate at a warm temperature for easier coating.
Coating the Maple Cream Candy
- Dip Carefully: Using dipping forks or toothpicks, immerse each maple cream center into the melted chocolate fully.
- Drain Excess: Lift the candy and tap gently on the side of the bowl to let excess chocolate drip off.
- Place on Rack: Set the coated candy on a wire rack or parchment-lined tray to let the chocolate harden uniformly.
- Repeat: Dip all pieces, working quickly before chocolate cools and thickens.
Setting and Cooling
- Cool Completely: Allow the dipped candies to set at room temperature or speed up the process by placing them in the refrigerator for 15–20 minutes.
- Check Texture: The chocolate coating should be firm and crisp, while the interior remains creamy and smooth.
- Store Properly: Keep candies in an airtight container in a cool, dry place until ready to serve or gift.
Make-Ahead and Storage Tips
Preparing Chocolate Covered Maple Cream Candy ahead of time can save us effort during busy occasions while preserving its fresh, indulgent flavor. Here’s how to store and handle the candy for optimal enjoyment:
Make-Ahead Preparation
- Shape and Chill: After beating the maple cream filling to the perfect texture, we should shape the centers and place them on a parchment-lined tray. Chill them in the refrigerator for at least 1 hour. This step firms the centers, making them easier to dip in chocolate.
- Chocolate Coating: For best results, dip the chilled centers in melted chocolate just before serving or gifting. However, coated candies can also be made ahead and stored properly.
Storage Guidelines
| Storage Method | Container Type | Temperature | Storage Duration | Notes |
|---|---|---|---|---|
| Refrigeration | Airtight container | 35°F to 40°F (2°C-4°C) | Up to 2 weeks | Prevents chocolate bloom, keeps filling firm |
| Freezing | Double-wrapped in foil and airtight container | 0°F (-18°C) | Up to 2 months | Thaw slowly in refrigerator before serving |
| Room temperature | Airtight container | 65°F to 70°F (18°C-21°C) | Up to 5 days | Keep away from heat and direct sunlight |
Tips for Maintaining Quality
- Avoid moisture: Moisture can cause the chocolate to seize or the maple cream center to become sticky. Always use airtight containers to minimize humidity exposure.
- Prevent Chocolate Bloom: Bloom appears as a white film on chocolate caused by temperature changes. To avoid it, store candies in a stable, cool environment.
- Slow Thawing: If frozen, thaw candies in the refrigerator overnight. Sudden temperature changes can cause condensation and affect texture.
Serving Suggestions After Storage
When ready to enjoy or serve, allow refrigerated candies to sit at room temperature for 10-15 minutes. This softens the chocolate coating slightly, enhancing the smooth, creamy texture of the maple cream center.
Serving Suggestions
To truly savor our Chocolate Covered Maple Cream Candy, we recommend presenting it in ways that enhance both its flavor and visual appeal. Here are several thoughtful serving ideas to elevate your experience:
- Serve at Room Temperature: Allow the candy to sit at room temperature for about 15 minutes before serving. This softens the chocolate shell slightly, unveiling the smooth, creamy maple center for optimal texture contrast.
- Pair with Hot Beverages: Enjoy alongside a cup of rich coffee, dark roast tea, or a velvety hot chocolate. The bittersweet notes of the drinks beautifully complement the sweet maple and chocolate flavors.
- Use as Dessert Garnish: Slice the candies into thin pieces and scatter over vanilla ice cream, panna cotta, or cheesecake. The creamy maple filling adds a burst of flavor and a delightful texture contrast.
- Include in Gift Boxes: Arrange the chocolates in decorative boxes with parchment paper, perfect for gifting during holidays or special occasions. Their striking combination of maple and chocolate makes an impressive homemade treat.
- Complement with Nuts or Fruit: Serve with toasted pecans, walnuts, or dried cranberries to add crunch and tartness which balance the sweetness.
Temperature and Serving Time Table
| Serving Step | Recommended Time | Purpose |
|---|---|---|
| Room temperature resting | 15 minutes | Softens chocolate shell, enhances creaminess |
| Pairing with hot beverages | Immediate | Balances sweetness with bitterness |
| Using as dessert garnish | Just before serving | Adds texture and flavor contrast |
| Inclusion in gift boxes | Store at cool temperature | Maintains freshness and shape |
By carefully selecting how we serve our Chocolate Covered Maple Cream Candy, we highlight the rich combination of maple and chocolate in ways that delight all the senses.
Conclusion
Making chocolate covered maple cream candy is a rewarding experience that brings together rich flavors and satisfying textures. With the right ingredients and techniques, we can create a treat that impresses both in taste and presentation.
Whether for gifting or enjoying at home, these candies offer a perfect balance of sweetness and indulgence. By following the steps carefully and storing them properly, we ensure every bite is as delightful as the first.
This recipe invites us to savor a classic North American favorite with a delicious twist, turning simple ingredients into a memorable confection.
Frequently Asked Questions
What are the main ingredients in Chocolate Covered Maple Cream Candy?
The key ingredients include pure maple syrup, heavy cream, unsalted butter, vanilla extract, salt, high-quality dark or semi-sweet chocolate, and coconut oil or vegetable shortening. These create a rich, smooth maple-flavored center coated with decadent chocolate.
What equipment do I need to make this candy?
You will need a heavy-bottomed saucepan, a candy thermometer, an electric mixer, and basic tools for dipping and cooling the candies. Preparing all equipment beforehand ensures a smooth process.
How do I make the maple cream center?
Heat maple syrup, cream, butter, vanilla, and salt to the firm ball stage, then cool the mixture. Beat it until smooth and creamy. Shape and chill the centers before coating.
What is the best way to melt the chocolate for coating?
Melt the chocolate gently while stirring to achieve a smooth, consistent texture. Maintain a moderate temperature to prevent burning or thickening.
How should I coat the maple cream centers with chocolate?
Dip chilled centers quickly into the melted chocolate, drain excess coating, then place them on parchment paper to cool fully before storing.
Can I prepare the candy ahead of time?
Yes, you can make and chill the maple cream centers in advance. Coat them later for fresh, perfectly coated candies.
How should I store Chocolate Covered Maple Cream Candy?
Store in an airtight container in a cool, dry place. Refrigerate or freeze for longer storage, but avoid moisture to prevent chocolate bloom.
What is the best temperature for serving these candies?
Serve at room temperature to soften the chocolate shell and enhance the creamy texture.
What are good serving suggestions for this candy?
Serve with hot coffee or hot chocolate, use as dessert garnish, or include in gift boxes. Pair with nuts or fruit to balance the sweetness.
Where does maple cream candy originally come from?
Maple cream candy is a traditional North American treat, rooted in regions known for pure maple syrup production.