
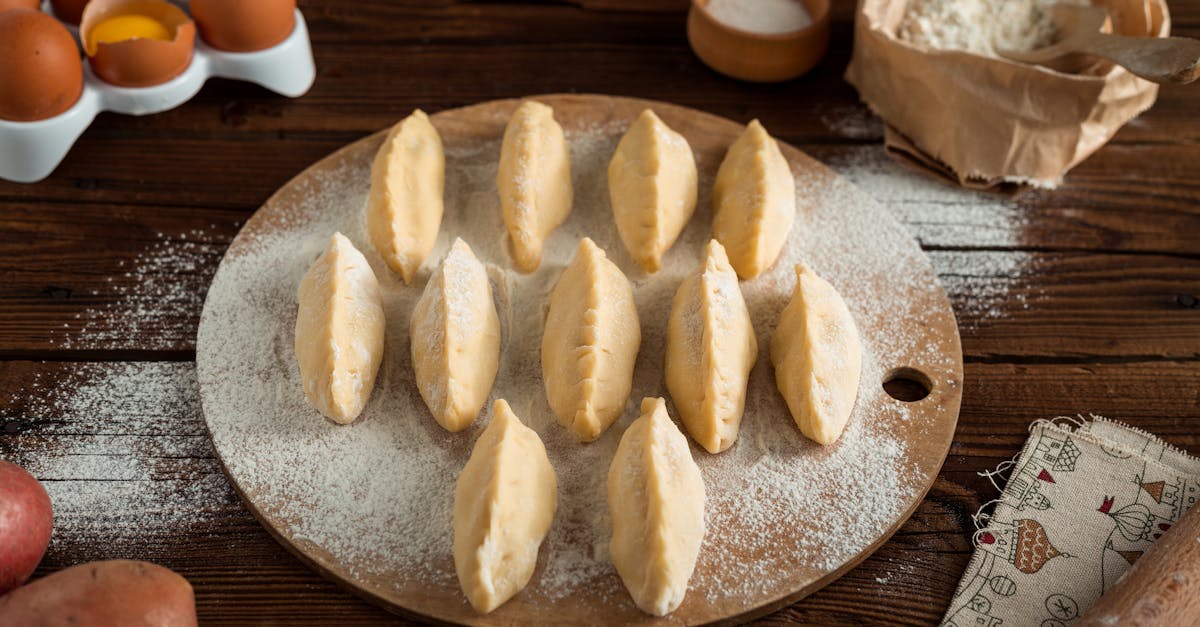
Pierogi hold a special place in Polish cuisine and family traditions. These tender dumplings filled with savory or sweet ingredients have been a beloved comfort food for generations. Our Babcia Pierogi recipe captures the authentic flavors and techniques passed down from grandmothers, or “babcias,” who perfected this dish with love and care.
Making pierogi from scratch may seem daunting but with our step-by-step guide, it’s easier than you think. We’ll show you how to create the perfect dough and classic fillings that bring out the nostalgic taste of homemade pierogi. Whether you’re new to Polish cooking or want to recreate a cherished family favorite, this recipe will become a staple in your kitchen.
Ingredients
To make authentic Babcia Pierogi from scratch, we use simple yet precisely measured ingredients. Let’s begin with the dough, the foundation of every perfect pierogi, followed by the classic filling components that bring traditional Polish flavors to life.
Dough Ingredients
Our pierogi dough requires just a handful of basic pantry staples combined carefully for elasticity and tenderness.
| Ingredient | Amount | Notes |
|---|---|---|
| All-purpose flour | 3 ½ cups (450g) | Sifted for a smooth dough |
| Warm water | 1 ¼ cups (300ml) | Adjust to achieve pliable dough |
| Large eggs | 1 | Room temperature |
| Salt | 1 tsp | Enhances dough flavor |
| Vegetable oil | 2 tbsp | Adds elasticity and richness |
Filling Ingredients
The traditional Babcia Pierogi filling blends creamy potatoes and sharp curd cheese, delivering that classic, comforting taste.
| Ingredient | Amount | Notes |
|---|---|---|
| Russet potatoes | 2 lbs (900g) | Peeled, boiled until tender |
| Farmer’s cheese | 1 cup (225g) | Or well-drained ricotta |
| Yellow onion | 1 medium | Finely chopped and sautéed |
| Butter | 2 tbsp | For sautéing onion and richness |
| Salt | 1 tsp | To taste |
| Ground black pepper | ½ tsp | To taste |
These ingredients combine to recreate the beloved Babcia Pierogi experience. Next, we’ll walk through each step to transform these basics into a dish steeped in Polish tradition.
Equipment Needed
To prepare our Babcia Pierogi Recipe with authentic precision and ease, having the right equipment is essential. Each tool supports us in crafting perfect dough and luscious fillings while preserving the traditional methods that make this dish special.
Essential Tools for Dough Preparation
- Mixing bowl: Use a large bowl to combine the flour, warm water, egg, salt, and vegetable oil comfortably.
- Wooden spoon or dough whisk: Ideal for mixing ingredients thoroughly without overworking the dough.
- Rolling pin: A smooth rolling pin helps us roll the dough evenly to about a 1/8-inch thickness for consistent pierogi size.
- Flour sifter (optional): For aerating the flour before mixing, ensuring a lighter dough texture.
Tools for Filling and Assembly
- Potato masher or ricer: To mash russet potatoes finely, creating a smooth filling base.
- Frying pan or skillet: To caramelize the yellow onions in butter, adding rich flavor to the filling.
- Sharp knife: For chopping and fine dicing the onions.
- Pierogi cutter or large circular cookie cutter (about 3 inches diameter): To cut uniform dough circles for easy filling and sealing.
- Small bowl of water: Used for sealing pierogi edges by moistening the dough perimeter.
Cooking and Finishing Equipment
- Large pot: Needed to boil water for cooking the pierogi until they’re tender and floating.
- Slotted spoon or spider strainer: To safely lift cooked pierogi from boiling water without breaking them.
- Serving dish or platter: For presenting the finished pierogi warmly.
| Equipment | Purpose |
|---|---|
| Mixing bowl | Combining dough ingredients |
| Wooden spoon / dough whisk | Mixing dough thoroughly |
| Rolling pin | Rolling dough to uniform thickness |
| Potato masher / ricer | Mashing potatoes finely for filling |
| Frying pan | Caramelizing onions with butter |
| Sharp knife | Chopping onions |
| Pierogi cutter / cookie cutter | Cutting dough circles for pierogi |
| Small bowl of water | Moistening edges for sealing pierogi |
| Large pot | Boiling pierogi |
| Slotted spoon / spider strainer | Removing pierogi safely from water |
| Serving dish | Presenting finished pierogi |
By gathering this precise equipment, we set ourselves up for a smooth, authentic experience making Babcia’s pierogi just like she did. Each tool reflects a step toward perfecting the timeless flavors and textures our family has cherished for generations.
Prep Work
Before diving into the assembly of Babcia Pierogi, proper preparation of both the dough and filling is essential to achieving that authentic, tender texture and rich flavor we cherish.
Preparing the Dough
- Measure Ingredients Accurately:
In a large mixing bowl, combine 2 cups all-purpose flour with 1/2 teaspoon salt. Use a flour sifter for even distribution if available.
- Add Wet Ingredients:
Create a well in the center. Pour in 3/4 cup warm water, 1 large egg, and 1 tablespoon vegetable oil.
- Mix and Knead:
Stir gently with a wooden spoon until the dough begins to form. Transfer to a lightly floured surface.
- Knead the Dough:
Knead vigorously for about 8-10 minutes until smooth, elastic, and slightly tacky but not sticky.
- Rest the Dough:
Wrap in plastic wrap or cover with a damp cloth. Allow it to rest for at least 30 minutes at room temperature. Resting relaxes the gluten, making rolling easier.
| Ingredient | Measurement | Prep Notes |
|---|---|---|
| All-purpose flour | 2 cups | Sifted if possible |
| Salt | 1/2 teaspoon | |
| Warm water | 3/4 cup | Approximately 110°F |
| Large egg | 1 | Lightly beaten |
| Vegetable oil | 1 tablespoon | Neutral flavor preferred |
“A well-kneaded dough is the foundation of perfect pierogi—it should feel supple but hold its shape when rolled.”
Preparing the Filling
- Cook the Potatoes:
Peel and chop 1 1/2 pounds russet potatoes into uniform pieces. Boil in salted water until tender, about 15-20 minutes.
- Drain and Mash:
Drain thoroughly and mash while still warm for a smooth texture.
- Prepare the Onions:
Finely dice 1 medium yellow onion. Sauté in 2 tablespoons butter over medium heat until golden brown and fragrant, about 5-7 minutes.
- Combine Filling Ingredients:
In a mixing bowl, combine the mashed potatoes with 8 ounces farmer’s cheese, the sautéed onions, 1/2 teaspoon salt, and 1/4 teaspoon ground black pepper.
- Season and Mix Thoroughly:
Adjust seasoning to taste. The filling should be creamy but thick enough to hold shape inside the pierogi without spilling.
| Ingredient | Measurement | Preparation Details |
|---|---|---|
| Russet potatoes | 1 1/2 pounds | Peeled, chopped, boiled |
| Farmer’s cheese | 8 ounces | Crumbled or softened |
| Yellow onion | 1 medium | Finely diced and sautéed |
| Butter | 2 tablespoons | For sautéing onions |
| Salt | 1/2 teaspoon | Adjusted to taste |
| Ground black pepper | 1/4 teaspoon | Freshly ground |
“The key to a classic Babcia Pierogi filling is balancing creamy potatoes with the rich, sweet aroma of sautéed onions and tangy farmer’s cheese.”
By thoroughly preparing our dough and filling ahead of time, we ensure the assembly process flows smoothly while preserving the authentic taste and texture of our cherished Babcia Pierogi.
Directions
Follow these detailed steps to master the art of making Babcia Pierogi from scratch. Each phase—rolling, filling, shaping, and cooking—ensures authentic texture and flavor, just like Babcia’s.
Rolling Out the Dough
- Lightly flour your work surface to prevent sticking.
- Place the rested dough ball on the floured surface.
- Using a rolling pin, roll the dough evenly, applying gentle pressure.
- Roll the dough to about 1/8-inch thickness, ensuring it is neither too thin nor too thick.
- Periodically lift the dough and sprinkle a bit more flour under to keep it from tearing or sticking.
- Use a round cutter or a drinking glass (approximately 3 inches in diameter) to cut out circles.
Tip: Keep the dough covered with a clean cloth to prevent it from drying out while working.
Filling and Shaping Pierogi
- Place about 1 tablespoon of the prepared filling in the center of each dough circle.
- Dip your finger into the small bowl of water and moisten the edges of the dough circle lightly.
- Fold the dough over the filling to form a half-moon shape.
- Carefully press the edges together, ensuring a tight seal to prevent filling from escaping.
- For a decorative finish, crimp the edges with a fork or pinch and fold the edges with your fingers.
- Arrange the shaped pierogi on a floured tray or surface, avoiding them touching each other.
| Step | Detail | Tip |
|---|---|---|
| Amount of filling | 1 tablespoon per dough circle | Avoid overfilling |
| Dough edge sealing | Moisten edges with water | Prevents filling leakage |
| Shaping method | Fold & press or crimp edges | Create tight seal & design |
Cooking the Pierogi
- Bring a large pot of salted water to a rolling boil.
- Gently lower pierogi into the boiling water using a slotted spoon, cooking in batches without overcrowding.
- Stir carefully to prevent sticking, especially when they first hit the water.
- Cook pierogi until they float to the surface, plus an additional 2–3 minutes (total about 5–6 minutes).
- Remove pierogi with the slotted spoon and drain well.
- Optional: Pan-fry pierogi in melted butter until golden on both sides for added crispness and flavor.
Pro Tip: Serve your Babcia Pierogi hot with a dollop of sour cream or sautéed onions for the ultimate traditional experience.
Serving Suggestions
To fully enjoy our Babcia Pierogi, we recommend serving them piping hot to savor their delicate texture and rich filling. Here are some traditional and delicious ways to serve these classic Polish dumplings:
- With Sour Cream: A dollop of cool, tangy sour cream complements the warm, savory pierogi perfectly. This classic pairing balances the flavors and adds a creamy contrast.
- Sautéed Onions: Lightly caramelized onions bring a sweet, golden crunch that enhances the comfort food experience. Sprinkle generously over the pierogi right after frying or boiling.
- Crisp Bacon Bits: For added texture and smoky flavor, crisp bacon bits sprinkled on top offer a savory contrast that guests will love.
- Melted Butter Drizzle: A simple drizzle of melted butter adds richness and a subtle gloss, elevating your pierogi’s presentation and taste.
- Chives or Fresh Dill: Garnish with finely chopped chives or fresh dill to add a bright, herbal note that pairs beautifully with the potato and cheese filling.
Serving Temperature and Portion
Our Babcia Pierogi best shine when served immediately after cooking, either boiled or pan-fried. Serve about 6 to 8 pierogi per person depending on appetite and accompanying dishes.
| Serving Component | Quantity per Person | Notes |
|---|---|---|
| Babcia Pierogi | 6-8 pieces | Adjust based on hunger |
| Sour Cream | 2 tablespoons | Optional but recommended |
| Sautéed Onions | 3 tablespoons | Provides sweetness and texture |
| Bacon Bits | 1 tablespoon | Optional for extra savoriness |
| Fresh Herbs | 1 teaspoon | Chives or dill for garnish |
Pairing Ideas
- Light Green Salad: A crisp, refreshing salad balances the richness of the pierogi.
- Pickled Vegetables: Tart pickles cut through the creamy filling.
- Traditional Polish Beet Soup (Barszcz): Serve the pierogi alongside for a hearty meal.
- Cold Polish Beer or Light White Wine: Complements the dish without overpowering.
“Serving Babcia Pierogi with simple yet flavorful accompaniments brings the full traditional Polish experience to your table.“
Following these serving suggestions, we create a memorable meal that honors the cherished family traditions behind this beloved recipe.
Make-Ahead and Storage Tips
Mastering Babcia Pierogi means not only making them fresh but also knowing how to prepare ahead and store them properly to preserve their authentic flavor and texture.
Preparing Pierogi in Advance
We recommend assembling the pierogi up to the sealing step, then placing them on a parchment-lined baking sheet in a single layer. Freeze them uncovered for 2 hours or until firm. After freezing, transfer them to an airtight container or resealable freezer bag. This step helps maintain their shape and prevents sticking.
Freezing and Storing
| Storage Method | Duration | Best Practices |
|---|---|---|
| Freezer (assembled) | Up to 3 months | Freeze individually on baking sheet, then bag |
| Freezer (cooked) | Up to 2 months | Cool completely before freezing, layer with parchment paper to prevent sticking |
| Refrigerator (cooked) | 2 to 3 days | Store in airtight container, reheat thoroughly |
Reheating Frozen Babcia Pierogi
When ready to enjoy, do not thaw frozen pierogi. Boil them directly from the freezer in salted water. They are done when they float to the surface plus an additional 2-3 minutes of cooking. For extra texture, pan-fry boiled pierogi in butter until golden and crispy.
Tips for Best Flavor and Texture
- Use cool water when sealing pierogi to prevent the dough from becoming soggy.
- Avoid overcrowding the boiling pot to ensure even cooking.
- Allow pierogi to cool on a wire rack if planning to pan-fry for crispness.
“Proper make-ahead and storage methods guarantee the same warm, comforting taste of freshly made Babcia Pierogi each time we serve them.”
By following these steps, we ensure that our Babcia Pierogi maintain their authentic taste, tender dough, and hearty filling long after we’ve made them.
Conclusion
Making Babcia Pierogi is more than just preparing a meal—it’s about connecting with tradition and sharing comfort through every bite. With the right ingredients, tools, and techniques, we can bring the authentic flavors of Polish heritage into our kitchens.
Whether it’s a weeknight dinner or a special family gathering, these pierogi offer a delicious way to celebrate culture and create lasting memories. Let’s keep this beloved recipe alive by enjoying it together and passing it on to future generations.
Frequently Asked Questions
What are Babcia Pierogi?
Babcia Pierogi are traditional Polish dumplings made from dough filled with a mixture of potatoes, farmer’s cheese, and sautéed onions. This recipe is passed down through generations and is cherished as an authentic comfort food in Polish families.
What ingredients are needed for Babcia Pierogi dough?
The dough requires all-purpose flour, warm water, one large egg, salt, and vegetable oil. Using precise measurements is important to achieve the perfect texture for rolling and shaping the pierogi.
What is the filling made of for Babcia Pierogi?
The classic filling includes russet potatoes, farmer’s cheese, yellow onion, butter, salt, and ground black pepper. These ingredients create the traditional, creamy, and savory taste of Babcia Pierogi.
What equipment do I need to make pierogi from scratch?
Essential tools include a mixing bowl, wooden spoon, rolling pin, potato masher, frying pan, sharp knife, pierogi cutter, a small bowl of water for sealing, large pot for boiling, and a slotted spoon for lifting cooked pierogi.
How do I prepare the dough for Babcia Pierogi?
Measure ingredients accurately, mix them, knead the dough thoroughly, and allow it to rest. This rest period improves elasticity and makes rolling the dough easier and smoother.
How should I prepare the filling?
Cook and mash the potatoes, sauté the onions in butter until golden, then combine with farmer’s cheese, salt, and pepper to create a balanced and flavorful filling.
What is the best thickness for rolling pierogi dough?
Roll the dough to about 1/8-inch thickness for optimal texture and ease of shaping. Too thick dough can be doughy; too thin can tear easily.
How do I seal pierogi to prevent filling from leaking?
Place a spoonful of filling on the dough circle, moisten the edges lightly with water, fold over, and press firmly to seal. You can pinch the edges or use a fork for a decorative and secure seal.
How are Babcia Pierogi cooked?
Boil the pierogi in salted water until they float, indicating they are cooked through. Optionally, pan-fry them afterward in butter for a crispy finish.
What are some serving suggestions for Babcia Pierogi?
Serve hot, topped with sour cream, sautéed onions, crisp bacon bits, melted butter, and fresh herbs like chives or dill. Pair them with a light salad, pickled veggies, or traditional Polish soups.
Can Babcia Pierogi be made ahead and frozen?
Yes, assemble and seal the pierogi, then freeze on a parchment-lined tray before storing in airtight containers. Cook directly from frozen for best results when reheating.
How long can frozen pierogi be stored?
Frozen pierogi maintain quality for up to 2-3 months when properly stored in airtight containers to preserve their flavor and texture.