
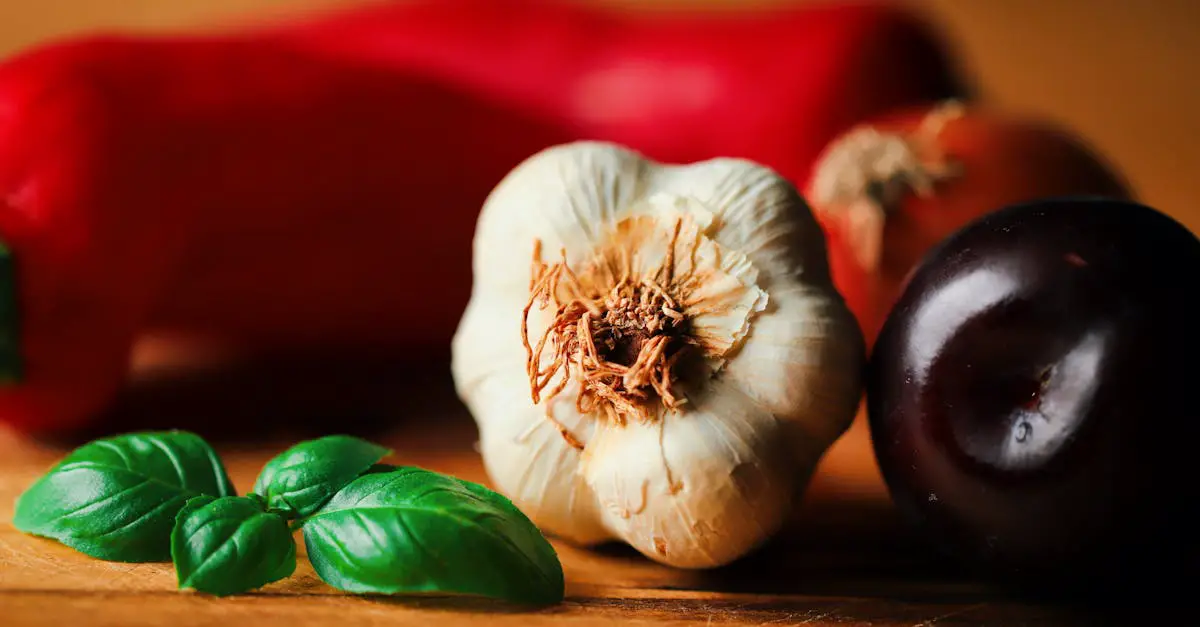
There’s something magical about combining the sweetness of honey, the tartness of ripe plums, and the ancient art of mead-making. Plum mead, often referred to as a melomel, is a fruity twist on traditional honey wine that’s both refreshing and full of character. It’s a drink that feels like a celebration of nature’s bounty, perfect for sipping on a cozy evening or sharing with friends.
Plum Mead Recipe
Making plum mead at home combines the art of fermentation with the flavors of ripe plums and rich honey. Follow these detailed steps for a successful batch of this delightful melomel.
Ingredients
- 3 lbs. fresh plums (washed, pitted, and sliced)
- 3 lbs. raw honey
- 1 gallon filtered water
- 1 tsp yeast nutrient
- 1 packet wine yeast (Lalvin EC-1118 or similar)
- 1 cinnamon stick (optional, for flavor)
- 1 star anise (optional, for depth)
Tools Needed
- 1-gallon glass jug or fermenter
- Airlock and bung
- Funnel
- Large saucepan
- Sanitized stirring spoon
- Sanitizer for equipment
- Fine mesh sieve or cheesecloth
Instructions
1. Sanitize Your Equipment:
- Clean all tools, bottles, and surfaces thoroughly with a sanitizing solution. Sanitization prevents unwanted bacteria and ensures a clean fermentation process.
2. Prepare the Plums:
- Slice the plums in half, remove pits, and chop them into smaller pieces. Place them aside. Their juicy, tart flesh will enhance the mead’s flavor.
3. Create the Must:
- In a large saucepan, heat the filtered water (about 2/3 of the total) over medium heat. Do not boil; aim for warm water around 100°F. Stir in the honey until fully dissolved. This mixture is known as the “must.”
- Add the sliced plums and stir gently to combine.
4. Add Spices (Optional):
- For enhanced flavors, add the cinnamon stick and star anise to the must.
5. Start Cooling:
- Cool the must to room temperature (70-75°F). Rapid cooling can be done using an ice bath or simply letting it rest.
6. Transfer to Fermenter:
- Use a funnel to transfer the cooled must into the glass fermenter. Leave some headspace at the top to avoid overflow during fermentation.
7. Add Nutrients and Yeast:
- Sprinkle the yeast nutrient directly into the fermenter. Rehydrate the wine yeast following the instructions on the packet, then add it to the fermenter.
8. Seal and Install Airlock:
- Secure the fermenter with a bung and install the airlock. Fill the airlock with sanitized water to prevent contamination.
9. Fermentation:
- Place the fermenter in a dark, room-temperature location (68-75°F). Fermentation should begin within 24-48 hours. You’ll notice bubbling in the airlock, indicating active fermentation. Allow this primary fermentation to continue for 2-4 weeks.
Fermentation Timelines Table
| Stage | Timeframe | Notes |
|---|---|---|
| Primary Fermentation | 2-4 weeks | Bubbling in the airlock will slow down. |
| Secondary Fermentation | 1-3 months | Helps refine taste and clarity. |
| Bottle Aging | 6 months to 1 year | Develops complex flavors over time. |
10. Secondary Fermentation:
- Once primary fermentation ends (minimal bubbling in the airlock), rack the mead into a second sanitized jug, leaving sediment behind. Install a clean airlock and allow it to age for 1-3 months.
11. Bottling:
- After aging, siphon the mead into sanitized bottles using a tube. Seal tightly and store in a cool, dark place for further aging.
- Wait at least 6 months to 1 year for optimal flavor development before serving. Pour into a glass, marvel at its rich color, and enjoy the blend of sweet honey and tart plum flavors!
Ingredients
Here is what we’ll need to create a flavorful plum mead. These ingredients are divided into two parts: those required for the plum base and those for the mead mixture.
For The Plum Base
- 4 lbs ripe plums, washed, pitted, and halved
- 1/4 tsp potassium metabisulfite (Campden tablet crushed) to sanitize and prevent unwanted bacteria
- 1/2 cup sugar (optional, depending on the sweetness of plums)
For The Mead Mixture
- 3 lbs raw honey, preferably unfiltered for richer flavor
- 1 gallon filtered water or spring water (chlorine-free)
- 1/4 tsp yeast nutrient, for a healthy fermentation process
- 1 packet wine yeast (Lalvin 71B-1122 is recommended for fruit meads)
- 1 cinnamon stick (optional, for a warm, spiced undertone)
- 1/2 tsp pectin enzyme, to help clear up any haze caused by the fruit
Additional Notes:
- We suggest tasting the plums for sweetness. If they’re particularly tart, adjust the sugar to balance the flavor.
- Always sanitize all tools and your workspace before starting. Cleanliness impacts the success of fermentation.
Tools And Equipment
When making plum mead, having the right tools and equipment is essential for consistent results and a smooth fermentation process. Below is the curated list of must-have items along with their purpose in crafting this delightful beverage:
Essential Tools
- Primary Fermenter: A large bucket or container with at least 2-gallon capacity, made of food-grade plastic or glass, for initiating the fermentation.
- Secondary Fermenter (Carboy): A glass or plastic vessel, preferably 1-gallon capacity, for aging the mead after primary fermentation.
- Airlock and Bung: Used to seal the fermenter while allowing gases to release, preventing contamination.
- Sanitizing Solution: A must for sterilizing all tools, such as potassium metabisulfite or brewing sanitizer.
- Hydrometer and Test Jar: Measures the specific gravity to track sugar levels and monitor fermentation progress.
- Brewing Spoon or Paddle: A long-handled spoon, preferably non-metallic, for mixing the must without scratching your container.
- Cheesecloth or Fine Strainer: For straining out solid plum pieces from the must.
- Siphon with Tubing: Used to transfer mead between containers without disturbing sediments.
- Digital Scale: For accurately measuring ingredients like plums and honey.
- Thermometer: Ensures the must maintains optimal temperatures during mixing and fermentation.
Optional Tools
- Pectinase (Pectin Enzyme Stirrer): A stirring tool useful if adding pectin enzyme to break down fruit pulp efficiently.
- Funnel: Helps with pouring the liquid into narrow-necked carboys without mess.
- Bottle Filler and Capper: Handy for bottling once your mead is finished aging.
- Labels and Markers: For tracking batches, especially if you experiment with different flavor infusions like cinnamon or cloves.
Equipment Table
Here’s a quick-reference table for the tools and their uses:
| Tool/Equipment | Function | Mandatory/Optional |
|---|---|---|
| Primary Fermenter | Holds the must during the main fermentation phase | Mandatory |
| Secondary Fermenter | Safely ages plum mead after primary fermentation | Mandatory |
| Airlock and Bung | Prevents contamination; releases gas | Mandatory |
| Sanitizing Solution | Sterilizes tools and prevents infection | Mandatory |
| Hydrometer | Measures sugar content and monitors fermentation progress | Mandatory |
| Brewing Spoon | Mixes ingredients | Mandatory |
| Cheesecloth/Fine Strainer | Filters out solid plum bits | Mandatory |
| Siphon with Tubing | Transfers mead cleanly across vessels | Mandatory |
| Digital Scale | Ensures accurate ingredient measurements | Mandatory |
| Thermometer | Monitors temperature for optimal fermentation | Mandatory |
| Pectin Enzyme Stirrer | Works with pectinase to break down fruit pulp | Optional |
| Funnel | Helps pour must into carboys easily | Optional |
| Bottle Filler and Capper | Aids in bottling the mead after aging | Optional |
| Labels and Markers | Tracks different mead batches | Optional |
Directions
Crafting plum mead is a rewarding process, requiring careful preparation, patience, and attention to detail. Follow these step-by-step instructions to bring a perfect balance of honey sweetness and plum tartness to life.
Prep The Plums
- Wash and Sanitize: Begin by thoroughly washing 4 lbs of ripe plums. Remove any debris or dirt. Sanitize all your tools, including your knife and cutting board, using a sanitizing solution to avoid contamination.
- Remove Pits and Chop: Slice each plum in half, removing the pits. Chop the plum halves into smaller pieces for easier maceration.
- Optional Sweetness Test: Taste a piece of plum for sweetness. If your plums are overly tart, you can add up to 1 cup of granulated sugar during this step to balance the flavors.
- Crush the Plums: Using a sanitized spoon or masher, gently crush the plums to release their juices. Transfer the mashed plums into a sanitized primary fermenter.
- Add Potassium Metabisulfite: Sprinkle 1/4 tsp of potassium metabisulfite into the fermenter to sanitize the fruit. Cover the fermenter and let it sit for 24 hours before proceeding to the next step.
Prepare The Must (Mead Base)
- Heat Filtered Water: Warm 1 gallon of filtered water on the stove until it’s lukewarm (around 90°F). Avoid boiling.
- Dissolve Honey: Add 3 lbs of raw honey to the warm water. Stir gently with a sanitized brewing spoon until fully dissolved. This mixture is your must.
- Add Optional Ingredients: If desired, drop in 1 cinnamon stick for a hint of spice or 1 tsp of pectin enzyme to aid in clearing the mead.
- Mix In Yeast Nutrient: Add 1 tsp of yeast nutrient to the must. Stir well to ensure even distribution.
- Pour Over Plums: Carefully pour the must into the primary fermenter over the crushed plums. Combine the flavors by stirring gently.
- Hydrometer Check: Use a sanitized hydrometer to measure the specific gravity of the must. Record this number for monitoring fermentation progress.
Quick Tip: The specific gravity should ideally range between 1.080 and 1.120 before fermentation begins.
Fermentation Process
- Activate Yeast: Rehydrate 1 packet of wine yeast according to the manufacturer’s instructions. Pour the yeast gently into the fermenter.
- Seal and Add Airlock: Cover the fermenter with its lid and attach an airlock and bung. The airlock allows carbon dioxide to escape while preventing oxygen from entering.
- Primary Fermentation: Place the fermenter in a cool, dark location (around 65°F to 75°F). Allow the must to ferment for 7 to 10 days. Stir the must gently once a day using a sanitized spoon.
- Strain and Transfer: After the initial fermentation, strain the liquid using cheesecloth or a fine strainer to remove the plum solids. Transfer the liquid to a sanitized secondary fermenter (such as a glass carboy) using a siphon.
- Secondary Fermentation: Seal the secondary fermenter with an airlock and allow fermentation to continue for an additional 4 to 6 weeks. Monitor the airlock; bubbling should be minimal by the end.
- Taste Test and Clarification: Once bubbling has ceased, use your hydrometer to confirm fermentation is complete. Gravity should measure around 0.995 to 1.010. Taste the mead and adjust sweetness or spices, if needed.
- Age and Bottle: Siphon the clarified plum mead into sanitized bottles. Cap tightly and label each bottle with the batch date. Age the bottles for at least 6 months to 1 year for the best flavor before enjoying.
Fermentation Timeline Breakdown
| Stage | Duration |
|---|---|
| Primary Fermentation | 7 to 10 days |
| Secondary Fermentation | 4 to 6 weeks |
| Bottle Aging | 6 months to 1 year |
Bottling The Plum Mead
Once our plum mead has fully matured and achieved the desired flavor profile, it is time for bottling. This step is essential for preserving our hard work and providing a polished, enjoyable drinking experience. Proper bottling ensures the mead remains safe to drink and ages gracefully over time. Let’s dive into the detailed steps for safely and effectively bottling plum mead.
Tools and Equipment for Bottling
Before we start, gather the following tools to streamline the bottling process:
- Sanitized bottles: Use glass wine bottles, flip-top bottles, or any airtight, food-safe bottle. Ensure they are clean and sterile.
- Caps or corks: Choose caps or corks depending on the bottle type.
- Bottle filler: Helps transfer liquid smoothly into the bottles without spillage.
- Siphon and tubing: Used for transferring the mead from the fermenter to the bottles while leaving behind sediment.
- Sanitizing solution: Essential for cleaning all bottling tools to avoid contamination.
- Labels and markers: Optional but recommended for dating and identifying batches.
Step-by-Step Guide to Bottling Plum Mead
- Sanitize All Equipment
Sanitation is key to preventing contamination. Thoroughly clean all bottles, caps or corks, the siphon, and the bottle filler using a sanitizing solution. Allow them to air dry completely.
- Prepare the Mead for Bottling
Using a hydrometer, confirm that fermentation is complete. The specific gravity should remain stable over several days. If you’re adding any stabilizers like potassium sorbate to prevent further fermentation, this is the time to do it.
- Set Up Siphoning System
Place the secondary fermenter (carboy) on a countertop or elevated surface. Attach the sanitized tubing to the siphon and position the bottle filler on the other end of the tubing.
- Transfer Without Disturbing Sediment
Begin siphoning the mead carefully to avoid disturbing the sediment at the bottom of the fermenter. Fill each bottle leaving about 1 inch of headspace to allow for expansion and proper sealing.
- Cap or Cork the Bottles
Seal each bottle tightly with a cap or cork. Ensure no air gaps remain to protect against spoilage.
- Label the Bottles
Use adhesive labels or waterproof markers to label the bottles with the date and batch details. This will help track the aging process and ensure we enjoy the mead at its prime.
- Store in a Cool, Dark Place
Place the bottles upright in a cool, dark space. Allow the mead to continue aging for optimal flavor, checking periodically to ensure the seals remain intact.
Quick Reference Table for Bottling Steps
| Step | Description | Key Items Needed |
|---|---|---|
| 1 | Sanitize equipment | Sanitizing solution, bottles, siphon, caps or corks |
| 2 | Confirm end of fermentation | Hydrometer |
| 3 | Set up siphoning | Siphon, tubing, bottle filler |
| 4 | Transfer mead | Siphon, tubing, fermenter |
| 5 | Seal bottles | Caps or corks, adhesive seals |
| 6 | Label bottles | Labels, markers |
| 7 | Store for aging | Cool, dark storage space |
Invest the time to bottle carefully, as this ensures the plum mead remains flavorful and safe to drink for months or even years to come.
Tips For Success
Creating plum mead is both an art and a science. Following these tips will help ensure your mead is flavorful, well-balanced, and free of any brewing mishaps. Whether you’re a beginner or an experienced brewer, these insights will elevate your brewing process:
1. Prioritize Sanitation
“Sanitation is the cornerstone of successful fermentation!” Every tool that touches the mead—from fermenters to siphons—must be sanitized. Use potassium metabisulfite or a reliable sanitizing solution to clean all equipment. Any leftover bacteria or wild yeast can ruin the batch.
2. Taste-Test Your Plums
Not all plums are created equal. Ripe and flavorful plums are essential for that perfect balance between tartness and sweetness. Before starting, taste the plums to gauge their sweetness. If they’re overly tart, consider adding a little more honey or sugar to the recipe for balance.
3. Measure Ingredients Accurately
Accurate measurements are key. Use a digital scale to weigh plums, honey, and other ingredients precisely. Here’s a quick-reference for the main measurements:
| Ingredient | Quantity |
|---|---|
| Ripe plums | 4 lbs |
| Raw honey | 3 lbs |
| Filtered water | To fill 1 gallon |
| Wine yeast (1 packet) | Appropriate dose |
Staying true to these quantities ensures consistent results and prevents over or under-fermentation.
4. Control Temperatures Carefully
Yeast thrives within a specific temperature range. Keep your fermentation space between 65°F and 75°F for optimal yeast activity. Use a thermometer to monitor temperature, and avoid placing the fermenter near heat sources or in drafty areas.
5. Use Fresh, High-Quality Ingredients
The quality of your raw honey, plums, and wine yeast greatly impacts the flavor. Choose local, unprocessed honey if possible. Fresh ingredients yield a richer, more complex brew.
6. Monitor Sugar Levels with a Hydrometer
A hydrometer is essential for tracking fermentation progress. Take an initial gravity reading after mixing the honey-water solution and note the reading just before bottling. This helps you calculate the alcohol content and ensures fermentation has fully completed.
7. Layer Flavors with Optional Add-Ins
Experiment with optional ingredients like a cinnamon stick or vanilla bean during fermentation. These additions can create rich layers of flavor in your finished mead, but use them sparingly to avoid overpowering the natural plum and honey essence.
8. Practice Patience
Good mead takes time. Allow primary fermentation (7 to 10 days) and secondary fermentation (4 to 6 weeks) to run their course. Once bottled, age your mead for at least 6 months. This extended aging highlights subtle flavors and ensures smoothness. Rushing the process can result in immature flavors.
9. Avoid Disturbing Sediments
When transferring or bottling, handle the mead with care to avoid disturbing the sediment at the bottom of the fermenter. A siphon with tubing is a handy tool for carefully racking your mead. Remember to stop siphoning as soon as sediment gets near.
10. Label Your Bottles
Keep track of your batches by labeling each bottle with the brewing date and recipe details. This makes it easier to identify batches as they age and ensures you can replicate successful recipes.
By following these proven tips, our plum mead will not only turn out better, but you’ll also enjoy the brewing journey with fewer challenges and more rewarding results.
Make-Ahead Instructions
When crafting plum mead, preparation in advance is key to ensuring a seamless fermentation process and optimal flavor development. Below, we outline make-ahead strategies to help you plan efficiently and stay organized.
1. Sanitize All Equipment
Before starting, thoroughly clean and sanitize all equipment, including fermenters, stirring spoons, airlocks, and siphons. Use a potassium metabisulfite solution or a brewer’s sanitizing solution to eliminate contaminants. Let the sanitized tools dry completely before use. This simple step can prevent unwanted bacteria or wild yeast from spoiling your mead.
2. Prepare Ingredients Ahead
- Pit and freeze the plums at least 24 hours in advance. Freezing helps break down cell walls, extracting more juice during fermentation.
- Dissolve the raw honey in warm, pre-boiled water and cool it down before use. Store this mixture in a sanitized container to save time during your brewing day.
- Measure out additional ingredients like yeast nutrient, pectin enzyme, and wine yeast, and keep them ready in small bowls or containers. Organization ensures that no step is skipped.
3. Activate the Yeast
On the day of brewing, activate your yeast at least 30 minutes prior to use:
- Add the wine yeast to warm water (95°F to 105°F) with a pinch of sugar or honey.
- Let it sit until foamy. This rehydration step jumpstarts fermentation and ensures a more vigorous start.
4. Plan Fermentation Space
Ensure adequate space for both primary fermentation (lasting 7 to 10 days) and secondary fermentation (4 to 6 weeks). Store the fermenters in a dark, cool area with a stable temperature between 60°F and 70°F. Space planning ahead of time reduces the risk of sudden temperature fluctuations.
5. Prepare Bottling Materials
While bottling happens months later, gather and sanitize bottles, corks or caps, and labeling supplies prior to the bottling day. Proper storage of these items prevents last-minute surprises. Store empty bottles in a dry, sanitized container until needed.
Quick-Reference Table for Make-Ahead Prep
| Task | Time Frame | Details |
|---|---|---|
| Sanitize Equipment | 1 day before brewing | Use potassium metabisulfite or sanitizing solution. |
| Freeze Plums | At least 24 hours in advance | Enhances juice extraction; pit plums first. |
| Dissolve Honey Mixture | 1 day before brewing | Mix honey with warm water; store in a sanitized jar. |
| Activate Yeast | 30 minutes before brewing | Add yeast to warm water (95°F-105°F) for rehydration. |
| Organize Fermentation Space | Before starting | Ensure 60°F-70°F area for primary and secondary stages. |
| Sanitize Bottling Materials | Any time before bottling | Clean and store ahead of time to save effort. |
By implementing the above make-ahead instructions, we can set ourselves up for a smooth brewing process. Careful planning ensures that every step of making delicious plum mead proceeds efficiently and without unnecessary delays.
Storage And Aging Recommendations
Proper storage and aging of plum mead are essential to develop its complex flavors and achieve the smooth, refined taste that makes it so special. Let’s discuss how to handle your bottled mead to ensure it reaches its peak potential.
Storage Tips for Bottled Plum Mead
- Choose an Appropriate Container: Store the plum mead in sanitized dark glass bottles or amber bottles. These protect the liquid from light, which can degrade the flavor and quality.
- Temperature Control: Keep the bottles in a cool location, ideally between 50°F and 60°F. Avoid temperature extremes to prevent unwanted chemical changes.
- Humidity: Ensure moderate humidity (around 70%) to keep corks from drying out if you’re using corked bottles.
- Positioning: Lay corked bottles on their sides to keep the cork moist, preventing air from seeping in. For screw caps, upright storage is better.
- Light Protection: Avoid direct sunlight. Store bottles in a dark area, such as a cellar or a closed cabinet, to protect the mead’s aromatic compounds from breaking down.
Aging Period for Plum Mead
Plum mead thrives with time, and patience is crucial here. We recommend aging it for at least 6 months to 1 year for a balanced flavor profile. For a more refined and mellow taste, you can extend the aging period to 2 years or more. Refer to the table below for estimated flavors at different stages:
| Aging Period | Expected Flavor Profile |
|---|---|
| 6-12 months | Fresh, fruity notes with a slight alcoholic harshness |
| 12-24 months | Balanced plum and honey flavors with smoother, more refined tastes |
| 24+ months | Deep, mellow, and complex mead with nuanced layers of flavor |
How to Know When Aging is Complete
Here are signs that your plum mead has aged well:
- The flavor is smooth with no harshness.
- Aromas are well-integrated, allowing the plum and honey notes to shine.
- There’s no excessive sediment in the bottle.
If any harsh or sharp alcoholic notes linger, additional aging may be necessary.
Labeling and Tracking Batches
Labeling is a fundamental part of mead storage and aging. Always note the following details on your bottles:
- Date of bottling.
- Plum variety used.
- Any additional ingredients or flavor notes.
- Target tasting or aging goal date.
This helps us track changes in flavor over time and identify our favorite recipes or techniques for future brewing sessions.
Conclusion
Crafting plum mead is a rewarding journey that combines patience, precision, and creativity. By blending ripe plums with rich honey and carefully managing the fermentation process, we unlock a beverage that’s as unique as it is delicious.
Whether you’re savoring it after months of aging or sharing it with friends, plum mead offers an experience that reflects the care and effort behind its creation. With the right tools, high-quality ingredients, and a little patience, we can enjoy a homemade drink that’s truly worth the wait.
Frequently Asked Questions
What is plum mead?
Plum mead is a type of melomel—a honey wine made with fruit. It combines the sweetness of honey with the tart, fruity flavor of ripe plums, creating a refreshing and unique beverage.
How long does plum mead take to ferment?
Plum mead requires a primary fermentation of 7 to 10 days and a secondary fermentation of 4 to 6 weeks. It should then be aged in bottles for at least 6 months to 1 year for the best flavor.
What ingredients are needed to make plum mead?
You’ll need ripe plums, raw honey, filtered water, wine yeast, yeast nutrient, pectin enzyme, and optional ingredients like cinnamon or sugar. Don’t forget sanitation essentials like potassium metabisulfite!
What tools are essential for making plum mead?
Key tools include a fermenter, airlock, siphon, hydrometer, thermometer, brewing spoon, and sanitized bottles. Optional tools like a funnel and bottle filler can make the process easier.
How should I store plum mead during the aging process?
Store plum mead in sanitized dark glass bottles in a cool, dark place with moderate humidity. Proper storage helps develop complex flavors during the 6-month to 1-year aging period.
How can I improve the flavor of plum mead?
Taste-test the plums for sweetness, use high-quality honey, and consider optional add-ins like spices or sugar. Proper fermentation, temperature control, and patient aging are key to enhancing flavor.
Why is sanitation important in making plum mead?
Sanitation prevents contamination during the brewing process, ensuring successful fermentation. Always sanitize tools, workspace, and bottles for quality and safety.
Can I customize the plum mead recipe?
Yes! You can experiment with spices, different plum varieties, or even blend additional fruits. Be sure to adjust sugar levels and flavors to suit your preference.
How do I know when fermentation is complete?
Fermentation is complete when the airlock activity stops, the hydrometer shows consistent readings over several days, and there’s no bubbling. At this point, bottling can begin.
Can I make plum mead ahead of time?
Yes, you can prepare ingredients and sanitize tools in advance. Activate the yeast before brewing, organize your workspace, and plan for fermentation space to streamline the process.
What are signs of successful aging in plum mead?
Successfully aged plum mead will have a smooth, balanced flavor profile with no harsh alcohol taste. Over time, the flavors meld together, creating a richer and more complex beverage.
How do I avoid sediment in my plum mead?
Carefully siphon the mead during transfers and bottling to leave sediment behind. Avoid disturbing the sediment at the bottom of the fermenter to ensure clearer mead.
Can I reuse bottles for plum mead?
Yes, you can reuse bottles, but ensure they are thoroughly cleaned and sanitized to prevent contamination. Sanitation is crucial for successful storage and aging.
How do I label my plum mead bottles?
Use waterproof labels and include details like bottling date, plum variety, and any recipe variations. Proper labeling helps track aging time and flavor profiles.