
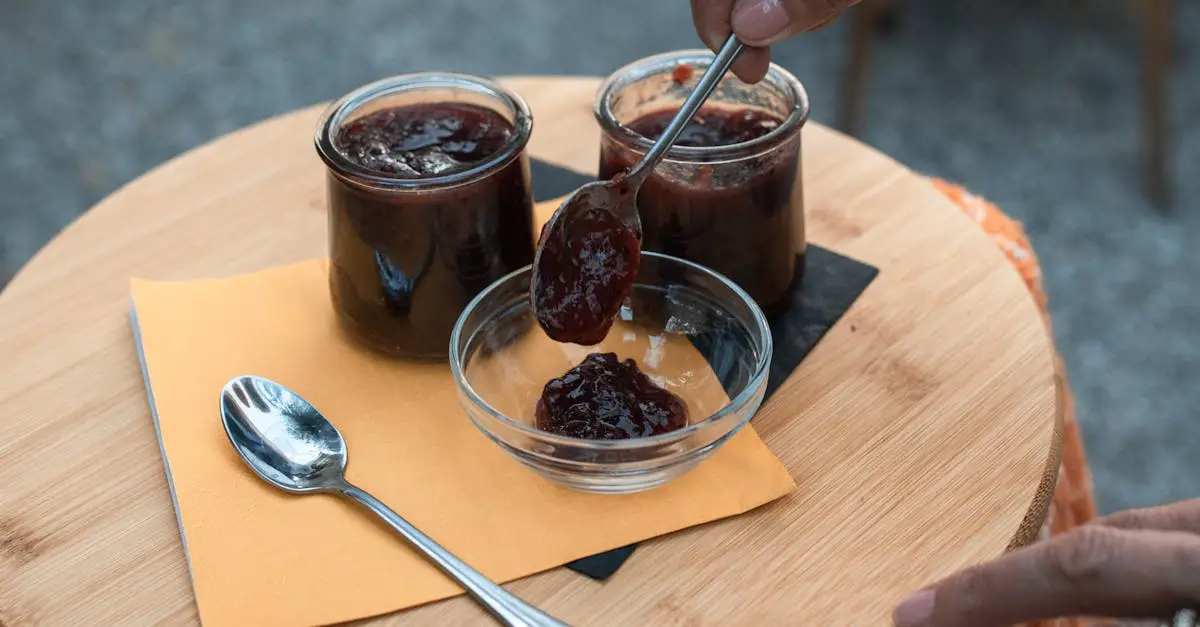
Hibiscus jelly offers a vibrant twist on traditional fruit spreads with its deep red color and tangy flavor. Made from hibiscus flowers, this jelly not only tastes refreshing but also brings a touch of elegance to any breakfast table or snack time. It’s a delightful way to enjoy the natural floral notes and a hint of tartness that hibiscus is known for.
Ingredients
To craft the perfect Hibiscus Jelly, we need to gather fresh and precise ingredients that highlight the vibrant, tart floral notes of hibiscus. Below is the detailed list of ingredients with their exact measurements and preparation notes to ensure consistent flavor and texture in every batch.
| Ingredient | Quantity | Preparation Notes |
|---|---|---|
| Dried hibiscus flowers | 2 cups | Use high-quality, unsweetened hibiscus petals |
| Water | 4 cups | Filtered for a clean, pure base |
| Granulated sugar | 2 ½ cups | Adjust for sweetness preference |
| Lemon juice | 3 tablespoons | Freshly squeezed for brightness |
| Fruit pectin (powdered) | 1 package (about 1.75 oz) | Use a pectin suitable for jelly |
Ingredient Details
- Dried hibiscus flowers deliver the signature color and tangy flavor that defines our jelly.
- Water acts as the infusion medium, extracting essence and color from the hibiscus.
- Granulated sugar balances the natural tartness and helps with proper setting.
- Lemon juice enhances the acidity, improving gel formation and adding brightness.
- Fruit pectin is key for achieving that firm yet smooth jelly consistency.
Maintaining exact quantities and using fresh preparation methods ensures our hibiscus jelly achieves the shimmering, jewel-like appearance and refreshing taste we love.
Equipment Needed
To create our vibrant hibiscus jelly, having the right equipment ensures a smooth process and perfect results every time. Below is a detailed list of the essential tools we recommend for making this delicate jelly with precision and ease.
- Large Saucepan: Use a heavy-bottomed saucepan with a capacity of at least 4 quarts to boil the hibiscus flowers evenly without scorching.
- Fine Mesh Strainer or Cheesecloth: For straining the hibiscus infusion, removing petals, and ensuring a clear jelly base.
- Measuring Cups and Spoons: Accurate measurements are critical; use standard measuring tools for sugar, lemon juice, and pectin.
- Wooden Spoon or Silicone Spatula: Stir ingredients gently to avoid sticking and ensure even mixing.
- Candy Thermometer (optional): To monitor temperature and confirm the jelly reaches the gelling point.
- Sterilized Jelly Jars with Lids: For storing the jelly; sterilize to maintain freshness and prevent spoilage.
- Ladle: To transfer hot jelly safely into jars.
- Jar Funnel (optional but helpful): Ensures cleaner pouring without spills.
Equipment Overview Table
| Equipment | Purpose | Notes |
|---|---|---|
| Large Saucepan | Boil hibiscus mixture | Heavy-bottomed for even heat |
| Fine Mesh Strainer | Strain hibiscus infusion | Remove flower particles |
| Measuring Cups/Spoons | Measure ingredients | Ensure precise quantities |
| Wooden Spoon/Spatula | Stir ingredients | Prevent sticking and burn |
| Candy Thermometer | Monitor temperature | Verify jelly sets properly |
| Sterilized Jelly Jars | Store finished jelly | Maintain shelf life |
| Ladle | Transfer jelly to jars | Avoid burns and mess |
| Jar Funnel | Pour jelly into jars | Optional for cleaner filling |
Using these tools, we guarantee a reliable process that highlights the natural floral aromas and tangy flavor of hibiscus jelly while achieving the perfect gel consistency.
Prep Work
Before we start cooking, proper Prep Work is essential to bring out the best in our Hibiscus Jelly. Let’s get everything ready to ensure a smooth process and vibrant results.
Preparing the Hibiscus Flowers
We begin by handling the star ingredient: dried hibiscus flowers. Here’s how we prepare them:
- Measure 2 cups of dried hibiscus flowers.
- Rinse the flowers under cold water briefly to remove any dust or impurities.
- Place the rinsed flowers into a large saucepan.
- Add 4 cups of cold water to the saucepan with the flowers.
- Let the mixture steep for at least 20 minutes to extract the deep red color and natural tart flavor.
- After steeping, strain the liquid through a fine mesh strainer to remove all flower particles, pressing gently to extract maximum flavor.
- Set the hibiscus infusion aside as the base for our jelly.
Gathering Other Ingredients
While the hibiscus flowers steep, we prepare the rest of our ingredients with accurate measurements for the perfect texture and taste:
| Ingredient | Quantity | Preparation Notes |
|---|---|---|
| Granulated sugar | 3 cups | Measure precisely for balance |
| Fresh lemon juice | 2 tablespoons | Use freshly squeezed for acidity |
| Fruit pectin | 1 package (1.75 oz) | Choose powder specifically for jelly making |
- Confirm fruit pectin is suited for jelly to achieve the right gel consistency.
- Squeeze lemons fresh with a strainer to avoid seeds and pulp.
- Keep all ingredients within reach to streamline cooking when heating the hibiscus liquid.
With the hibiscus infusion ready and all ingredients gathered, we are perfectly set to move forward to cooking the Hibiscus Jelly.
Directions
Follow these precise steps to craft our vibrant and refreshing Hibiscus Jelly with perfect texture and flavor.
Making the Hibiscus Tea Base
- Rinse 1 cup dried hibiscus flowers briefly under cold water to remove any dust.
- In a large saucepan, combine the rinsed hibiscus flowers with 4 cups of water.
- Bring the mixture to a gentle boil over medium heat.
- Reduce to a simmer and steep for 15 minutes allowing the flowers to release their deep red color and tart floral flavor.
- Remove from heat and strain through a fine mesh strainer into a large bowl or pot.
- Press gently on the flowers to extract maximum liquid, then discard the solids.
- Measure out exactly 3 ½ cups of the hibiscus tea for the jelly cooking process.
Cooking the Jelly Mixture
- Return the 3 ½ cups of hibiscus tea to the cleaned saucepan.
- Add 5 cups of granulated sugar and 1/4 cup fresh lemon juice to the tea.
- Stir gently over medium heat until the sugar dissolves completely.
- While stirring, sprinkle in 1 package (1.75 oz) fruit pectin gradually to prevent clumps.
- Bring the mixture to a full rolling boil that cannot be stirred down.
- Boil hard for exactly 1 minute, stirring constantly to activate the pectin and thicken the jelly.
- Remove from heat immediately to prevent overcooking which can affect texture.
Setting the Jelly
- Skim off any foam from the surface to ensure a clear jelly.
- Ladle the hot jelly carefully into sterilized jars leaving 1/4 inch headspace.
- Wipe rims clean and seal jars with sterilized lids.
- Process jars in a boiling water bath for 5 minutes to preserve.
- Remove jars and let cool undisturbed at room temperature.
- The jelly will fully set within 24 hours and develop the signature vibrant red hue and tangy floral flavor.
| Step | Key Action | Details |
|---|---|---|
| Hibiscus Tea Base | Steep hibiscus in water | 1 cup dried flowers + 4 cups water, 15 minutes steep |
| Jelly Mixture Cooking | Add sugar, lemon, pectin | 5 cups sugar, 1/4 cup lemon juice, 1.75 oz fruit pectin |
| Boil & Thickening | Full rolling boil | Boil hard for 1 minute |
| Setting Jelly | Jar filling & processing | Leave 1/4 inch headspace, 5 min boiling water bath |
By carefully following these directions, we guarantee a perfectly balanced hibiscus jelly that highlights the beautiful color and tangy sweetness of the hibiscus flower.
Storage Tips
To preserve the vibrant color and tangy flavor of our hibiscus jelly, careful storage is essential. Proper handling keeps the jelly fresh and maintains its perfect gel consistency over time.
Refrigeration
- After opening, always refrigerate the jelly immediately.
- Store the jar tightly sealed to prevent exposure to air and contamination.
- Use a clean spoon each time to avoid introducing bacteria.
- Typically, opened hibiscus jelly lasts 3 to 4 weeks in the refrigerator.
Shelf Life of Unopened Jars
- When properly processed and sealed, our hibiscus jelly can be stored in a cool, dark pantry.
- Ideal storage temperature: 50°F to 70°F (10°C to 21°C)
- Shelf life ranges from 12 to 18 months under optimal conditions.
| Storage Condition | Duration | Temperature Range | Notes |
|---|---|---|---|
| Unopened jars (pantry) | 12 to 18 months | 50°F to 70°F (10-21°C) | Keep away from heat and light |
| Opened jars | 3 to 4 weeks | Refrigerated at 38°F (3°C) | Use clean utensils |
Freezing Option
- For longer storage, freeze hibiscus jelly in airtight containers.
- Leave some headspace to allow expansion.
- Thaw in the refrigerator and stir gently before serving.
- Note that freezing might slightly alter the texture but preserves the flavor.
Avoiding Common Issues
- Crystallization: Keep jelly sealed and avoid temperature fluctuations.
- Mold growth: Discard if visible mold appears; it indicates contamination.
- Loss of flavor: Store away from strong odors and sunlight to maintain floral richness.
Serving Suggestions
Our hibiscus jelly offers a vibrant and tangy flavor that pairs beautifully with a variety of dishes. Here are several ways to enjoy this unique floral spread:
Breakfast Pairings
- Spread the hibiscus jelly on warm toast, bagels, or croissants for a refreshing start to the day.
- Use it as a topping for creamy yogurt or cottage cheese to add a pop of bright color and tartness.
- Drizzle over pancakes or waffles as an alternative to traditional syrup to enhance your breakfast with floral notes.
Snack and Appetizer Ideas
- Serve hibiscus jelly alongside cheese boards, pairing it with mild cheeses like brie, cream cheese, or goat cheese for a delightful balance of sweet and tangy flavors.
- Dollop on crackers with a touch of fresh herbs such as thyme or basil to impress guests with a sophisticated snack.
- Incorporate it as a glaze for roasted nuts or savory finger foods to introduce an unexpected burst of flavor.
Culinary Enhancements
- Mix the jelly into salad dressings or vinaigrettes for a subtle floral zing.
- Use as a sauce base or condiment for grilled meats like chicken or pork to complement their natural flavors.
- Add a spoonful to smoothies or cocktails for a colorful and tasty twist.
| Serving Suggestions | Description | Recommended Pairings |
|---|---|---|
| Toast and Breakfast Items | Spread or drizzle for vibrant morning flavors | Bagels, yogurt, pancakes |
| Cheese and Crackers | Balances creamy and savory tastes | Brie, goat cheese, thyme, basil |
| Cooking and Beverage Additions | Enhances dressings, glazes, and drinks | Salad dressings, grilled meats, cocktails |
“Hibiscus jelly is not just a spread; it’s a versatile ingredient that elevates everything from breakfast to gourmet snacks.”
Experimenting with these serving ideas will allow us to fully appreciate the natural floral aromas and tangy sweetness that make our hibiscus jelly so special.
Conclusion
Hibiscus jelly offers a vibrant twist to your pantry staples with its unique flavor and stunning color. Once you’ve mastered the recipe and storage tips, it becomes an easy way to add a touch of elegance to everyday meals. Whether spread on toast or used in creative dishes, this jelly brings a refreshing burst of floral tartness that’s hard to resist.
With the right ingredients and tools, making hibiscus jelly at home is a rewarding experience that yields delicious results every time. We’re confident this recipe will become a favorite for those who appreciate both flavor and versatility in their kitchen creations.
Frequently Asked Questions
What is hibiscus jelly?
Hibiscus jelly is a fruit spread made from dried hibiscus flowers. It features a vibrant red color and a tangy, floral flavor that makes it a refreshing alternative to traditional jams and jellies.
What ingredients are needed to make hibiscus jelly?
The key ingredients include dried hibiscus flowers, water, granulated sugar, lemon juice, and fruit pectin. Each contributes to the jelly’s color, flavor, and gel-like texture.
What equipment is essential for making hibiscus jelly?
You’ll need a large saucepan, fine mesh strainer, measuring cups and spoons, and a ladle. Optional tools like a candy thermometer and jar funnel can help improve accuracy and ease.
How do you prepare hibiscus flowers for jelly?
Rinse the dried hibiscus flowers and steep them in hot water to extract their vibrant color and tangy flavor, forming the base for the jelly.
What is the cooking process for hibiscus jelly?
Steep hibiscus flowers, then add sugar, lemon juice, and fruit pectin. Boil the mixture for one minute to activate the pectin, then pour into sterilized jars for setting.
How should hibiscus jelly be stored?
Unopened jars should be kept in a cool, dark pantry for 12 to 18 months. After opening, refrigerate the jelly and use within 3 to 4 weeks to maintain freshness.
Can hibiscus jelly be frozen?
Yes, it can be frozen in airtight containers. Freezing may slightly change the texture but will help preserve flavor over a longer period.
What are common issues when making hibiscus jelly, and how can they be avoided?
Common problems include crystallization, mold growth, and loss of flavor. Use clean utensils, ensure proper boiling time, and store jelly correctly to prevent these issues.
How can hibiscus jelly be served?
Serve on toast, pancakes, or bagels. It’s also great with cheese boards, as a glaze for meats, in salad dressings, or even in cocktails for added flavor.