
There’s something truly special about cooking a Cornish hen in a Dutch oven. This method locks in moisture and flavor, giving us tender, juicy meat with a perfectly crispy skin. Whether we’re preparing a cozy weeknight dinner or impressing guests, this recipe delivers comfort and elegance in one pot.
Cornish hens are smaller than regular chickens, making them ideal for individual servings or intimate meals. Using a Dutch oven allows us to slow-cook the hens evenly while infusing them with herbs, spices, and any veggies we add. It’s a hands-off approach that guarantees delicious results every time.
In this recipe, we’ll guide you through simple steps to create a mouthwatering Cornish hen dish that’s both easy and impressive. Get ready to enjoy a flavorful meal that’s perfect for any occasion.
Ingredients
To achieve the perfect Cornish Hen Dutch Oven meal, we carefully select fresh ingredients that enhance the bird’s natural flavor while ensuring balanced seasoning and complementary sides.
For the Cornish Hens
- 2 whole Cornish hens (about 1 to 1.5 pounds each), thawed if frozen, patted dry
- Salt (kosher or sea salt) – for seasoning inside and out
- Freshly ground black pepper – to taste
For the Marinade or Seasoning
| Ingredient | Quantity | Purpose |
|---|---|---|
| Olive oil | 3 tablespoons | Moisture and flavor carrier |
| Garlic cloves | 4, minced | Aromatic depth |
| Fresh rosemary | 2 sprigs, chopped | Earthy herbal note |
| Fresh thyme | 2 sprigs, chopped | Subtle herbal flavor |
| Lemon zest | 1 teaspoon | Bright citrus accent |
| Lemon juice | 2 tablespoons | Tenderizing and fresh taste |
| Paprika | 1 teaspoon | Mild smoky warmth |
| Onion powder | 1 teaspoon | Enhances savory profile |
We combine these ingredients to create a marinade that not only tenderizes but also layers the hens with vibrant, fresh flavors.
For Vegetables and Sides (Optional)
- 1 large onion, sliced into thick rings
- 3 carrots, peeled and cut into chunks
- 2 celery stalks, sliced
- 1 cup baby potatoes, halved
- 4 cloves garlic, whole but smashed
- Fresh herbs (rosemary, thyme) to scatter among vegetables
- Salt and pepper, to season vegetables
- 2 tablespoons olive oil
These vegetables can be roasted alongside the Cornish hens in the Dutch oven. They absorb the hen’s juices, creating a full, flavorful meal in one pot.
Equipment Needed
To create our perfect Cornish Hen Dutch Oven Recipe, having the right equipment ensures even cooking and rich flavor development. Below we outline the essential tools to bring this dish to life effortlessly.
Dutch Oven
A heavy-duty Dutch oven is indispensable for this recipe. Its thick walls and tight-fitting lid provide excellent heat retention and circulation, allowing the hens to cook evenly and remain moist. We recommend choosing a cast iron Dutch oven with a capacity of 5 to 7 quarts to comfortably accommodate two Cornish hens with room for vegetables.
| Feature | Description |
|---|---|
| Material | Cast iron (enameled or traditional) |
| Capacity | 5 to 7 quarts |
| Lid | Tight-fitting to lock in moisture |
| Heat source | Suitable for stovetop and oven |
| Weight | Heavy for better heat distribution |
This cookware also helps develop the signature crispy skin we desire by combining slow roasting and braising techniques in one vessel.
Additional Kitchen Tools
Alongside our Dutch oven, a few other key tools will streamline preparation and cooking:
- Tongs: To safely handle the hot hens for turning or basting without piercing the skin.
- Basting brush or spoon: For applying marinade evenly and keeping the meat moist.
- Sharp chef’s knife: Essential for prepping garlic, herbs, and chopping vegetables.
- Cutting board: For safe and organized ingredient preparation.
- Meat thermometer: Helps us monitor internal temperature ensuring the hen reaches the ideal 165°F (74°C) for safe consumption while avoiding overcooking.
- Mixing bowl: For combining marinade ingredients thoroughly.
- Aluminum foil: Optional but useful for tenting if the skin browns too quickly during roasting.
Each tool plays a role in crafting the flavorful, tender, and visually stunning Cornish hen dish we are aiming for. Using the proper equipment brings out the best results from our Dutch oven cooking method.
Prep Work
Before we start cooking, careful Prep Work ensures our Cornish Hen Dutch Oven Recipe comes out perfectly tender and flavorful. Let’s break down each preparatory step to streamline the cooking process.
Preparing the Cornish Hens
- Rinse each Cornish hen under cold water and pat dry with paper towels to remove excess moisture.
- Trim any excess fat or leftover feathers for a cleaner presentation.
- Season the hens generously with kosher salt and freshly ground black pepper both inside and out.
- Place a few sprigs of fresh herbs, like thyme or rosemary, inside the cavity to infuse flavor.
- Tie the legs together with kitchen twine to ensure even cooking and maintain shape.
Preparing Vegetables
- Wash all vegetables thoroughly.
- Peel and chop the following:
- Onions into quarters
- Carrots into 2-inch chunks
- Celery stalks roughly sliced
- Baby potatoes left whole or halved if large
- Smash garlic cloves gently with the flat side of a knife to release aroma without peeling.
- Toss vegetables with a little olive oil, salt, and pepper in a mixing bowl for an extra layer of seasoning.
- Arrange the prepared vegetables in the bottom of the Dutch oven to act as a flavorful bed for the hens.
Making the Marinade or Rub
We use a zesty, herb-infused marinade to elevate the deep flavors of the Cornish hens:
| Ingredient | Quantity | Preparation |
|---|---|---|
| Olive oil | ¼ cup | |
| Garlic | 4 cloves | Minced |
| Fresh thyme | 2 tbsp | Chopped |
| Fresh rosemary | 1 tbsp | Chopped |
| Lemon zest | 1 tsp | Grated |
| Lemon juice | 2 tbsp | Freshly squeezed |
| Paprika | 1 tsp | |
| Onion powder | 1 tsp | |
| Salt | 1 tsp | |
| Black pepper | ½ tsp | Freshly ground |
- Combine all ingredients in a bowl.
- Whisk together vigorously until the marinade emulsifies.
- Use a basting brush to coat each hen thoroughly inside and out.
- Allow hens to marinate for at least 30 minutes at room temperature or up to overnight in the refrigerator for deep flavor penetration.
“Marinating the Cornish hens in this vibrant blend ensures every bite will be infused with herbaceous, citrusy notes that complement the natural richness of the bird.”
This prep work sets the stage for a perfectly roasted, juicy Cornish Hen Dutch Oven meal packed with layered flavors and aromas.
Cooking Instructions
Follow these precise steps to cook the Cornish Hen Dutch Oven recipe perfectly. We will brown the hens first, add the vegetables and liquid, then slow-cook everything to develop rich flavor and tender meat.
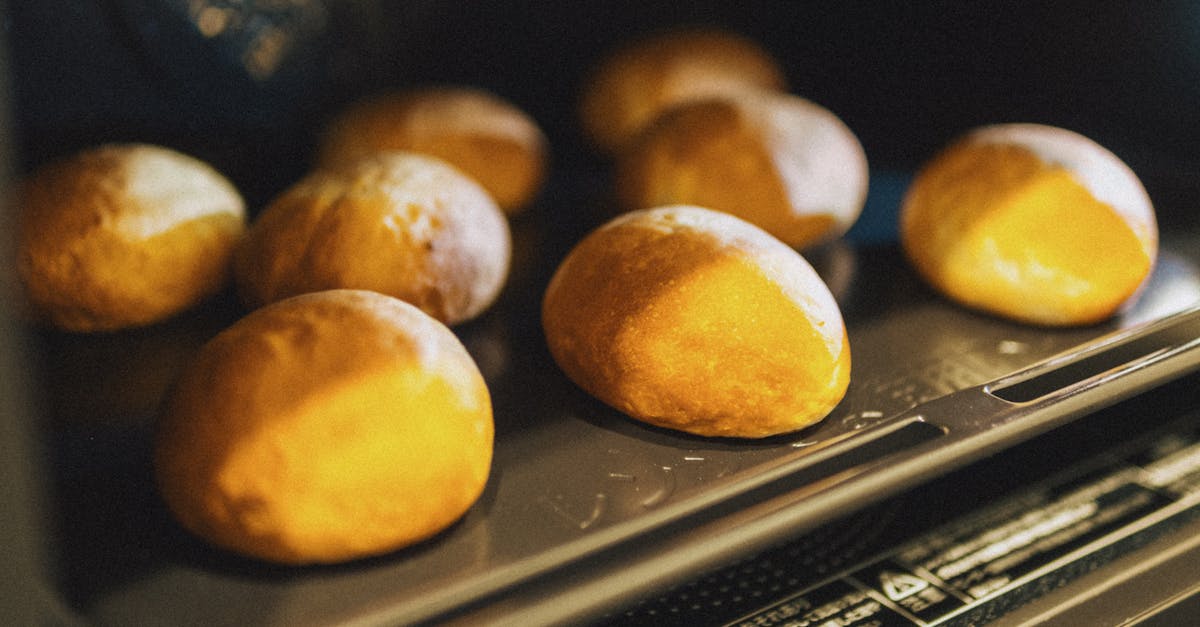
Browning the Cornish Hens
- Preheat the Dutch oven over medium-high heat until hot.
- Add 2 tablespoons of olive oil and swirl to coat the bottom evenly.
- Place each seasoned Cornish hen breast-side down carefully to avoid splattering.
- Sear the hens for 4 to 5 minutes until the skin turns golden brown and crispy.
- Use tongs to flip and brown the hens on all sides, about 3 minutes per side.
- Remove the hens and set aside on a plate; reserve the browned bits and oil in the Dutch oven as they hold flavor.
Adding Vegetables and Liquid
- Add prepared vegetables (onions, carrots, celery, baby potatoes, garlic) to the Dutch oven.
- Toss vegetables lightly in the residual oil and browned bits.
- Pour the marinade or appropriate cooking liquid (about 1 cup) gently over the vegetables to deglaze the pot.
- Stir the vegetables to evenly coat them with the juices and loosen any stuck flavors from the pan base.
- Place the browned hens on top of the vegetable bed, breast-side up.
Cooking in the Dutch Oven
- Cover the Dutch oven securely with its lid.
- Reduce heat to low or transfer to a preheated oven at 325°F (163°C) for even slow-cooking.
- Cook for 1 hour 15 minutes to 1 hour 30 minutes until the hens reach an internal temperature of 165°F (74°C).
- Baste the hens twice during cooking to keep skin moist and flavorful.
- At the end of cooking, remove the lid and cook uncovered for an additional 10 minutes to crisp the skin further.
- Let the hens rest in the Dutch oven for 10 minutes before serving to allow juices to redistribute.
| Step | Action | Time/Temp | Notes |
|---|---|---|---|
| Browning | Sear hens on all sides | 4-5 min per side | Medium-high heat, use olive oil |
| Adding vegetables | Toss and deglaze with liquid | N/A | Use marinade or 1 cup cooking liquid |
| Cooking | Covered slow cook or oven bake | 1 hr 15-30 min at 325°F | Internal temp 165°F, baste twice |
| Final finishing | Uncovered cook for crisp skin | 10 min | Rest hens 10 min before serving |
We rely on slow heat and moisture retention in the Dutch oven to transform the Cornish hens into a tender, flavorful centerpiece with crispy golden skin and perfectly roasted vegetables infused with rich juices.
Serving Suggestions
To elevate our Cornish Hen Dutch Oven recipe, pairing it with complementary sides and presenting it beautifully will enhance the overall dining experience.
Recommended Side Dishes
For a well-rounded meal, we recommend these perfect side dishes that balance flavors and textures alongside the juicy, tender Cornish hens:
- Garlic Mashed Potatoes
Creamy and smooth with a subtle garlic punch, they soak up the savory hen juices.
- Roasted Seasonal Vegetables
Carrots, Brussels sprouts, and parsnips roasted with olive oil and fresh herbs add earthiness and color.
- Wild Rice Pilaf
Nutty and aromatic, this pilaf brings a pleasant chew and complements the herbs in the hen marinade.
- Crisp Green Salad
A refreshing side with mixed greens, cherry tomatoes, and a light vinaigrette cuts through the richness.
| Side Dish | Key Flavors | Preparation Tip |
|---|---|---|
| Garlic Mashed Potatoes | Creamy, savory, garlicky | Use roasted garlic for deeper flavor |
| Roasted Vegetables | Earthy, herbaceous | Toss in thyme and rosemary |
| Wild Rice Pilaf | Nutty, aromatic | Cook with chicken broth |
| Green Salad | Fresh, tangy | Dress just before serving |
Presentation Tips
The visual appeal of our Cornish Hen Dutch Oven recipe is just as important as its taste. Here are our top presentation tips to impress at every meal:
- Serve Individual Hens: Place one Cornish hen per plate for a personalized and elegant touch.
- Use Fresh Herb Garnishes: Sprinkle fresh thyme or rosemary sprigs around the hen to accent the herbal notes.
- Arrange Vegetables Artistically: Fan roasted vegetables or baby potatoes around the hen to create a rustic yet refined look.
- Lemon Wedges: Add bright lemon wedges on the side to provide guests with an optional citrusy squeeze.
“Presentation is the first bite—we want our guests to feast with their eyes before their palate.”
- Choose a Warm Serving Plate: This helps maintain the perfect temperature and highlights the glossy, crispy skin.
- Drizzle Pan Juices: Lightly spoon the concentrated pan juices over the hen to add sheen and extra moisture.
These thoughtful touches ensure our Cornish Hen Dutch Oven recipe is as inviting visually as it is flavorful.
Make-Ahead and Storage Tips
Planning ahead and storing your Cornish Hen Dutch Oven meal properly helps maintain its fresh flavors and tender texture. Here are our best tips for preparing and storing this delicious dish.
Preparing in Advance
To save time on the day you plan to serve, you can prepare several steps in advance:
- Marinate the hens: Combine the olive oil, garlic, herbs, lemon zest, lemon juice, paprika, and onion powder to create the marinade. Coat the Cornish hens evenly and refrigerate for up to 24 hours. This deepens the flavor and tenderizes the meat.
- Chop vegetables: Wash, peel, and chop your onions, carrots, celery, baby potatoes, and garlic. Store them in an airtight container in the refrigerator. This makes assembling the Dutch oven quicker.
- Pre-measure seasonings: Mix your salt, pepper, and any additional herbs and spices into a small bowl or jar and keep it ready by your cooking station.
“Proper advance preparation lets us focus on cooking without rush, ensuring a juicy, flavorful result every time.”
| Make-Ahead Step | Time Frame | Storage Tips |
|---|---|---|
| Marinating Cornish hens | Up to 24 hours | Refrigerate in a sealed container |
| Chopped vegetables | Up to 24 hours | Airtight container in fridge |
| Seasoning mix | Indefinite until cooking | Seal in a dry, cool place |
Storing Leftovers
Once you’ve enjoyed your meal, storing leftovers correctly keeps the Cornish Hen Dutch Oven dish tasty and safe:
- Cool promptly: Allow leftovers to cool to room temperature within two hours before refrigerating.
- Use airtight containers: Transfer leftover hens and vegetables into separate airtight containers.
- Label and date: To keep track of freshness, label containers with the date they were stored.
- Refrigeration: Store leftovers in the refrigerator for up to 3-4 days.
- Freezing: For longer storage, freeze leftovers in heavy-duty freezer bags or containers, where they remain good for up to 3 months.
- Reheating: Reheat gently in an oven preheated to 325°F, covered with foil to retain moisture, or microwave on medium power, stirring the vegetables halfway.
| Storage Method | Duration | Best Practices |
|---|---|---|
| Refrigeration | 3-4 days | Airtight containers, cool before storing |
| Freezing | Up to 3 months | Heavy-duty freezer bags/containers, label date |
| Reheating | As needed | Oven at 325°F covered or microwave medium power |
Pro tip: Slice the leftover hens before freezing to speed up reheating and portion control.
Our Cornish Hen Dutch Oven recipe tastes just as wonderful days later when stored and reheated with care.
Conclusion
Cooking Cornish hens in a Dutch oven brings out incredible flavors while keeping the meat juicy and tender. This method lets us create a complete meal with minimal fuss, combining perfectly roasted hens and vegetables in one pot.
Whether for a special occasion or a cozy dinner, this recipe offers a reliable way to impress with simple ingredients and straightforward steps. With a little preparation and attention, we can enjoy a delicious, restaurant-quality meal right at home.
Frequently Asked Questions
What are the benefits of cooking Cornish hen in a Dutch oven?
Cooking Cornish hen in a Dutch oven retains moisture and flavor, resulting in tender meat and crispy skin. The even, slow cooking infuses herbs, spices, and vegetables’ flavors, creating a delicious and impressive dish.
Why is Cornish hen ideal for individual servings?
Cornish hens are smaller in size, perfect for single servings or intimate meals. They provide a tender, flavorful meat portion that’s visually appealing and easy to serve.
What ingredients are essential for this Dutch oven recipe?
Key ingredients include whole Cornish hens, salt, pepper, a marinade with olive oil, garlic, fresh herbs, lemon zest and juice, paprika, and onion powder. Optional vegetables like onions, carrots, celery, and baby potatoes complete the meal.
What type of Dutch oven should I use?
A heavy-duty, preferably cast iron Dutch oven with a 5 to 7-quart capacity is ideal. It ensures even cooking, moisture retention, and perfect roasting results.
How should I prepare the Cornish hens before cooking?
Rinse and dry the hens thoroughly, trim excess fat, season generously, and marinate with fresh herbs and spices. This prep enhances flavor and tenderness.
What is the recommended cooking process for the hens?
Start by browning the hens in the Dutch oven, add vegetables, deglaze with marinade, cover and cook low and slow until hens reach 165°F. Baste during cooking and finish uncovered for crispy skin.
What side dishes pair well with the Cornish hen?
Garlic mashed potatoes, roasted seasonal vegetables, wild rice pilaf, and crisp green salad are perfect complements. They enhance the meal’s flavors and balance the plate.
Can I prepare the ingredients in advance?
Yes, marinate hens, chop vegetables, and pre-measure seasonings ahead to save time. This helps streamline the cooking process without sacrificing flavor.
How should leftovers be stored?
Cool leftovers promptly, store in airtight containers, label and date them. Refrigerate for up to 3 days or freeze for longer storage to maintain freshness.
What’s the best way to reheat the Cornish hen?
Reheat gently in an oven or covered stovetop pan to retain moisture and avoid drying out. Reheating properly preserves the dish’s tenderness and flavor.