
Apple jelly is a timeless favorite that brings a burst of natural sweetness to any breakfast table. But traditional recipes often pack in a lot of sugar, which isn’t ideal for those watching their intake. That’s why we’re excited to share our low sugar apple jelly recipe that keeps all the delicious flavor without the extra sweetness.
Using fresh apples and just a touch of natural sweetener, this jelly offers a perfect balance of tart and sweet. It’s easy to make and great for spreading on toast, adding to yogurt, or even using in recipes that call for a fruity twist. Let’s dive into a healthier way to enjoy this classic treat without sacrificing taste.
Ingredients
To create the perfect Apple Jelly Low Sugar Recipe, we carefully select ingredients that deliver flavor and texture while keeping sugar content minimal. Below are the essential components for our delicious and wholesome jelly.
Fresh Apples
Using fresh apples is crucial to achieving the right balance of natural sweetness and tartness. We recommend:
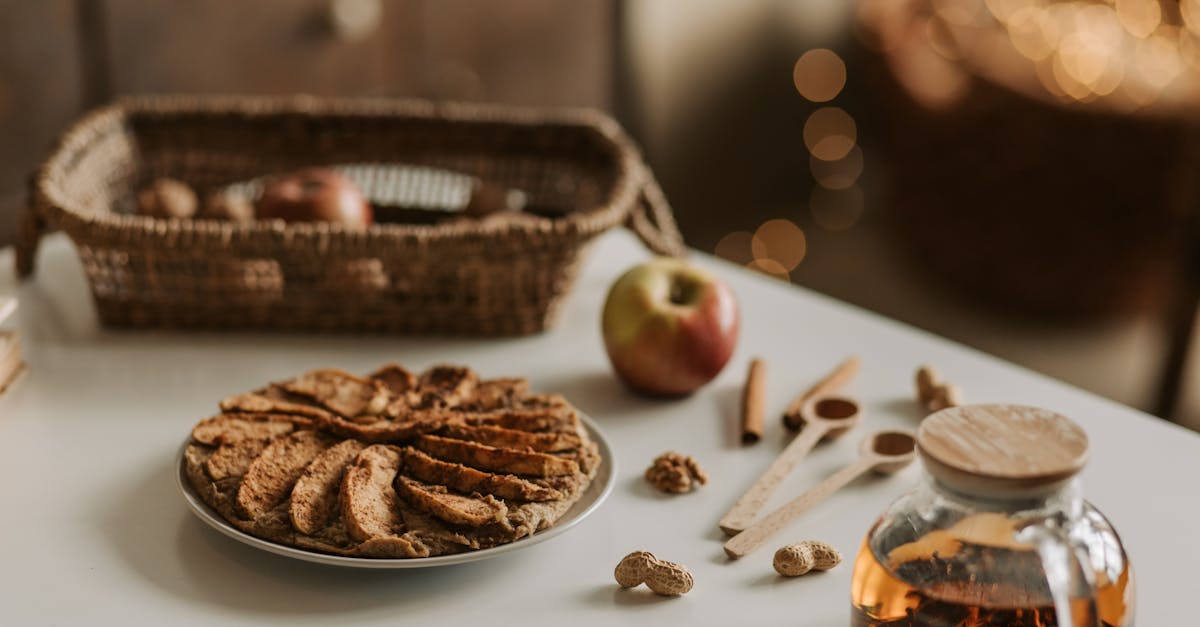
- 6 cups of fresh apples, chopped (preferably a mix of tart and sweet varieties such as Granny Smith and Fuji)
- Ensure apples are washed and cored, skin on, as the peel adds natural pectin
| Apple Variety | Notes | Quantity (cups) |
|---|---|---|
| Granny Smith | Tart flavor, high pectin | 3 |
| Fuji | Sweet flavor, crisp texture | 3 |
Sweeteners and Pectin
To keep our low sugar apple jelly enjoyable, we substitute refined sugar with natural sweeteners and add pectin for proper gel formation.
- 1 cup natural sweetener (such as honey or agave syrup) – adjust slightly to taste
- 1 tablespoon low sugar pectin – ensures the jelly sets firmly without excess sugar
- A pinch of citric acid or lemon juice to enhance gel strength and preserve freshness
Additional Flavorings
We elevate the flavor complexity while keeping the recipe clean with simple natural additions:
- 1 teaspoon ground cinnamon – adds warming spice note
- Optional: ¼ teaspoon ground nutmeg – complements apple flavor subtly
- ¼ cup cold water – to help dissolve pectin and blend ingredients smoothly
By combining these carefully chosen ingredients, we create a low sugar apple jelly that combines deep apple flavor with the right texture and just the right touch of sweetness.
Equipment Needed
To make our Apple Jelly Low Sugar Recipe perfectly every time, having the right equipment is essential. Each tool plays a role in achieving the ideal consistency and flavor. Here is what we need to prepare:
- Large stainless steel pot
We use this to cook the apples and extract the juice. Stainless steel ensures even heat distribution and prevents unwanted reactions with the fruit acids.
- Fine mesh strainer or jelly bag
This is crucial for separating the clear apple juice from the pulp. A jelly bag provides slow, drip-strain for a crystal-clear result.
- Measuring cups and spoons
Accuracy matters especially with the low sugar approach. Precise measurements help maintain flavor balance and set.
- Candy or jelly thermometer
Monitoring temperature is key to ensuring the jelly sets properly without overcooking.
- Sterilized canning jars with lids
We use these to store the jelly safely. Sterilization prevents contamination and extends shelf life.
- Ladle and funnel
These tools help transfer hot jelly into jars cleanly and without spills.
- Wooden spoon or heatproof spatula
For stirring the cooking jelly gently, preventing sticking and burning.
Summary of Essential Equipment
| Equipment | Purpose | Notes |
|---|---|---|
| Large stainless pot | Cook apples and extract juice | Use heavy-bottomed for even heat |
| Fine mesh strainer/jelly bag | Separate juice from pulp | Choose based on juice clarity desired |
| Measuring cups/spoons | Accurate ingredient measurement | Critical with low sugar recipes |
| Candy/jelly thermometer | Monitor cooking temperature for gel point | Prevents overcooking |
| Sterilized canning jars | Store jelly safely | Use with airtight lids |
| Ladle and funnel | Transfer jelly without mess | Heatproof for safety |
| Wooden spoon/spatula | Stir jelly during cooking | Gentle mixing needed |
With these tools ready, we can confidently move forward to transform fresh apples into a luscious, low sugar apple jelly bursting with natural flavor and texture.
Prep Work
Before we start cooking, thorough preparation ensures our apple jelly low sugar recipe turns out perfectly clear, flavorful, and safe to store. Careful handling of ingredients and equipment sets the foundation for success.
Washing and Preparing Apples
We select a balanced mix of fresh Granny Smith and Fuji apples for their complementary tartness and sweetness. Start by:
- Rinsing apples thoroughly under cold running water to remove dirt and residues.
- Using a vegetable brush to scrub gently, especially around the stems and blossom ends.
- Removing any bruised or damaged spots to avoid off-flavors.
- Coring and slicing apples into quarters; no need to peel, as the skins add color and natural pectin.
- Keeping apple pieces in a large bowl with water and a tablespoon of lemon juice prevents browning while we prepare the rest.
Tip: Using fresh, quality fruit enhances both the flavor and natural pectin content vital for gel formation in this low sugar jelly.
Sterilizing Jars and Lids
To preserve freshness and safety, we sterilize our canning jars and lids meticulously.
| Step | Details |
|---|---|
| Wash | Use hot soapy water to clean jars/lids |
| Rinse | Thoroughly rinse off soap residues |
| Boil jars | Submerge jars in boiling water for 10 min |
| Heat lids | Warm lids in hot (not boiling) water to soften sealing compound |
| Dry | Place jars upside down on clean towel |
| Use promptly | Keep jars hot until filling to avoid breakage |
Remember: Sterilization prevents microbial growth and ensures our apple jelly low sugar stays fresh longer. We fill the jars while they are still warm to maintain the perfect seal.
By investing a few extra minutes in washing our apples and sterilizing jars, we create the ideal conditions to craft a beautiful low sugar apple jelly that is flavorful, safe, and shelf-ready.
Cooking the Apple Jelly
With our ingredients prepared and equipment ready, it’s time to bring together the flavors by cooking the apple jelly. We will extract fresh juice and then carefully cook the mixture to achieve that perfect low sugar gel.
Making Apple Juice
To start, we extract the juice from our fresh apples. This step is crucial for clarity and flavor in our low sugar apple jelly.
- Place the washed and cored apples into a large stainless steel pot.
- Add just enough water (about 2 cups) to cover the bottom of the pot to prevent burning.
- Cook over medium heat, stirring occasionally, until the apples soften and break down, approximately 30 to 40 minutes.
- Once softened, mash the apples gently with a potato masher to release more juice.
- Strain the mixture through a fine mesh strainer or jelly bag. Allow to drip naturally without pressing hard to avoid cloudiness.
- Collect the clear juice in a bowl or pot.
Our goal is to yield about 6 cups of fresh apple juice. If needed, cook additional apples following the same procedure.
| Step | Detail |
|---|---|
| Apple cooking time | 30 to 40 minutes |
| Water added | 2 cups |
| Juice yield goal | 6 cups |
| Straining method | Fine mesh strainer or jelly bag |
Cooking the Jelly Mixture
Now we combine the apple juice with our natural sweetener, low sugar pectin, and spices to create the jelly base:
- Pour the 6 cups of fresh apple juice into the large pot.
- Stir in the measured low sugar pectin thoroughly until dissolved.
- Add natural sweetener (honey or agave syrup) according to your preferred sweetness level but keep it low, around 1/2 cup.
- Sprinkle in ground cinnamon (1 teaspoon) and, if desired, a pinch of nutmeg.
- Heat the mixture over medium-high heat. Stir constantly with a wooden spoon or heatproof spatula.
- Bring the mixture to a rolling boil that cannot be stirred down.
- Maintain this boil for 1 minute while stirring continuously. Use a jelly or candy thermometer to confirm the temperature reaches 220°F (104°C), indicating proper setting point.
- Remove from heat immediately to prevent overcooking.
- Skim off any foam from the surface with a spoon.
“Achieving the perfect set requires precise timing and temperature control.” We trust that by following these steps, the apple jelly will form a clear, firm gel with wonderfully balanced flavor and minimal sugar.
| Ingredient | Quantity |
|---|---|
| Fresh apple juice | 6 cups |
| Low sugar pectin | As per packet instructions |
| Natural sweetener | 1/2 cup |
| Ground cinnamon | 1 teaspoon |
| Nutmeg (optional) | Pinch |
| Target cooking temp | 220°F (104°C) |
| Boil duration | 1 minute |
With this stage complete, our low sugar apple jelly is ready to be jarred and preserved using sterilized equipment as prepared earlier.
Directions for Low Sugar Jelly
To make a perfect low sugar apple jelly we focus on carefully managing sweetness levels and ensuring the ideal jelly consistency. Follow these steps to maintain flavor integrity while keeping sugar content minimal.
Adjusting Sweetener Amounts
Start by measuring the natural sweetener. Since we’re using honey or agave syrup as a substitute, adjust the amount based on your preference and the tartness of the apples. Generally, we recommend:
- Use 1/3 to 1/2 cup of honey or agave syrup per 6 cups of apple juice.
- Add sweetener gradually during cooking and taste as you go.
- Remember the goal: balance tartness without overpowering the natural apple flavor.
“Less sugar lets the true apple essence shine; don’t mask it with too much sweetness.“
| Ingredient | Recommended Amount per 6 Cups Apple Juice | Notes |
|---|---|---|
| Honey or Agave Syrup | 1/3 to 1/2 cup | Adjust to taste gradually |
| Granulated Sugar | Optional, maximum 1/4 cup | Use only if extra sweetness desired |
Avoid adding sweetener before boiling; instead, stir it in during the heating process to achieve better dissolution and flavor integration.
Monitoring Consistency and Setting Point
Achieving the perfect jelly firmness is crucial especially when using low sugar pectin. Follow these steps:
- Boil the juice and pectin mixture vigorously for exactly 1 minute to activate gel formation.
- Use a jelly or candy thermometer to monitor temperature aiming for about 220°F (104°C) which is the standard jelly setting point.
- Perform the wrinkle test: drop a small amount of hot jelly on a cold plate, let it cool for a minute, then push it gently. If it wrinkles, the jelly is set.
- If the jelly is too runny, bring it back to a boil for another 30 seconds and test again.
| Step | Details | Temperature / Time |
|---|---|---|
| Boiling time | Rolling boil after adding pectin | 1 minute (minimum) |
| Ideal temperature | Jelly setting point | 220°F (104°C) |
| Wrinkle test | Cool drop on plate then test | ~1 minute cooling |
Remember to stir constantly during boiling to prevent scorching and promote even gel formation.
With these controls on sweetener adjustment and consistency checks, our low sugar apple jelly delivers a clear, firm texture alongside the natural vibrant apple flavor, perfect for spreading or cooking.
Canning and Storage
Efficient Canning and Storage are key to preserving the fresh taste and quality of our low sugar apple jelly. Proper techniques ensure safety, maintain flavor, and extend shelf life.
Filling Jars
We begin by filling our sterilized jars with hot apple jelly, leaving about 1/4 inch headspace at the top to allow for expansion during processing. Using a ladle and a funnel helps pour the jelly cleanly without spills, which prevents residue on jar rims that could compromise sealing.
Ensure to:
- Fill jars while the jelly is still hot, around 185°F (85°C), to prevent premature setting.
- Remove air bubbles by running a non-metallic spatula or plastic knife around the inside edge of the jar.
- Wipe the jar rims with a clean damp cloth to remove any jelly drips or sugar crystals.
Proper Sealing Techniques
Sealing the jars correctly is critical to avoid spoilage and contamination. We recommend these steps for a secure seal:
| Step | Action |
|---|---|
| 1. Place Lid | Center the sterilized flat lid on the jar rim. |
| 2. Screw Band | Apply the metal screw band firmly but not too tight. Tighten until resistance is felt, then reduce a quarter turn. |
| 3. Process Jars | Process jars in a boiling water bath for 10 minutes (adjusting for altitude). |
| 4. Cool Jars | Remove jars carefully and place on a towel, spacing apart to cool undisturbed for 12-24 hours. |
We look for the "pop" sound indicating the lids have vacuum-sealed properly. Press the center of each lid after cooling; it should not flex up and down.
Storage Tips
For optimal longevity and quality of our low sugar apple jelly, follow these storage guidelines:
- Store jars in a cool, dark, and dry place, ideally between 50°F and 70°F.
- Avoid direct sunlight as it can degrade color and flavor.
- Label jars with preparation date to track freshness.
- Unopened jars can last up to 12-18 months.
- Once opened, refrigerate and use within 3 weeks.
Remember: If you detect any cloudiness, bulging lids, or off odors, discard the jelly to ensure safety.
By adhering to these Canning and Storage best practices, our low sugar apple jelly will remain fresh, flavorful, and safe for everyone to enjoy.
Serving Suggestions
We love how versatile our low sugar apple jelly can be. Here are some of the best ways to enjoy this naturally flavorful, lightly sweetened treat:
- Spread on Toast or Warm Bread
The classic and simplest way to enjoy our apple jelly. Spread a generous layer on warm buttered toast or fresh bread to balance the tartness and subtle sweetness.
- Swirled into Yogurt or Oatmeal
Add 1 to 2 tablespoons of the jelly into your morning yogurt or oatmeal for a fruity twist. The jelly melts slightly adding a silky texture and vibrant apple flavor.
- Topping for Cheese Boards
Pair the jelly with sharp cheddar, creamy brie, or nutty gouda. The low sugar profile complements savory cheeses, providing a fruity contrast without overpowering sweetness.
- Ingredient in Glazes and Sauces
Incorporate this jelly into glazes for roast pork, chicken, or ham. Mix it with mustard or balsamic vinegar to create a shiny, flavorful sauce.
- Dessert Accent
Use as a topping for vanilla ice cream, pancakes, or waffles. The subtle apple notes with hints of cinnamon add warmth and depth.
Serving Ideas at a Glance
| Serving Method | Description | Serving Amount |
|---|---|---|
| Toast Spread | On buttered toast or fresh bread | 1-2 tablespoons |
| Yogurt or Oatmeal Mix-In | Blend into plain yogurt or oatmeal | 1-2 tablespoons |
| Cheese Board Accent | Pair with cheese varieties | Serve alongside cheese |
| Meat Glaze or Sauce | Combine with mustard/vinegar for glaze | As needed for glazing |
| Dessert Topping | Drizzle on ice cream or pancakes | 1-3 tablespoons |
“We find that the low sugar apple jelly enhances every dish it accompanies, adding a natural sweetness with a crisp apple finish that excites our palate without excess sugar.“
Feel free to experiment with these suggestions or create your own signature uses. This jelly’s balanced taste and delicate texture make it a perfect companion in both sweet and savory applications.
Conclusion
Making our own low sugar apple jelly lets us enjoy the natural flavors of fresh apples without the extra sweetness. It’s a rewarding process that combines simple ingredients and careful techniques to create a versatile treat.
With the right preparation and attention to detail, we can produce a jelly that’s perfect for a variety of uses—from breakfast spreads to savory dishes. This recipe offers a healthier way to savor a classic favorite while keeping sugar intake in check.
Frequently Asked Questions
What makes this apple jelly recipe low in sugar?
This recipe uses fresh apples combined with natural sweeteners like honey or agave syrup in smaller amounts. It also uses low sugar pectin for gel formation, reducing the overall sugar content while maintaining flavor.
Which types of apples are best for making low sugar apple jelly?
A mix of Granny Smith and Fuji apples is recommended for a balanced tart and sweet taste, essential for creating a flavorful low sugar apple jelly.
What equipment is needed to make this apple jelly?
You need a large stainless steel pot, fine mesh strainer or jelly bag, measuring cups and spoons, candy thermometer, sterilized canning jars with lids, ladle, funnel, and a wooden spoon or heatproof spatula.
How do I prepare apples before making the jelly?
Wash, rinse, and scrub apples, core them, and keep them in lemon juice water to prevent browning. Preparing apples this way ensures clarity and better flavor in the jelly.
How do I extract juice from apples for the jelly?
Cook the prepared apples with a small amount of water until softened, then strain through a fine mesh strainer or jelly bag to collect clear apple juice.
How much sweetener should I add to this jelly?
Add 1/3 to 1/2 cup of honey or agave syrup per 6 cups of apple juice. Adjust based on personal taste and apple tartness, avoiding adding sweetener before boiling.
What is the ideal cooking temperature and time for the jelly?
Boil the juice and pectin mixture for exactly one minute, reaching a temperature of 220°F (104°C) for proper gel formation.
How can I test if the jelly is set properly?
Use the wrinkle test by placing a spoonful of jelly on a cold plate; if it wrinkles when pushed with a finger, the jelly is ready.
What is the proper method for canning and storing low sugar apple jelly?
Fill sterilized jars leaving headspace, remove air bubbles, clean rims, seal with lids and screw bands, then process jars in a boiling water bath. Store in a cool, dark place and label jars with the date.
How should I serve low sugar apple jelly?
Spread it on toast or warm bread, mix into yogurt or oatmeal, pair with cheese, use in meat glazes, or top desserts like pancakes and ice cream for a versatile treat.