
There’s something magical about a warm bowl of soup that brings comfort to any day. Whether we’re whipping up a hearty stew or a light broth, starting with the right base makes all the difference. That’s where this versatile soup starter recipe comes in—it’s the perfect foundation for creating soups full of flavor and depth.
Inspired by classic techniques, this recipe combines simple, fresh ingredients to build a rich, aromatic base. It’s incredibly easy to customize, so we can adapt it to suit any type of soup we’re craving. From creamy blends to chunky vegetable creations, this starter sets us up for success every time.
With just a few steps, we’ll have a go-to recipe that saves time and enhances every soup we make. Let’s dive into this essential kitchen staple and discover how it can elevate our homemade soups to the next level.
Soup Starter Recipe
Creating a soup starter is the key to achieving a rich and flavorful soup base for countless recipes. The following steps will guide us in crafting a versatile and aromatic starter, setting the perfect tone for any soup variety.
Ingredients
- 2 tablespoons of olive oil
- 1 large yellow onion, finely chopped
- 2 medium carrots, peeled and diced
- 2 stalks of celery, diced
- 3 cloves of garlic, minced
- 1 teaspoon of salt
- ½ teaspoon of black pepper
- 1 teaspoon of dried thyme
- 1 teaspoon of paprika (optional for added depth)
- 1 bay leaf
- 4 cups of vegetable stock or chicken stock
Instructions
1. Heat the base:
In a large heavy-bottomed pot, heat the olive oil over medium heat until it shimmers. This step ensures we evenly sauté the aromatics without burning.
2. Sauté the aromatics:
Add the chopped onion and cook for 2-3 minutes, stirring frequently, until it’s soft and translucent. Then, add the carrots and celery. Continue cooking for 5 minutes until the vegetables begin to soften and release their natural sweetness. Sprinkle in the minced garlic, salt, and pepper, and cook for another 30 seconds until fragrant.
3. Incorporate seasonings:
Stir in the dried thyme, paprika, and bay leaf. Toasting these spices for 1 minute heightens their flavor and ensures an aromatic base.
4. Add the stock:
Pour in the vegetable or chicken stock. Stir well to deglaze the pot, scraping up any browned bits at the bottom. Bring the mixture to a gentle boil over medium-high heat.
5. Simmer and infuse:
Reduce the heat to low and let the soup starter simmer uncovered for 20-25 minutes. During this time, the flavors meld together, forming a cohesive and fragrant base.
Optional Adjustments
- For additional depth, add 1 teaspoon of tomato paste during Step 3.
- If making a creamy soup, blend the finished starter with 1 cup of heavy cream or coconut milk.
- To enhance the umami, stir in ½ teaspoon of soy sauce or miso paste before serving.
Nutritional Highlights
| Ingredient | Benefit |
|---|---|
| Olive oil | Rich in healthy fats |
| Garlic | Immune-boosting properties |
| Onion, carrot, celery | Packed with vitamins and minerals |
| Thyme | Anti-inflammatory herb |
This soup starter serves as the blank canvas to customize soups that fit our tastes and preferences. The harmony of aromatics, seasonings, and stock ensures each spoonful will be both satisfying and nourishing.
Ingredients
Creating a flavorful soup starter begins with the right balance of fresh, aromatic ingredients. Below, we list the essential elements for a robust base alongside optional enhancements to customize the flavor profile to your liking.
Essential Ingredients
These are the key components that form the foundation of your soup starter:
- 2 tablespoons olive oil – For sautéing and flavor enhancement.
- 1 large onion, diced – Sweetness and depth.
- 2 medium carrots, peeled and diced – Subtle sweetness and color.
- 2 celery stalks, diced – Adds a mild earthiness and crunch.
- 3 garlic cloves, minced – Robust aroma and taste.
- 1 teaspoon salt – Balances flavors.
- ½ teaspoon black pepper – Adds mild heat and complexity.
Optional Add-Ins
- 1 teaspoon dried thyme or Italian seasoning – An herbal touch for savory soups.
- 1 bay leaf – Subtle, fragrant enhancement.
- ½ teaspoon smoked paprika – Adds a hint of smoky warmth.
- 1 tablespoon tomato paste – For richness and a slight tang.
- ½ cup chopped fresh parsley – Brightens the base with freshness.
Tools And Equipment
To create our rich, aromatic soup starter, having the right tools and equipment is essential. Each item plays a specific role in streamlining the process and ensuring consistent results. Here’s what we recommend:
Essential Tools
- Cutting board: A sturdy surface for chopping vegetables without slipping.
- Chef’s knife: A sharp, reliable knife for finely dicing onions, celery, and carrots.
- Vegetable peeler: Ideal for peeling carrots or other root vegetables quickly and efficiently.
- Measuring cups and spoons: For accurate measurements of liquids, seasonings, and herbs.
- Large heavy-bottomed pot: A high-quality pot helps retain and evenly distribute heat for sautéing and simmering.
- Wooden spoon or silicone spatula: Perfect for stirring ingredients without scratching cookware.
- Ladle: Useful for portioning and serving while maintaining presentation.
Optional Tools
- Immersion blender: If preferred, use this for blending the base into a smooth consistency.
- Strainer or fine mesh sieve: For removing herb stems, bay leaves, or any solids from the base, delivering a polished finish.
- Garlic press: Speeds up the process of mincing garlic for deeper flavor infusion.
- Tongs: Handy for removing larger herbs like parsley or thyme while reducing mess.
To keep things organized, we’ve prepared a simple table summarizing these essentials:
| Tool/Equipment | Usage |
|---|---|
| Cutting board | For stable and safe chopping of vegetables |
| Chef’s knife | Dicing vegetables into uniform sizes for even cooking |
| Vegetable peeler | Peeling carrots or other root vegetables |
| Measuring cups/spoons | Ensuring accurate seasoning and liquid ratios |
| Large heavy-bottomed pot | Even heat distribution for sautéing and simmering ingredients |
| Wooden spoon/spatula | Stirring without damaging pots |
| Ladle | For portioning and serving the soup starter |
| Immersion blender (optional) | Blending for a smoother texture if desired |
| Strainer/fine mesh sieve (optional) | Filtering solids for a clear, smooth base |
| Garlic press (optional) | Effortless garlic mincing |
| Tongs (optional) | Removing herbs and large items with ease |
Investing in quality tools improves not only the cooking process but also the flavor of our soup starter. Let us handle these tools with confidence to bring out the best in this foundational recipe.
Directions
Creating the perfect soup starter is a straightforward process with just a few key steps. By following these directions, we ensure a rich, aromatic base that will elevate any soup we make.
Prep The Ingredients
- Dice the vegetables: Start by finely chopping 1 medium onion, 2 large carrots, and 2 celery ribs. Ensure they are evenly sized for consistent cooking.
- Mince the garlic: Use a garlic press or a sharp knife to mince 4 cloves of garlic. Set aside for later use.
- Measure seasonings: Prepare 1 teaspoon each of salt, pepper, and dried thyme. If using optional seasonings like smoked paprika or tomato paste, measure those as well.
- Gather liquids: Have 6 cups of broth (vegetable or chicken) on hand. If broth is unavailable, use water with bouillon for added depth.
Sauté The Base
- Heat the oil: Add 2 tablespoons of olive oil to a large heavy-bottomed pot over medium heat.
- Cook the aromatics: Add the onions, carrots, and celery. Sauté for 6–8 minutes until the vegetables are softened and the onions turn translucent. This step develops the flavor foundation.
- Add garlic and seasonings: Stir in the garlic, salt, pepper, and dried thyme. Cook for 1–2 minutes until the mixture is aromatic but avoid browning the garlic—it can make the base bitter.
- Optional flavors: If desired, add 2 tablespoons of tomato paste now. Stir well to coat the vegetables and release additional depth.
Add The Liquid And Simmer
- Deglaze the pot: If necessary, use 1/4 cup of broth to scrape up any browned bits from the bottom of the pot. This step ensures no flavor is left behind.
- Add the broth: Pour in the remaining liquid, stirring to combine with the sautéed vegetables.
- Incorporate bay leaves: Toss in 1–2 bay leaves for an earthy aroma.
- Simmer: Bring the mixture to a gentle boil before reducing the heat to low. Cover partially with a lid and let simmer for 20–30 minutes. Stir occasionally to ensure everything cooks evenly.
| Tip: For a smoother texture, use an immersion blender to purée the base after simmering, or leave it chunky for rustic soups. |
Season To Taste
- Taste test: After simmering, remove the bay leaves and taste the broth. Add more salt, pepper, or seasoning if needed.
- Enhance flavors: Stir in fresh parsley or a squeeze of lemon juice to brighten the flavors. For a richer base, consider swirling in a tablespoon of butter or cream.
- Adjust consistency: If the broth is too thick, add a bit of water or broth. If too thin, simmer longer to reduce.
The soup starter is ready to serve as a base for any soup recipe. From here, we can easily customize it for creamy soups, hearty stews, or light broths.
Serving Suggestions
Once our soup starter is ready, the possibilities to create hearty and flavorful soups are endless. To help you make the most out of this versatile base, here are some Serving Suggestions and creative ideas that will elevate your soup recipes:
1. Add Protein for a Complete Meal
Including protein in your soup transforms it into a satisfying, filling meal. Consider these options:
- Chicken or Turkey: Add shredded, cooked chicken or turkey for a comforting classic.
- Legumes: Stir in canned or pre-cooked lentils, chickpeas, or beans for a plant-based protein boost.
- Seafood: Shrimp, fish fillets, or clams pair beautifully with the aromatic starter for seafood soups.
- Meatballs: Small, tender meatballs bring a hearty touch to your soup.
2. Incorporate Grains and Pasta
Enhance the texture and substance of your soup by adding grains or pasta during simmering.
- Rice: White, brown, or wild rice adds a chewy texture and slight nutty flavor.
- Quinoa or Farro: Both are excellent gluten-free options and cook quickly.
- Noodles: Egg noodles, orzo, or even gluten-free pasta bring comfort to the bowl.
| Ingredient | Recommended Quantity per 4 Servings |
|---|---|
| Cooked Rice | 1 cup |
| Quinoa/Farro | 1 cup |
| Pasta/Noodles | 1-2 cups |
3. Garnish Generously
Garnishing your soup can elevate its flavor and presentation. Try these toppings:
- Fresh Herbs: Sprinkle finely chopped parsley, cilantro, or chives.
- Dairy: Add a dollop of sour cream, yogurt, or a sprinkle of Parmesan.
- Crispy Toppings: Croutons, toasted nuts, or crispy bacon provide crunch.
- Drizzle of Olive Oil: A swirl of flavored oil adds a gourmet touch.
4. Pair with Sides
Serving our soup with complementary sides transforms the meal into a dining experience. A few great options include:
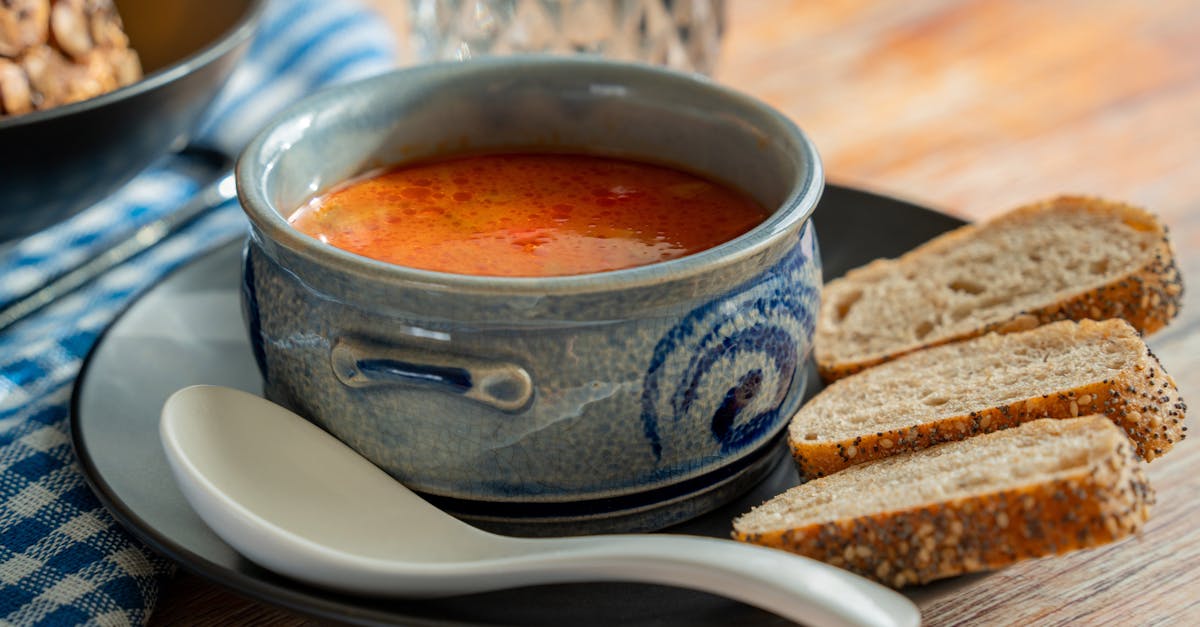
- Crusty Bread: Serve with toasted artisan bread or baguettes to soak up every drop of flavor.
- Salads: A fresh green salad with vinaigrette balances the warmth of a rich soup.
- Sandwiches: Pair the soup with grilled cheese, panini, or wraps for a perfect combo.
5. Customize for Seasonal Ingredients
Our soup starter adapts beautifully with seasonal produce. In spring, add asparagus and peas for a light, fresh taste. In fall, go for squash or pumpkin to create a robust, comforting dish. Use what’s freshest for the best results.
Make-Ahead Instructions
With busy schedules, having a make-ahead soup starter guarantees an easy start to any soup recipe. Here’s how we can successfully prepare and store it for future use:
1. Batch Preparation
To save time, we recommend making a large batch of the soup starter. Multiply the ingredient quantities proportionally to maintain consistent flavor. Use a heavy-bottomed stockpot or Dutch oven for even cooking when scaling up.
2. Cooling Properly
After cooking, allow the soup starter to cool completely. Rapid cooling prevents bacteria growth. Transfer the starter to shallow containers to cool within 1-2 hours. If needed, place the containers in an ice bath to speed up the process.
3. Storing in the Refrigerator
Once cooled, transfer the soup starter into airtight containers or mason jars. Label with preparation date using masking tape and a marker. Keep refrigerated for up to 4 days.
| Storage Option | Maximum Duration | Key Tips |
|---|---|---|
| Refrigerator | Up to 4 days | Use airtight containers or jars. |
| Freezer | Up to 3 months | Use freezer bags or containers. |
4. Freezing for Long-Term Use
Freeze any portion you won’t use within 4 days. Divide the starter into individual portions using freezer-safe zip-top bags or silicone molds for convenience. Lay bags flat in the freezer to save space. The soup starter remains fresh for up to 3 months when properly stored.
Pro Tip: Freeze in 1-cup portions for easy measurement while cooking.
5. Thawing and Reheating
When ready to use, thaw the frozen starter in the refrigerator overnight or run the sealed bag under cool running water. Reheat the starter gently in a saucepan over medium heat, stirring occasionally until warmed through.
Note: Avoid boiling the thawed starter to preserve its flavor and texture.
Storage And Reheating Tips
Effective storage and reheating ensures our soup starter keeps its rich flavor and texture. Follow these essential tips to maintain its quality:
Storage Guidelines
- Refrigeration: Allow the soup starter to cool completely before transferring it to an airtight container. Store in the fridge for up to 4 days.
- Freezing: For long-term storage, divide the starter into freezer-safe containers or resealable bags. Lay bags flat in the freezer to save space. It stays fresh for up to 3 months.
- Labeling: Always label your containers with the contents and freezing date to ensure proper use within the recommended time frame.
| Storage Method | Duration |
|---|---|
| Refrigeration | Up to 4 days |
| Freezing | Up to 3 months |
Thawing Tips
- Overnight Thawing: Transfer the frozen soup starter to the refrigerator and let it thaw overnight. This ensures gradual and safe defrosting.
- Quick Thawing: Place the freezer bag or container in a bowl of cold water. Change the water every 30 minutes until thawed. Avoid hot water to maintain the texture and flavor.
Reheating Instructions
- Stovetop Reheating: Pour the thawed or refrigerated soup starter into a heavy-bottomed pot for even heating. Stir occasionally over medium heat for 7–10 minutes. Add a splash of broth or water if it thickened during storage.
- Microwave Option: Use a microwave-safe bowl. Heat in 30-second intervals, stirring after each, until warmed evenly.
- Avoid Overcooking: Reheat just until the starter is hot, as overcooking can alter its taste and reduce its nutritional value.
Pro Tips for Maintaining Flavor
- Add a splash of fresh herbs, squeeze of lemon juice, or a touch of seasoning when reheating to revive the flavor’s brightness.
- Always use airtight containers and avoid exposing the starter to air to prevent freezer burn or spoilage.
Conclusion
A well-made soup starter sets the stage for endless culinary possibilities. With its rich flavors and adaptability, it transforms simple ingredients into something truly special. By mastering this essential recipe, we can elevate our soup-making skills and create meals that are both comforting and nourishing.
Whether we’re preparing a quick weeknight dinner or crafting a hearty meal for loved ones, this versatile base ensures every bowl is full of flavor. Let’s embrace the joy of homemade soups and make this soup starter a staple in our kitchens.
Frequently Asked Questions
What is a soup starter?
A soup starter is a flavorful base made from fresh ingredients like onions, carrots, celery, garlic, and seasonings. It helps build depth in soups, making them more aromatic and rich. It serves as the foundation for creating a variety of soups, from creamy to hearty broths.
Can I customize the soup starter?
Yes, the soup starter is highly customizable! You can adjust seasonings, add tomato paste, fresh herbs, or spices like smoked paprika, and include ingredients that suit your preferred soup style or dietary needs.
What tools are essential for making a soup starter?
Key tools include a cutting board, knife, vegetable peeler, heavy-bottomed pot, wooden spoon, and measuring cups. Optional tools like an immersion blender or garlic press can further simplify the process.
How long can I store the soup starter?
You can refrigerate the soup starter for up to 4 days or freeze it for up to 3 months. Proper storage, including using airtight containers and labeling, ensures the best flavor and freshness.
How do I reheat a frozen soup starter?
Thaw the starter overnight in the refrigerator or quickly in cold water. Reheat gently on the stovetop or in the microwave, stirring occasionally to maintain texture and flavor.
Can I use the soup starter for non-soup recipes?
Yes, the soup starter can be used as a base for sauces, casseroles, or stews. Its versatile nature allows it to enhance a variety of dishes.
What types of soups can I make with this starter?
You can create endless soup variations, such as creamy soups, hearty stews, light broths, or chunky vegetable soups. Add proteins, grains, or pasta to further customize your soup.
Are there any nutritional benefits to this soup starter?
Yes, the soup starter is packed with nutrients from fresh vegetables like carrots, onions, and celery. It’s a wholesome base that provides vitamins, minerals, and antioxidants.
How do I ensure the best flavor in my soup starter?
For the best flavor, dice vegetables evenly, sauté them until aromatic, and use high-quality broth or water. Experiment with fresh herbs and spices to boost the flavor profile.
Can I prepare the soup starter in advance?
Absolutely! Batch-preparing the soup starter saves time. Store in the refrigerator or freezer, and you’ll have a ready-to-use base whenever you need to cook a comforting soup.