
If you’re looking for a dessert that’s as delightful to the eyes as it is to the taste buds, our Mosaic Pie is the perfect treat. This no-bake wonder combines vibrant colors, creamy textures, and a touch of nostalgia, making it a showstopper for any occasion. It’s the kind of dessert that sparks curiosity and leaves everyone asking for seconds.
Originating from classic gelatin desserts, Mosaic Pie takes a playful twist with its colorful cubes suspended in a luscious, creamy base. It’s a fun and creative way to bring a splash of color to your dessert table while keeping things simple and easy to prepare. Plus, it’s kid-friendly and endlessly customizable with your favorite flavors.
Mosaic Pie Recipe
Let’s dive into the detailed steps to create a delicious Mosaic Pie. This visually stunning dessert is as fun to make as it is to eat.
Ingredients
To prepare this vibrant dessert, you’ll need the following ingredients:
- 3 small packets of flavored gelatin (Jell-O), any colors of your choice (e.g., strawberry, lime, orange)
- 1 envelope of unflavored gelatin (about 7 grams)
- 2 cups hot water, divided equally for the flavored gelatin
- 2 cups cold water, divided equally for the flavored gelatin
- 1 cup heavy cream, chilled
- 1 cup sweetened condensed milk
- ½ cup whole milk
- A 9-inch springform pan (or deep pie dish) – for assembly
Step-by-Step Instructions
Step 1: Prepare the Flavored Gelatin
- Dissolve one packet of flavored gelatin in 1 cup of hot water, stirring until fully dissolved.
- Add 1 cup of cold water and stir well.
- Pour the mixture into a shallow dish (like a square or rectangular container) for easy cutting later.
- Repeat this process for the remaining two flavors of gelatin.
- Chill the dishes in the refrigerator for at least 3 hours until fully set.
Tip: For the best visual contrast in your pie, opt for bold, bright colors like red, green, and orange.
Step 2: Cut the Gelatin Cubes
- Once set, gently loosen the flavored gelatin from the dish using a knife.
- Using a sharp knife, cut the gelatin into even 1-inch cubes.
- Carefully transfer the cubes into a large mixing bowl, gently tossing to combine the colors without breaking the cubes.
Step 3: Make the Creamy Base
- In a small saucepan, sprinkle the unflavored gelatin over ½ cup of whole milk. Let it sit for 5 minutes to bloom.
- Place the saucepan over low heat and stir until the gelatin is dissolved completely.
- Remove from heat and allow to cool slightly.
- In a separate bowl, whisk together the sweetened condensed milk and heavy cream until smooth.
- Slowly whisk the cooled gelatin mixture into the creamy base until fully incorporated.
Note: Ensure the gelatin mixture cools enough to prevent curdling the cream but remains liquid for an even texture.
Step 4: Assemble the Mosaic Pie
- Prep the springform pan by lightly greasing its sides with oil or non-stick spray.
- Gently pour the prepared flavored gelatin cubes into the pan, spreading them evenly for a vibrant mosaic effect.
- Slowly pour the creamy base over the gelatin cubes, ensuring the liquid seeps into all gaps.
- Tap the pan gently on the counter to release air bubbles and ensure the liquid base surrounds the cubes evenly.
Step 5: Set and Chill
- Cover the pan with plastic wrap and refrigerate for at least 4 hours or until firm.
- Once set, release the pie from the springform pan. Slice into wedges to showcase its beautiful, colorful mosaic design.
Ingredients
For our Mosaic Pie, we’ll need a mix of beautifully colored gelatin, a creamy filling, and an optional topping for added flair. This layered dessert is as fun to prepare as it is to eat. Let’s break it down step by step.
Crust Ingredients
- 2 cups crushed graham crackers (about 12-14 crackers)
- 1/2 cup unsalted butter, melted
- 2 tablespoons granulated sugar
Filling Ingredients
- 3 boxes flavored gelatin (choose vibrant colors like strawberry, lime, and orange), 3 ounces each
- 4 cups boiling water (divided for gelatin preparation)
- 2 tablespoons unflavored gelatin
- 1/4 cup cold water
- 1 can sweetened condensed milk (14 ounces)
- 1 cup heavy cream (chilled for a creamy texture)
- 1 teaspoon vanilla extract (optional, for a hint of flavor)
Topping Ingredients (Optional)
- Whipped cream (light and airy for garnish)
- Fresh fruits (like berries or sliced kiwi for a pop of color)
- 2 tablespoons shredded coconut (toasted for added crunch)
Tools And Equipment
Creating the perfect Mosaic Pie requires a selection of essential tools and equipment to ensure seamless preparation. Here is a list of what we’ll need to bring this vibrant no-bake dessert to life:
Tools You’ll Need
- Mixing Bowls: A set of medium and large-sized bowls for preparing the flavored gelatin and the creamy filling.
- Whisk: To mix and smooth out the cream filling without lumps.
- Small Saucepan: For dissolving the unflavored gelatin over gentle heat.
- Measuring Cups and Spoons: To ensure precise measurements of liquid and dry ingredients.
- Knife & Cutting Board: To cut the flavored gelatin into neat, colorful cubes.
- Spatula: A silicone or rubber spatula works best for folding ingredients together.
- Springform Pan (9-inch): This will be the base of the pie, ensuring easy removal for a flawless presentation.
- Plastic Wrap or Aluminum Foil: To cover and chill the pie while setting in the refrigerator.
Optional Tools for Extra Precision
- Gelatin Molds or Ice Cube Trays: To shape the cubes uniformly if you want perfectly shaped mosaic blocks.
- Electric Mixer or Hand Mixer: For whipping heavy cream if making your own whipped topping.
Breakdown: Tools and Their Purpose
| Tool | Purpose |
|---|---|
| Mixing Bowls | Combine, mix, and hold various ingredients during preparation. |
| Whisk | Blend liquids smoothly and ensure even texture for the cream base. |
| Small Saucepan | Gently heat unflavored gelatin for proper dissolution. |
| Knife & Cutting Board | Create uniform, colorful gelatin cubes central to the pie’s appearance. |
| Springform Pan (9-inch) | Shapes the final pie and makes it easy to release once set. |
| Plastic Wrap or Foil | Covers and secures the pie while chilling in the fridge. |
| Gelatin Molds (Optional) | Perfect for achieving uniformly shaped mosaic blocks. |
| Electric Mixer (Optional) | Speeds up the process of making homemade whipped topping if desired. |
Equipping our kitchen with these Tools And Equipment will ensure a smooth process from start to finish, allowing us to focus on achieving that iconic, colorful mosaic design. Each tool has its purpose in elevating our dessert both in appearance and texture.
Directions
Let’s dive into the step-by-step process of creating the stunning and delicious Mosaic Pie. Follow these detailed instructions for the perfect mix of creamy goodness and colorful charm.
Prep The Crust
- In a medium-sized mixing bowl, combine 2 cups of crushed graham crackers, 1/4 cup of sugar, and 1/2 cup of melted butter. Stir until the mixture resembles wet sand.
- Press the crust mixture into the bottom of a springform pan, ensuring it forms an even layer. Use the back of a spoon or the bottom of a glass to press it firmly.
- Place the pan in the refrigerator to chill while preparing the filling.
Prepare The Filling
- Begin by preparing the flavored gelatin. For each color (e.g., red, green, yellow, and blue), dissolve one 3 oz. package of flavored gelatin into 1 cup of boiling water. Stir until completely dissolved, then pour into small, shallow containers.
- Refrigerate the gelatin for at least 4 hours or until firm.
- Once the flavored gelatin is set, cut it into small cubes using a sharp knife. Gently remove the cubes and set them aside.
- In a small saucepan, sprinkle 2 tbsp of unflavored gelatin over 1/4 cup of cold water. Let it bloom for 5 minutes, then heat over low heat, stirring, until completely dissolved. Set aside.
- In a large mixing bowl, combine 1 can of sweetened condensed milk and 1 cup of heavy cream. Add the melted unflavored gelatin mixture and stir thoroughly.
- If desired, stir in 1 tsp of vanilla extract for added flavor.
Assemble The Pie
- Retrieve the chilled crust from the refrigerator. Scatter the colorful gelatin cubes evenly across the crust.
- Slowly pour the creamy filling mixture over the gelatin cubes, making sure they remain spread out and surrounded by the cream.
- Gently tap the pan on the counter to release any air bubbles.
Bake The Mosaic Pie
The Mosaic Pie is a no-bake dessert, so we skip the oven entirely, making this recipe simple and family-friendly. Instead, proceed to the final step for setting.
Cool And Set
- Cover the springform pan with plastic wrap or aluminum foil to prevent odors from the fridge affecting the dessert.
- Refrigerate the pie for at least 3-4 hours, or until the filling is completely set and firm to the touch.
- Once set, carefully remove the springform pan’s sides. Slice the pie into wedges and serve.
Optional: Top the pie with whipped cream, fresh fruits, or toasted coconut for an extra layer of flavor and visual appeal.
Make-Ahead Instructions
Planning ahead makes preparing our Mosaic Pie even more enjoyable. This dessert is perfect for making in advance since it requires ample chilling time for the gelatin and creamy filling to set properly. Here are the detailed make-ahead steps:
1. Prepare the Gelatin Cubes
- Follow the recipe steps to dissolve the flavored gelatin in boiling water. Once dissolved, let it cool to room temperature.
- Transfer the mixture into shallow containers and refrigerate for at least 4 hours or until fully set. This is a great task to complete the day before.
- Once set, cut the gelatin into bite-sized cubes and store them in an airtight container in the refrigerator for up to 2 days.
2. Make the Creamy Filling
- The creamy base can also be prepared 1 day in advance. After blooming the unflavored gelatin and mixing it with the sweetened condensed milk and heavy cream, let it cool to room temperature.
- Cover the bowl tightly with plastic wrap and store in the refrigerator. Gently whisk the filling to ensure smoothness before assembling the pie.
3. Prepare the Crust
- Assemble the graham cracker crust up to 2 days ahead. Press the mixture into the springform pan and refrigerate it.
- To avoid dryness or cracking, cover the pan with plastic wrap or foil while storing in the refrigerator.
4. Assemble the Pie
- For the best results, assemble the pie no more than 1 day before serving. Layer the prepared gelatin cubes within the crust and pour the creamy filling over them.
- Once assembled, cover the pan and refrigerate the pie for at least 6 hours or overnight to ensure it sets firmly.
| Make-Ahead Components | Storage Time | Tips for Best Results |
|---|---|---|
| Gelatin Cubes | Up to 2 days | Store in airtight containers to prevent drying or absorbing fridge odors. |
| Creamy Filling | 1 day | Whisk lightly before using to restore its smooth texture. |
| Graham Cracker Crust | Up to 2 days | Cover tightly to maintain its consistency and freshness. |
| Fully Assembled Pie | 1 day | Refrigerate overnight for proper setting and convenience. |
By utilizing these make-ahead steps, we can simplify the process and ensure our Mosaic Pie bursts with both flavor and visual appeal on the day it’s served. Proper storage and timing will yield a dessert that’s not only strikingly beautiful but also delightfully convenient for any event.
Tips For Perfect Results
Achieving a stunning and delicious Mosaic Pie calls for attention to detail and strategic preparation. Follow these pro-tips to ensure perfect results every single time:
1. Prioritize Gelatin Preparation
- Ensure the flavored gelatin fully dissolves in boiling water to avoid grainy textures. Stir continuously for at least 2 minutes.
- Allow the gelatin to cool completely before cutting into cubes. To speed up the cooling process, refrigerate for at least 4 hours or until fully firm.
- Use a sharp knife for clean and precise cuts. Wipe the blade with a damp cloth between cuts to prevent smudging the gelatin.
2. Use Quality Ingredients
- Opt for high-quality flavored gelatins to achieve vibrant colors and authentic taste.
- Use real heavy cream for the creamy filling to ensure a rich and smooth texture. Artificial substitutes might not yield the best results.
- When possible, include pure vanilla extract for an added layer of aroma and flavor.
3. Assemble With Care
- Layer the gelatin cubes gently into the crust to preserve their shape. Avoid pressing them down too firmly.
- Pour the creamy mixture slowly and evenly over the cubes. For even distribution, tilt the pan slightly while pouring.
- Tap the pan lightly on a flat surface after assembly. This helps remove air bubbles and evenly spreads the filling.
4. Choose the Right Tools
The following tools help us craft a perfect Mosaic Pie seamlessly.
| Tool | Purpose |
|---|---|
| Mixing Bowls | To mix gelatin and creamy components effectively. |
| Sharp Knife | For clean and even gelatin cube cuts. |
| Springform Pan | For easy removal and perfect pie presentation. |
| Plastic Wrap or Aluminum Foil | To tightly wrap and preserve the pie in the fridge. |
| Electric Mixer (optional) | For whipping the creamy filling till smooth. |
5. Perfect Chilling Times
- Chill the crust for at least 30 minutes before assembling the pie to ensure it sets properly.
- After assembling, refrigerate the pie for at least 6 hours (preferably overnight) for optimal flavor integration and firm texture.
6. Customization Tips
- Experiment with varying flavored gelatin hues for a customized color scheme to complement different occasions.
- Consider adding fresh fruits, whipped cream, or toasted coconut as toppings for enhanced flavor and an eye-catching presentation.
- Use gelatin molds for unique cube shapes like stars or hearts to further personalize the dessert.
7. Timing Is Key
Assemble the pie no more than 24 hours before serving to maintain its fresh, creamy texture and vibrant colors. Additionally, store it properly in the refrigerator, tightly covered, to avoid absorbing any fridge odors.
Serving Suggestions
Presenting the Mosaic Pie to your guests is almost as delightful as eating it. With its vibrant, colorful appearance and creamy texture, this dessert deserves to be showcased in the best way possible. Here are some creative serving ideas and pairing suggestions to elevate the experience:
1. Plating the Mosaic Pie
- Use a sharp knife to cut the pie cleanly into slices. Wipe the blade with a damp cloth between cuts to maintain the visual integrity of the colorful cubes.
- Serve each slice on a white or neutral-colored plate; it provides a perfect contrast to the pie’s bright hues, making the colors pop.
- Garnish each serving with fresh whipped cream piped elegantly along the edges for added texture.
- For an extra touch, sprinkle a pinch of crushed graham crackers or shredded toasted coconut on the plate before placing the slice.
2. Complementary Toppings
Customize your Mosaic Pie slices with optional toppings to suit the occasion or guest preferences:
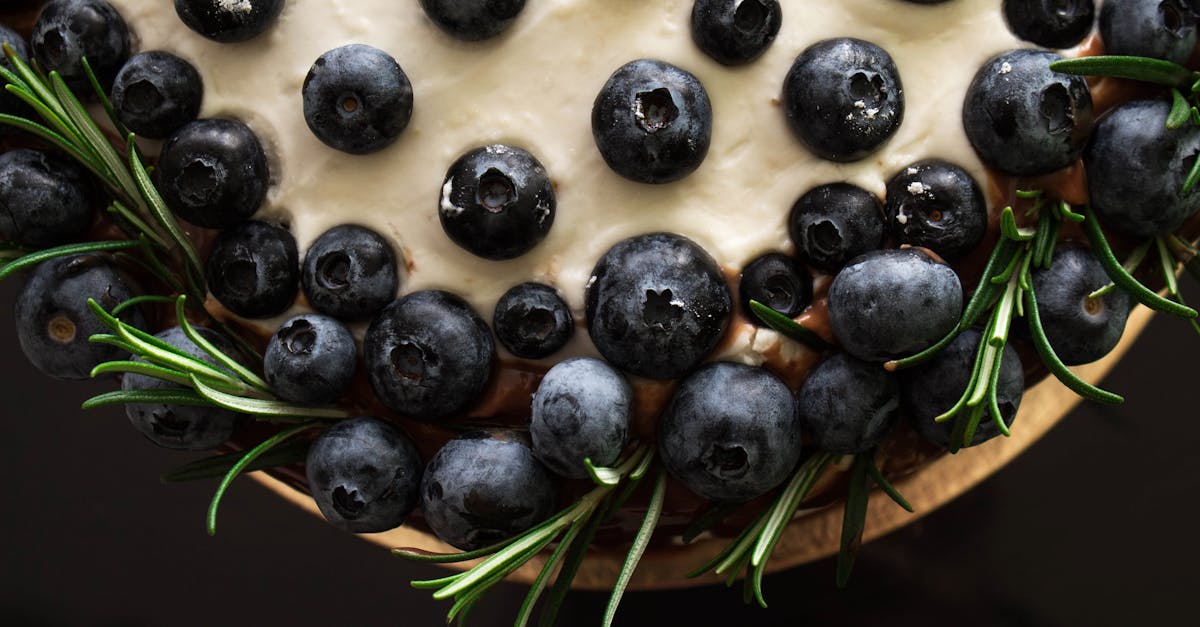
- Fresh Fruits: Add slices of strawberries, kiwi, or mango for a burst of natural sweetness and added color. Berries like blueberries or raspberries also work beautifully.
- Drizzles: Serve with a drizzle of chocolate ganache, caramel sauce, or berry coulis over the slice for added decadence.
- Edible Flowers: Consider edible blooms like pansies or violets for an elegant and sophisticated presentation.
- Dusting of Powdered Sugar: Lightly dust the pie with powdered sugar right before serving for a polished finish.
3. Pairing Beverages
Balance the sweetness of the Mosaic Pie with complementary beverages:
| Drink Type | Recommendation |
|---|---|
| Tea | Light herbal teas like chamomile or mint |
| Coffee | Mild brews or lattes with a hint of vanilla |
| Sparkling Beverages | Fruit-infused sparkling water or lemonade |
| Dessert Wine | A sweet Moscato or fruity Riesling for a luxurious pairing |
4. Occasion-Specific Ideas
This versatile dessert is perfect for various occasions:
- For Parties and Gatherings: Slice the pie into smaller, bite-sized squares for easier sharing. Serve them in small colorful cupcake liners for a grab-and-go option.
- For Kids’ Events: Add a playful touch with rainbow sprinkles or small gummy candies on top.
- For Formal Dinners: Plate a slice with a chocolate curl or gold leaf flakes for an elegant presentation.
5. Storage and Leftover Serving
If you have leftovers:
- Store the pie loosely covered in the refrigerator for up to 2 days to preserve its fresh taste and texture.
- Leftovers can also be served as a layered parfait. Dice the pie into small cubes and layer it with whipped cream or yogurt in a clear cup for an enticing second-day dessert option.
By implementing these serving ideas, we can ensure our Mosaic Pie not only tastes divine but is also a feast for the eyes.
Conclusion
The Mosaic Pie is more than just a dessert; it’s a creative masterpiece that brings joy to any table. Its vibrant colors, creamy textures, and endless customization options make it a crowd-pleaser for all ages. Whether you’re preparing it for a special gathering or a fun family treat, this no-bake recipe is as delightful to make as it is to eat.
With the right tools, a little patience, and a touch of creativity, anyone can craft this stunning dessert. It’s a perfect way to showcase your culinary skills while adding a splash of color to your celebration. Let’s embrace the fun of making Mosaic Pie and create a dessert that’s as beautiful as it is delicious.
Frequently Asked Questions
What is a Mosaic Pie?
A Mosaic Pie is a vibrant, no-bake dessert featuring colorful gelatin cubes suspended in a creamy base on a graham cracker crust. This visually stunning treat is easy to make, kid-friendly, and perfect for any occasion.
Can I customize the colors and flavors in the Mosaic Pie?
Yes! You can use different flavored gelatin in a variety of colors to match your preference or the theme of your event. You can also add optional flavors like vanilla extract for a personal touch.
What ingredients are needed for the Mosaic Pie?
You’ll need graham crackers, sugar, and butter for the crust. The filling requires flavored gelatin, unflavored gelatin, heavy cream, sweetened condensed milk, and water. Optional ingredients include vanilla extract, whipped cream, and fruits.
How long does it take to prepare a Mosaic Pie?
The preparation process takes a few hours, including time for the gelatin to set and the assembled pie to chill. For best results, plan ahead and leave enough time to refrigerate the dessert.
Can the Mosaic Pie be made ahead of time?
Yes, you can prepare the gelatin cubes, creamy filling, and crust in advance. Assemble the pie no more than 24 hours before serving to ensure it stays fresh and vibrant.
What tools do I need to make a Mosaic Pie?
Essential tools include mixing bowls, a whisk, a saucepan, measuring cups, a knife, a cutting board, and a springform pan. Optional items like gelatin molds and an electric mixer may help improve precision.
How do I get clean slices for serving the Mosaic Pie?
Use a sharp knife dipped in warm water for clean slices. Wipe the knife between cuts to maintain the pie’s neat appearance and keep the colorful design intact.
What are some topping ideas for the Mosaic Pie?
Enhance your Mosaic Pie with whipped cream, fresh fruits, toasted coconut, drizzles, crushed graham crackers, edible flowers, or powdered sugar. These toppings add flavor and visual appeal.
How do I store leftover Mosaic Pie?
Cover leftovers tightly with plastic wrap or store in an airtight container in the refrigerator for up to three days. Alternatively, transform the leftovers into fun layered parfaits for a refreshed dessert.
Can kids help make the Mosaic Pie?
Absolutely! The Mosaic Pie recipe is easy and kid-friendly. Children can assist with cutting gelatin cubes, mixing, and decorating, making it a fun family activity.